Select a "Category" tab below, or use the "Index" in the right column to search by ingredient.
Showing posts with label Meat. Show all posts

Friday, July 4, 2025

Solomillo de Cerdo Curado (Cured Pork Tenderloin)

Ingredients:

2 pork tenderloin tips
500 grams of coarse salt
200 grams of brown sugar
175 grams of white sugar

The ingredients for the marinade are:
2 tablespoons of oregano
2 tablespoons of garlic powder
1 tablespoon of onion powder
2 tablespoons of smoked paprika
1 tablespoon of rosemary
1 tablespoon of thyme
1 tablespoon of pepper
2 teaspoons of cumin
2 teaspoons of cilantro powder 

Directions:
Clean the meat to remove any excess fat or gristle.

Mix sugar and salt, layering some at the bottom of a container, placing the meat on top, and covering it with the remaining mixture.

Refrigerating the meat for 24 hours.

After refrigeration, rinse and dry the meat with paper towels.

Coat it with spices, and tightly wrap it in a kitchen towel or cheesecloth.

Let the tender loin rest in the refrigerator for three weeks to allow the herbs to infuse their flavors. After the fourth day, the food is ready to eat, but the longer it sits, the more cured it becomes.


Sunday, January 21, 2024

2015 Chili Cook-Off ~ People’s Choice Award - Texas Style

Authentic Texas-style chili contains no beans and is usually made with diced beef. Some purest use only beef and spices in their chili. We use brisket that has been smoked for 24 hours. Once the brisket has cooled, it is finely diced before being added to the remaining ingredients.

Ingredients:
2 pounds (or 1 kilo) smoked brisket (“Pecho” en español), shredded and trimmed of fat. We smoke the brisket for 12 hours and then finish it in the oven for another 12 hours. (If you don’t have brisket, you could use ground beef, browned and drained, or chuck roast (posta) that has been diced into ¼” cubes. You will need to increase the liquid smoke to 1/3 cup.
1 pound Italian sausage, browned and drained
1 medium onion, diced small
1 – 14.5 cans of diced tomatoes
1 – 6 oz. cans of tomato paste
2 cups of chicken stock
¼ cup liquid smoky broth from the brisket, with all fat dripping removed. Alternately, you can use “Colgin Liquid Smoke” sold in most grocery stores, including AutoMercado in Costa Rica
1 cups of water
½ pint of Pace salsa picante (medium) or 1 can of La Costeña Salsa Mexicana
1 tablespoon of beef stock concentrate 
2 cloves of garlic, minced
1 teaspoon of salt
½ teaspoon cumin
½ teaspoon fresh ground black pepper
2 tablespoon masa (corn flour) dissolved in ½ cup of water for thickening
2 tablespoons homemade chili powder (more, or less, according to taste)

Directions:
Brown the ground sausage and drain.  Add the meat and sausage to the pot with all the onions, tomato paste, diced tomatoes, chicken stock, beef concentrate, salsa, garlic, oregano, chili powder, salt, pepper, and 1 cup of water. Bring mixture to a steady boil, stirring frequently for at least an hour.  Mix the masa (corn flour) with enough cold water to create a thick batter and add it to the pot.  Simmer for 4 hours, or more.
Top with grated cheddar and diced onions before serving. Corn tortillas or chips go great with a bowl of chili.

Yield ~ 1 gallon

*Homemade Chili Powder
4 tablespoons ground cumin
1 tablespoon chili de árbol powder (Tree chili is a small Mexican Chili with a woody stem that is sometimes called bird’s beak chili.) 
2 whole chipotle chili peppers with stems removed, minced, and ground to a powder (Chipotle chili is a smoked Jalapeño chili pepper used primarily in Mexican and Tex-Mex cooking.)
2 tablespoons cayenne pepper
2 tablespoons smoked Spanish paprika
2 tablespoons garlic powder
3 tablespoons fresh finely minced oregano
1 tablespoon fresh ground coriander seeds
1 teaspoon ground cinnamon
½ teaspoon ground clove
4 tablespoons Hot Chili Powder (Purchased from MySpiceSage.com. Ingredients: Chile Pepper, Salt, Cumin, Oregano, Garlic, Cayenne Pepper, and Crushed Red Pepper)


Saturday, October 10, 2020

Sous Vide Home Cured Canadian/Back Bacon

Our local Supermercado LaCoope in Atenas sells Hormel Canadian Bacon. It has been reported to be selling for around $15 USD per pound, or ¢16,500 CRC per kilo. Now we love Canadian Bacon, but $15 per pound is a splurge and beyond our normal budget. I have nothing against Hormel, but I do consider ABC (already been chewed) meats that have been chopped and formed, very disappointing.

We've been making our own Canadian/Back Bacon for several years now and have been pleased with the overall results. Every now and then we get a batch that is just a little too tough and dry. This week we tried a Sous Vide method to finish the cooking and this is a total game-changer.

So here you have it… A lean pork loin is soaked in a salty-sweet maple cure then smoked with applewood, finished off in the SousVide, and ultimately sliced to be pan-fried. This process produced amazingly moist and fork-tender bacon. The best we have ever eaten.

We picked up a beautiful boneless pork loin for about $2.10 USD per pound. Combined with the ingredients needed for the brine and the cost of electricity for the smoker and Sous Vide our cost will come in around $2.75 USD.

Ingredients:

  • 1 gallon of water, divided into 1 quart & 3 quarts
  • 1 cup kosher or pure salt, coarse or fine grind will work because it will be dissolved in the brine.
  • 1 cup maple syrup (imitation maple will also work)
  • 1/2 cup brown sugar (packed)
  • 2 teaspoons pink curing salt, or 1 teaspoon for every 5 pounds of meat (aka InstaCure or Prague Powder). This is called "Sal de Cura" in Costa Rica and I have found it at the Alajuela Central Market at vendor booth #34)
  • 4 bay leaves
  • 1 sprig of fresh rosemary
  • 4 medium cloves garlic, peeled and smashed
  • 1 tablespoon of peppercorns
  • 1 boneless pork loin, trimmed of excess fat (about 8 to 10 pounds). A thin layer of fat will caramelize and add flavor when the bacon is fried.
  • 1 to 2 large chunks of light smoking wood, such as apple, pecan, lemon, or coffee wood

Directions:


  • Make the brine by combining 1 quart of water, salt, maple syrup, brown sugar, pink curing salt, bay leaves, rosemary, garlic, and peppercorns in a medium saucepan. Bring to a boil over high heat, stirring to dissolve all the salt and sugar. Boil for about a minute.

  • Pour 3 quarts of very cold water into a large container (I use an inverted plastic cake safe). Add the brine mixture and when it is completely chilled, submerge the pork into the cure. If the meat tries to float, place a heavy weight on top of it to keep it in the brining solution. Place the container in the refrigerator for 3 to 5 days. Turn the pork over every day to make sure it cures evenly.
  • Remove the pork from the cure and dispose of the brining solution. Fill the container with fresh cold water and submerge the pork again for a minimum of 90 minutes. Remove pork from the water and pat it dry with paper towels.

  • Heat your smoker or grill to about 165°F and when it at temperature, add the wood chunks (we prefer coffee wood) for the smoke and place the pork in the smoker. It is best to use indirect heat for this process. Smoke the pork for 90 minutes in the smoker. While the meat is smoking, heat the water bath for the Sous Vide to 60°C/140°F. 
  • After the pork loin has been smoked, place it in a large vacuum seal bag (you may need to split the loin into two pieces to fit properly in the water bath container) and seal it. Place the sealed bag(s) in the water bath for 5 hours. 
  • Remove the bag(s) and place in a 1/2 ice & 1/2 water bath until chilled. 
  • Chill the bacon for several hours before attempting to slice.
  • Slice the bacon to your desired thickness and seal packets of the sliced bacon in vacuum-sealed bags for freezing. Bacon may be stored in the freezer for 6-9 months.
  • 5 pounds of Pork Loin yielded 48 slices of Sous Vide Home Cured Canadian/Back Bacon.

Pan-fry the slices and enjoy!


Wednesday, October 7, 2020

Cochinita Pibil

I was first introduced to Cochinita pibil back in 1990 when I was in Cancun, Mexico on vacation. Cochinita pibil is a slow-roasted pork dish typical of the Yucatán Peninsula. The traditional preparation involves marinating pork in sour oranges, spices, and achiote (annatto) paste. The pork is then wrapped in banana leaves and placed on hot coals and rocks place in a pib (underground oven). The pib is covered over with banana leaves and topped with soil. The pork roasts underground for several hours until the meat is fork-tender. The method in this recipe uses a wood-fired, or conventional, oven to roast the pork.

Ingredients:

  • 1 kilo (2.2 pounds) of boneless pork (pork shoulder or pork loin with a nice layer of fat works well)
  • 350 ml (1½ cups) of limón mandarina (If you don’t have limón mandarina, use 250 ml (1 cup) of orange use with 125 ml (½ cup) of lemon or lime juice)
  • 125 ml (½ cup) apple cider vinegar
  • 1/4 of a medium onion
  • 1 chili habanero
  • 1 teaspoon of ground cinnamon
  • 5 whole cloves
  • 8 whole black peppercorns
  • 4 cloves of garlic
  • 1 teaspoon salt
  • 90 g (3 ounces) of achiote paste (annatto)
  • 2 tablespoons of lard or vegetable shortening
  • 2 hojas de platano (banana leaves)

Directions:

    Prepare the pork

  • Slice the pork to a thickness of 4 or 5 cm (1½ or 2 inches) and set aside.
  • Prepare the marinade (adobo)
  • Warm the achiote and lard in a small saucepan or microwave just until melted.
  • Add the limón mandarina, vinegar, onion, chili habanero, cinnamon, cloves, peppercorns, garlic, and salt to a blender jar and mix on high speed until everything is finely minced and blended.
  • Gradually add the warmed achiote and lard to the blender and mix until blended.

    Marinate the pork

  • Place a layer of pork in a glass dish or plastic container. Cover the pork with some of the marinade and continue layering the pork with more of the marinade until all of the pork is completely covered with the marinade. Cover the container with a lid or plastic wrap.
  • Refrigerate the pork for a minimum of 4 hours, preferably overnight. Remove the pork from the refrigerator and allow it to come to room temperature before cooking.
  • Preheat oven to 175-200°C (350-400°F). We enjoy a smoky flavor, so we use an outdoor wood-fired stone oven and the temperature fluctuates somewhat. A conventional oven works fine too, but the meat won’t have any smoke flavoring.

    Prepare the Hojas de Platano (Banana Leaves) 

  • Cut the banana leaves so that 4 pieces are twice the length of the baking dish, and 4 more pieces are twice the width of the baking dish. Slightly toast them over low heat on the stove to make them softer and more elastic. They will change to a dark green and become very pliable.
    Roasting the Pork
  • Line a baking dish with the banana leaves overlap each other and extend over the sides of the baking dish by at least the same as the length and width of the dish.

  • Layer the pork into the dish on top of the banana leaves and pour the remaining marinade on top of the pork. You will probably have chunks of the achiote/lard paste that you can just spread evenly on top of the pork.
  • Fold the banana leaves on the short sides of the baking dish across to the middle. Then fold the banana leaves on the long sides of the dish across to form a closed package that will stay closed while the meat cooks. We place glass weights on top of the banana leaves to ensure they stay in place.
  • Place the baking dish in the oven for about 2 to 3 hours, until the pork is thoroughly cooked and pulls apart with a fork.
  • When the pork is finished roasting, shred the meat on a serving platter and pour any remaining juices in the baking dish over the top of the pork before serving.

Cochinita Pibil is typically served with corn tortillas and pickled habanero peppers and red onions.

Friday, May 1, 2020

Barbeque Baby Back Ribs (A Sous Vide Recipe)

Fixing some Barbeque Baby Back Ribs this weekend and cooking them low and slow with our Sous Vide Immersion Heater/Circulator. These ribs will be over-the-top with flavor and tenderness.

Sous vide, which means “under vacuum” in French, refers to the process of vacuum-sealing food in a bag, then cooking it to a very precise temperature in a water bath. This technique produces results that are very difficult to achieve through other cooking methods. When cooking with water, instead of an oven or a pan, we can raise the temperature to get the food to the exact temperatures we prefer. We can take it out as soon as it's done cooking, or let it rest in the water until we’re ready to eat—no more obsessively checking inside the oven, no more chaining yourself to the stove.

Equipment:
  • Sous Vide Immersion Heater/Circulator
  • Sous Vide water container with lid
  • Vacuum food sealer (Foodsaver)
  • 3 or 4 vacuum seal bags
  • Large mixing bowl
Ingredients:
Directions:
  • Attach the Sous Vide Immersion Heater/Circulator to the water container
  • Fill the water container with hot water until it reaches about 3 or 4 inches below the maximum water level of the Sour Vide device.
  • Mix all of the spices with the BBQ sauce in a large bowl.
  • Cut the Baby Back Ribs into sections with 3 or 4 bones each.
  • Toss the cut sections into the spicy sauce mixture massaging them so that they are thoroughly coated.
  • Place each section of ribs into a vacuum seal bag and use the vacuum food sealer to seal each bag. Make sure to STOP the vacuuming and seal the bag before the vacuum pressure force a rib bone to puncture the bag.
  • Insert the vacuumed sealed bags into the hot water container so that the bags are not touching each other. Good water circulation is important for the perfect cook.
  • Check the water level in the container and add, or remove, water so that the water level reaches the maximum level of the Sous Vide Immersion Heater/Circulator
  • Follow the guideline of the Sous Vide device and set the cooking temperature to 60.5°C, with the cooking time set to 24 hours. (These ribs can actually cook up to 48 hours in the water bath and they will still be perfect.)
  • Check the water level in the container every few hours to ensure water is not evaporating. If it is, add more to bring the water level back up where it should be.
  • When the ribs are finished, remove them from the vacuumed sealed bags and startup your barbeque grill. When the grill is hot toss the ribs on it for just a few minutes to slightly char them on each side. 
  • Transfer to a cutting board to carve and serve.
  • Enjoy!


Sunday, December 15, 2019

Tex Mex Pork Tamales


Every now and then we have a craving for Tex Mex foods and this season it was for Pork Tamales. The tamales are not difficult to make, but there are many steps and it is best to plan to make these over a two day period. Prepare the meat and chili paste on day one, and the remainder of the steps can be completed on day two. This recipe makes about 48 tamales.


Shredded Pork Recipe
Ingredients
  • 1 kilos (2¼ pounds) of pork, cut into large cubes. Do not discard fat.
  • 8 cloves garlic, peeled and coarsely chopped
  • 1 medium onion, diced
  • 2 teaspoons dried oregano
  • 2 teaspoons ground cumin
  • 1 tablespoons salt
  • water (enough to yield enough stock for the masa, chili paste and the shredded pork)
Instructions
  • Cover the pork in a large stock pot with water (at least 8 cups) and add garlic, onion, oregano, cumin, salt, and enough water to cover. Bring to a boil then turn the heat down to low and cook uncovered until tender, about 1 1/2 hours. While the pork is cooking, prepare the Chili Paste (see below).
  • When the meat is tender, remove it from the pork stock and shred it with two forks, removing any pieces of fat or gristle. Reserve the pork stock for the Chili Paste and Masa (see the recipes below).
  • Return the shredded pork to the empty stock pot, and stir in one cup of the Chili Paste into the shredded pork, and cook for 10 minutes. Taste and adjust seasonings, adding more salt if needed and pepper to taste.

Chili Paste Recipe
Dried Chiles
  • 6 Pasilla chilies, seed, stems & veins removed
  • 4 Chipotle chilies, seeds, stems & veins removed
  • Pot of hot water (to reconstitute chilies)
Prepare Chilies
  • Remove stems and seeds from chilies. With a paring knife, make a slit down the side, and open up the chilies. Remove seeds and stems. Submerge in a small pot of hot water. Cover the pot, and allow the chilies to sit for 1 hour
Prepare the Chili Paste
  • Reconstituted chilies without any of the liquid
  • 4 tablespoons of minced garlic
  • 3 tablespoons of ground cumin
  • 2 tablespoons of dried oregano
  • 1 teaspoon of salt
  • ½ teaspoon of black pepper
  • 1½ cups reserved pork stock
  • Place all ingredients in a blender and puree until smooth. Use a ½ cup of Chili Paste in the masa, and the remainder will be used in the shredded pork.

Corn Husks
  • 6 oz bag dried corn husks (60-70 husks needed)
  • A large bucket or pot of warm water (enough to submerge husks) 
Prepare Husks
  • Pull husks apart. In a large pot or bucket of warm water, soak the husks, making sure that they are completely submerged. Let them soak for a couple of hours. The longer they soak, the better.
  • After they have soaked, trim them down to about 4” wide. Trim 1-2" off the length of any of the extremely long husks
  • About 1 hour before use, drain the water and stand husks upright in the pot or a large bowl, allowing them to drain and dry.

Tamale Dough (Masa) Recipe
Ingredients
  • 2 cups of semi-melted lard or vegetable shortening
  • 5 cups pork stock, chicken stock, or vegetable broth
  • 6 cups masa harina
  • ½ cup of Chili Paste (see recipe above)
  • 2 teaspoons of baking powder
  • 2 tablespoons salt 
Instructions
  • Mix the baking powder and salt into a bowl with the masa harina, and set aside.
  • Place the fat and Chili Paste in a mixing bowl and beat until fluffy.
  • Add broth, and masa harina to the mixer, and beat until completely mixed—about 5 to 7 minutes or until the dough is thick yet malleable, about the consistency of Play-Doh. It might be easier to mix by hand.
  • You can test for doneness by dropping a small ball of dough into cold water. If it floats it’s ready, but if not, keep beating. Place a moist towel over the dough until ready to use. The masa may be kept in the fridge for several days.

Make Pork & Chili Paste Filling
  • In a large pot, melt 1 tablespoon of lard over medium heat.
  • Add the shredded pork and chili paste, and stir to incorporate ingredients.
  • Add the remainder of the reserved pork stock, stir, and allow it to simmer, uncovered for 30-45 minutes.

Assemble Tamales & Steam
  • Pat dry softened husks.
  • When filling each husk, place the smooth side facing up from the palm of your hand.
  • Spread 1 heaping tablespoon of masa with a large spatula or knife (leaving approximately 2" at the top). The masa should be evenly spread across the lower ¾ of the husk.
  • Place husk horizontal on cutting board. With spoon, place approximately 1 heaping tbsp of pork filling in a line along the center of the masa. Roll the husk with meat inside and fold in the side that has no masa.
  • Use thin strips of corn husk to tie the folded end to the tamale.
  • After all the tamales have been rolled and stacked (do not flatten), they can be frozen for later use or cooked immediately.
  • To prepare the steamer, place a large mound of aluminum foil in the center steam basket. Line the bottom of the basket loosely with a few of the husk scraps.
  • To cook, stack tamales upright, side by side (with the fold at the bottom) around the foil, as if “building a teepee.”  Pile some husk scraps atop the tamales to help lock in the steam and add another layer of flavoring.
  • Start with 1½ cups of water to simmer in the steamer’s pot. Place the steamer basket inside, cover, and cook for 1 hour, until the masa is firm and pulls away from the husk. Check the water level and add more as needed. Do not let the tamales sit in water or they will fall apart.


Let tamales cool 15 minutes before serving. Serve with your favorite sauce or salsa. Once cooled the tamales can be frozen. To reheat, place them in a steamer basket for about 10-15 minutes, or wrap them in a damp towel and microwave on high for 2-3 minutes. 
Yield - 48 (4 dozen) tamales.


Sunday, November 17, 2019

Rum Glazed Pork Tenderloin (A Sous Vide Recipe)

We purchased a Sous Vide Immersion Circulator sometime ago and have been learning new cooking techniques to produce outstanding meals. Today's treat was a Rum Glazed Pork Tenderloin with Roasted Rosemary Lemon Baby Potatoes. It was absolutely amazing! Without a doubt, the most tender piece of meat we have had in a very long time.

Sous vide, which means “under vacuum” in French, refers to the process of vacuum-sealing food in a bag, then cooking it to a very precise temperature in a water bath. This technique produces results that are very difficult to achieve through other cooking methods. When cooking with water, instead of an oven or a pan, we can raise the temperature to get the food to the exact temperatures we prefer. We can take it out as soon as it's done cooking, or let it rest in the water until we’re ready to eat—no more obsessively checking inside the oven, no more chaining yourself to the stove.

Ingredients:
For the Pork
  • 1-2 pounds pork tenderloin
  • 1 teaspoon dried sage
  • 1 teaspoon allspice
  • 1/2 teaspoon ginger
  • ½ teaspoon pepper
  • ½ teaspoon salt
For the glaze
  • 1 cup dark rum
  • ½ cup brown sugar
  • ½ cup ketchup
  • 1 tablespoon butter
  • 2 teaspoons Worcester sauce
  • 1 teaspoon liquid smoke
  • ½ cup apple juice
  • 2 tablespoon lemon juice
  • 1 tablespoon minced garlic
  • ½ teaspoon cayenne pepper
  • ¼ teaspoon dry mustard
  • Salt and pepper
Directions:
  • If cooking the same day, preheat the sous vide water bath. 
  • Mix the spices together in a bowl. 
  • Thoroughly massage the spice blend into the pork tenderloin.
  • Vacuum seal the pork tenderloin in the sous vide bag.
  • Store the sealed tenderloin in the refrigerator for up to 2 days, freeze it for up to 6 months, or cook it right away.
Cooking Instructions:
  • Preheat the water bath to 140°F / 60°C. 
  • Place the sous vide bag in the water bath and cook for 3 to 6 hours.
  • Remove the pouches and place in a 1/2 ice & 1/2 water bath until chilled. You can store the pouches in the refrigerator for around 2 days or freeze them for up to 6 months.
Finishing Instructions:
  • Preheat a grill to high heat or the broiler in the oven.
Prepare the Glaze:
  • Mix together all of the glaze ingredients in a pot over medium-high heat and bring to a simmer, stirring occasionally. 
  • Cook for about 30 minutes, until it thickens some.
  • Take the pork out of the pouches and pat dry. 
  • Sear on the grill until grill marks form on the first side, a couple of minutes.
  • Brush the glaze on the side facing up and turn the tenderloin.
  • Repeat several times until it is coated with the glaze, cooking about 30 to 60 seconds per turn. 
  • Remove from the heat, brush once more with the glaze, slice into 1/2" rounds and serve.

Saturday, June 1, 2019

Barbeque Spice Rub

Excellent rub for grilled steaks, chops, ribs, brisket, wings, etc.

Ingredients:
3 tablespoons ground cumin
3 tablespoons smoked Spanish paprika
3 tablespoons granulated garlic
4 tablespoons granulated onion
3 tablespoons chili powder
1 tablespoon ground Chinese 5-spice
1/2 cup brown sugar
4 tablespoons kosher salt
1 tablespoon cayenne pepper
1 tablespoon black pepper

Directions:
Mix all of the ingredients and store in the freezer, in an airtight jar/container

Yield: 2 cups of spice rub

Wednesday, April 11, 2018

South African Biltong

Meat preservation is a survival technique dating back to ancient times. Many cultures developed recipes for dried cured meat, or jerky. Biltong is just one type originated in Botswana, South Africa, Zimbabwe and Namibia. Various types of meat can be used to produce biltong, ranging from beef and game meats to fillets of meat cut into strips following the grain of the muscle, or flat pieces sliced across the grain. It is related to beef jerky in that they are both spiced, dried meats; however, the typical ingredients, taste and production processes may differ.

John discovered this delicious recipe for a South African style jerky a couple of years ago. We give full credit to https://www.biltongblog.com/making-biltong/ for this original recipe. There are many other techniques for producing a great biltong, but this is the method that works best for us.


Ingredients:
  • 2 kilos (4.4 lbs) good beef cut (or venison if you have available)
  • 1½ cup white distilled vinegar
  • ½ cup Worcestershire Sauce
  • 4 tablespoons coarse salt
  • 4 tablespoon ground black pepper
  • 8 tablespoons of ground coriander seeds
  • ½ cup of whole coriander seeds (these will be roasted in a pan then crushed and applied just before drying)
  • 4 tablespoons of raw brown sugar
  • 65 mg of ground smoked Carolina Reaper pepper
  • other optional ingredients: paprika, cayenne pepper (for spicier biltong – not much needed..), crushed dry garlic, any other herbs and spices that you want to experiment with.
Directions:
  1. Start with a cut of good beef such as sirloin. 
  2. Cut the beef into flat strips of about 1 inch deep by 2 inches wide. Cut the strips with the grain and if possible (and desired) leave a thin strip of the fat on one side. The fat will dry out nicely and add to the taste.
  3. Make the brining solution: Mix 1½ cups of white vinegar and ½ Worcestershire Sauce into a large flat dish deep enough to cover the meat strips. Lay the strips in the vinegar mix for 2-4 hours to absorb and begin the curing process. When finished this initial curing remove the strips and squeeze and pat dry. You can keep the vinegar/water mix for rinsing the strips later.
  4. Prepare the dry rub: Mix the dry spices (excluding the whole coriander seeds)
  5. Place a layer onto the bottom of a dish or plastic container that is large enough to lay the meat flat. Stack the spiced strips on top of each other with a layer of spices in between each. 
    Pour any excess dry rub over the top of the meat strips, and press spices into the strips. Set aside to cure for 6 – 24 hours. The longer you leave it the more the meat will absorb the salt, pepper, coriander – i.e. if you prefer a more natural taste then leave the meat in the spices for less time.
  6. Remove the spiced strips from the dish and rinse in the vinegar/water mix from 2 above. Most of the spices on the outside of the meat should wash off.
    Squeeze or pat dry.  Leave more or less of the spices to your taste.
  7. OPTIONAL – ADD CRACKED CORIANDER SEEDS Lay the meat down and apply the coarse cracked coriander seeds to the outside of the meat in sufficient quantity to stick to the strips. If you slightly roast the coriander seeds in a pan before crushing them this releases additional flavor of the seeds – highly recommended (you can also put the seeds into the microwave for 20-30 seconds). Crush the seeds into halves or quarters in a small mortar bowl so you end up with pieces that will stick nicely to the meat. Alternatively you can put the seeds in an old pepper or spice grinder that is set to grind very coarse.
  8. Dehydrate the biltong strips in a smoker (no wood chips to produce smoke required, but we add a small amount at the beginning of the drying process), or oven, set to 165°F. Lay the strips on racks with a space between each strip for the air to circulate. Depending on the thickness of the biltong, it should take about 12 hours in the smoker/oven, and another day to air dry. During this time you can gently pinch the pieces to check for dryness and/or cut off pieces to sample to check for readiness.
  9. Once the strips are dried, they're about two-thirds their original thickness and width. Traditionally the finished strips are cross-cut into little rectangular "cookies" about 1/4" thick. That exposes the tender middle and makes them a great snack, or energy source.
  10. Store biltong in the fridge, especially in warm climates.  Never store in a plastic bag unless vacuum sealed. 

Tuesday, December 5, 2017

Marinated Tico Pork Ribs

These are just about the best pork ribs you will ever taste. Typical North American pork ribs are cut down the length of the ribs, so that you have to eat the meat off of a long bone. Frequently this involves getting sauce all over the face as you eat from side to side. A Tico style pork rib is typically cut across the rib bones, so that you have short pieces you can enjoy without all the mess. When the ribs are cut this way, they are better able to soak up all the goodness of the marinade too.

These ribs are great served as a party appetizer, or a full meal with fries and a salad.

Ingredients:
  • 2 - 3 kilos of typical Tico cross cut ribs
  • 1⁄2 cup dark sugar cane syrup (tapa de dulce)
  • 1⁄2 teaspoon ground black pepper
  • 1 teaspoon garlic powder
  • 1 teaspoon onion powder
  • 1⁄2 cup water
  • 1⁄2 cup Worcestershire sauce
  • 1/3 cup soy sauce
  • 4 tablespoons Dijon mustard
  • 1/2 cup lime juice
Directions:
Prepare the meat:
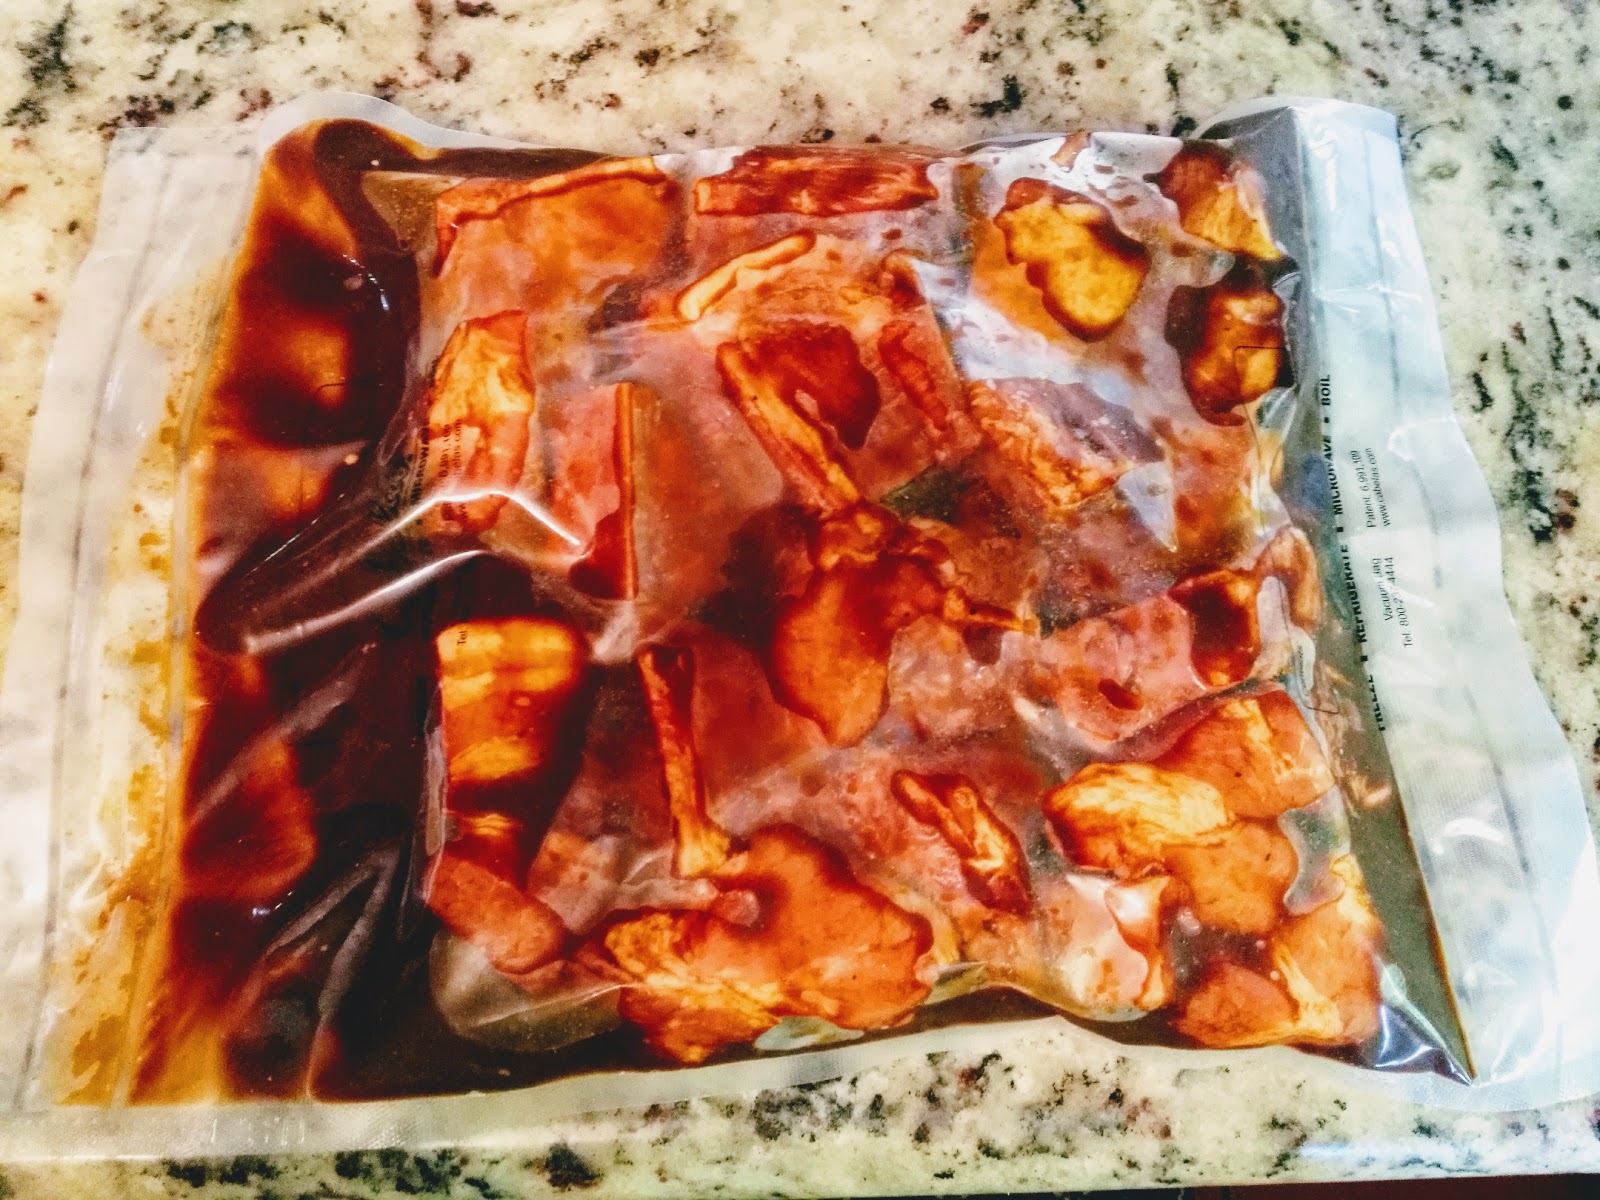
Cut the strip of ribs between the bones so you have individual snack size pieces. Place them in a large vacuum seal bag. If you don't have a vacuum sealer, you can use a gallon size zip lock freezer bag. Set the meat aside.

Prepare the marinade:
Add all the remaining ingredients to a large measuring cup or bowl. Whisk the ingredients to blend thoroughly.

Pour all of the marinade over the meat in the bag. Seal the vacuum seal bag with the moist setting on your vacuum sealer. If you don't have a vacuum sealer, you can use the "water displacement" method to expel all the air from the bag. Seal the zip lock bag leaving just the width of a finger open on one corner. While holding the open corner of the bag, submerge the bag in a sink, or bowl full of water until it pushes all the air out and quickly close the open corner of the bag.

Place the bag in the refrigerator for 12 to 24 hours. Turn the bag over every few hours to make sure all the ribs are soaking up the marinade.
Open the bag and place the ribs over the hot fire/coals (without draining) and grill the ribs until well browned, usually about 30 to 40 minutes. Transfer the ribs to a covered oven roasting pan and finish them in a low oven (185°F) for 2 to 4 hours.


Sunday, July 24, 2016

Pan Seared Pork Chops

Today we had a delicious pork dinner consisting of thick cut, pan seared pork chops, with homemade apple sauce, and garlic mashed potatoes. I wish I had taken a photograph of the pork chops before we ate them. They were stunning! Perfectly seared on the outside, and tender and juicy on the inside. I will add a photo for you next time.

Ingredients:
2 center cut pork chops, about 1 inch thick with the bone
1 sprig of rosemary
1 tablespoon of fresh lemon juice
1½ tablespoons of olive oil
Salt
Pepper

Directions:
Bring the pork chops to room temperature. Season both sides of the chops with salt & pepper and lemon juice. Place the sprig of rosemary between the two chops and cover for 30 minutes.

Preheat the oven to 375°F. When the oven is at temperature, heat a cast iron skillet on the stovetop with medium high heat. Add the olive oil to the skillet and when it starts to glisten, add the pork chops. Let the chops sear for 3 minutes on one side without moving them. Flip them over and add the sprig of rosemary to the oil for 20 seconds, then place the rosemary on top of the chops. Let the chops sear for no more than 2 minutes. Place the skillet in the oven for 8 minutes. Check the internal temperature. It should be between 140°F and 145°F. Remove the skillet from the oven, and place the meat on a platter to rest for 4 minutes before plating and serving.

Saturday, June 6, 2015

Canadian Bacon or Back Bacon

Our local Supermercado Coopeatenas has just started to carry Hormel Canadian Bacon. It has been reported to be selling for around $15 USD per pound, or ¢16,500 CRC per kilo. Now we love Canadian Bacon and we haven’t had it in years, but $15 per pound it just a little beyond our normal budget.

This got me thinking, that if we could brine a ham, we should be able to cure bacon. How hard can it be? I started searching the internet and found a couple of similar recipes that would work with the ingredients in my pantry.

So here you have it… A lean pork loin is soaked in a salty-sweet maple cure then smoked, sliced, and pan-fried. The end result is better than we imagined and so much better than the imported store-bought. We will be making this frequently.

Update 10/4/2020: Started another batch of bacon in a maple cure today with a boneless Pork Loin we picked up at a great price. It was around $2.10 per pound. Combining this with the ingredients needed for the brine, our cost will even out to about $2.35 per pound.

Update 9/23/2019: Started another batch of bacon brining today with a beautiful boneless Pork Loin we picked up at a great price. It was around $3.30 per pound. Combining this with the ingredients needed for the brine, our cost will even out to about $3.55 per pound. I don't think we will ever buy the pre-packaged ABC (Already Been Chewed) meat called Canadian Bacon ever again. (4.41 kg = 9.7 lb for ¢18,514, or $31.92. $31.92 + $2.50 for the brine ingredients = $34.42. $34.42 / 9.7 = $3.55 Cost per pound) This meat will sit in its bathwater for 4 days before we smoke it. 

Update 7/1/2016: We have been tweaking this recipe every time we make it trying to adjust the level of smokiness and moisture for our taste. Today we nailed it and the results are absolute perfection! We had the butcher sell us an entire 6-kilo pork loin, including the pork chop bones. He trimmed off the bones with enough meat still on them for me to fix a delicious dinner of roasted pork with potatoes and onions. This left us with a good 3 kilos of lean pork loin to brine for bacon. Our net cost came to about $34 for 6.6 pounds of meat or $5 per pound.

Ingredients:
1 gallon of water, divided into 1 quart & 3 quarts
1 cup kosher or pure salt, coarse or fine grind will work because it will be dissolved in the brine.
1 cup maple syrup (imitation maple will also work)
1/2 cup brown sugar
2 teaspoons pink curing salt, or 1 level teaspoon for every 5 pounds of meat (aka InstaCure or Prague Powder. This is called "Sal de Cura" in Costa Rica and I have found it at the Alajuela Central Market at vendor booth #34)
4 bay leaves
1 sprig of fresh rosemary
4 medium cloves garlic, peeled and smashed
1 tablespoon of peppercorns
1 boneless pork loin, trimmed of excess fat (about 8 to 10 pounds). A thin layer of fat will caramelize and add flavor when the bacon is fried.
1 to 2 large chunks of light smoking wood, such as apple, pecan, lemon or coffee wood

Directions:
Make the brine by combining 1 quart of water, salt, maple syrup, brown sugar, pink curing salt, bay leaves, rosemary, garlic, and peppercorns in a medium saucepan. Bring to a boil over high heat, stirring to dissolve all the salt and sugar. Boil for about a minute.

Pour 3 quarts of very cold water into a large container (I use an inverted plastic cake safe). Add the brine mixture and when it is completely chilled, submerge the pork into the cure. If the meat tries to float, place a heavyweight on top of it to keep it in the brining solution. Place the container in the refrigerator for 3 to 5 days. Turn the pork over every day to make sure it cures evenly.

Remove the pork from the cure and dispose of the brining solution. Fill the container with fresh cold water and submerge the pork again for a minimum of 90 minutes. Remove pork from the water and pat it dry with paper towels.

Heat your smoker or grill to about 165°F and when it at temperature, add the wood chunks for smoke and place the pork in the smoker. It is best to use indirect heat for this process. Smoke the pork for 1 hour in the smoker. While the meat is smoking, preheat the oven to 185°F. Move the meat from the smoker to the oven to continue cooking it uncovered. When the internal temperature of the thickest part of the meat reaches 145-150°F, it’s done. This should take about 2 or 3 hours.

Let the bacon come to room temperature in a covered container. Thoroughly wrap it in plastic wrap and chill the bacon for several hours before attempting to slice.

Pan fry and enjoy!

Eggs Benedict with homemade Canadian Bacon
and homemade Sourdough English Muffins

Thursday, March 12, 2015

Home Cured Corned Beef Brisket

Next week will be Saint Patrick's Day and for the first time since we've been in Costa Rica, we have a corned beef brisket ready to cook to celebrate this American Irish holiday. I had been hungry for some corned beef brisket for a few years now and decided a couple of weeks ago we really needed to try our hand at making a brine and home curing a brisket. This is amazingly easy if you have 10 days of preparation time. This is not something you decide to make from one day to the next.

The first challenge was to locate all the spices I would need for the brine solution. I had enough Prague Powder #1 (InstaCure Pink Salt) on hand that our daughter had brought from the States, so I just needed to track down the rest of the spices. It turned out most of the ingredients can be found at our local spice vendor's booth at our Feria (Farmers' Market) every Friday morning. I was able to find a couple of the spices he didn't carry at the Mercado Central (central market) in Alajuela, including a new local source for the Prague Powder #1, called "Sal de Cura" at vendor booth #34. The only spice I couldn't locate was juniper berry. With just a little research I found sprigs of Rosemary make an acceptable substitute, and the Rosemary will impart the same earthy pine flavor and scent as a juniper berry.

If you have the time to brine, and you're ready to try your hand a making a home-cured corned beef brisket, here's how to do it.

Ingredients:

Spice Mix:
4 cinnamon stick, broken into several pieces (canela)
1 tablespoon mustard seeds (semillas de mostaza)
1 tablespoon black peppercorns (granos de pimienta negra)
1 tablespoon coriander seeds (semilla de culantro)
2 teaspoons Star Anise (estrellas de anís)
½ teaspoon red pepper flakes (hojuelas de chili rojo)
24 whole cloves (clavo de olor)
24 whole allspice berries (granos de Jamaica)
24 whole juniper berries or 8 sprigs of rosemary (ramitas de romero)
6 bay leaves, crumbled (hojas de laurel)

Thoroughly mix all the spices together and store in an airtight jar.

Corned Beef Brine:
3 quarts of water
1½ cup kosher salt (we use swimming pool salt because it is pure with no iodine or fluoride)
3/4 cup brown sugar
3 ounces Prague Insta-Cure #1 (by weight, not by volume) (Sal de Cura)
5 tablespoons of Spice Mix
3/4 teaspoon ground ginger (jengibre molido)
4 sliced cloves of garlic (optional) (clavos de ajo)
2 pounds ice
1 (6 to 7 pound) beef brisket, trimmed (pecho entero)

Directions:

Curing the Meat:
Place the water into a large 6 to 8-quart stockpot along with salt, sugar, Prague powder, and all the spices. Cook over high heat until the salt and sugar have dissolved. Remove from the heat and add the ice. Stir until the ice has melted. If necessary, place the brine into the refrigerator until it reaches a temperature of 45 degrees F. Once it has cooled, place the brisket in a 2-gallon container (or zip-top bag) and add the brine. Seal the container, and refrigerate for 10 days. Check daily to make sure the beef is completely submerged, turn it over as necessary and stir the brine.2. After 10 days, remove from the brine and rinse well under cool water and remove the old spices. Put the corned beef in a pot slightly larger than the meat and cover it with cold water. Refrigerate for at least 8 hours in order to remove excess salt from the meat. If you can change the water once or twice.

There are two cooking methods you can use to finish the Corned Beef: A Stovetop or Sous Vide method with an Immersion Circulator.

STOVETOP:
When you are ready to cook, place the brisket into a pot just large enough to hold the meat, cover with water, bring to a boil and reduce to low for 30 minutes to remove the salt. Pour off all the salty water, add the onion, carrot, and celery and cover with water by 1-inch. If you like additional spice, add 1 tablespoon of the leftover mix. Set over high heat and bring to a boil. Reduce the heat to low, cover, and gently simmer for 2½ to 3 hours, or until the meat is fork-tender. If you want, you can add cabbage and potatoes during the last 45 minutes of cooking. Remove from the pot and thinly slice across the grain.

SOUS VIDE:
Prepare sous vide immersion circulator and set the water temperature for 80°C/175°F.

Remove the desalinated corned beef from the pot and place it in a gallon-size sealable freezer bag. 

Carefully submerge the freezer bag in the water bath until most of the air has been removed and then seal the bag. 

Once the bag is submerged, cook the corned beef for 10 hours.

Fill a large container with a 50/50 mix of ice and water. Place the bag of cooked corned beef in the ice water for 30 to 60 minutes to quickly reduce the meat's core temperature to 34 to 38ºF. Place the meat in the refrigerator until ready to slice (up to two days ahead of time). When ready to serve, thinly slice the corned beef across the grain.


(Modified from Alton Brown’s recipe on the Food Network, 2007)

Sunday, November 23, 2014

Slow Cooker Pork Roast

I came up with a simple new recipe for Sunday's Pork Roast dinner, using honey and balsamic vinegar. The meat came out wonderfully rich and flavorful, and perfectly fork tender. I put this on to cook on high, at 7 AM, and it was ready to serve by 1 PM. This recipe will definitely go on my "make it again" list. 

Ingredients:
4 pound boneless pork roast
1 tablespoon vegetable oil
1 tablespoon all purpose steak rub
1 tablespoon Worcestershire sauce
1 tablespoon Dijon mustard
½ teaspoon garlic powder
1/3 cup of honey
1/3 cup of balsamic vinegar
1/3 cup of chicken stock

Directions:
Grease the slow cooker with a tablespoon of vegetable oil. Thoroughly coat pork with steak rub and place it in the slow cooker with the fat side up. Mix all of the remaining ingredients in a small bowl. Pour this mixture over the pork, cover and cook on low for 6-8 hours, or high for 4-6 hours. The roast is ready when the meat shreds apart easily.

Serve with a side of rice, or potatoes, and steamed broccoli.

Thursday, September 19, 2013

Barbecued Pulled Pork – Crock Pot Style

Ingredients:
2 medium onions, thinly sliced
6 garlic cloves, thinly sliced
1 cup chicken stock
2 tablespoons packed dark brown sugar
1½ tablespoons chili powder
1½ tablespoons kosher salt, plus more as needed
1 teaspoon ground cumin
½ teaspoon ground cinnamon
4½ -5 pound boneless pork
2 cups barbecue sauce

Directions:
Place the onions and garlic in the bottom of the crock pot. Add the chicken stock.

Combine all the dry ingredients in a small bowl to make a dry rub.

Rinse the pork meat and pat it dry with paper towels.

Thoroughly coat the pork with the dry rub and place the meat on top of the onions and garlic.

Cover and cook until the pork is fork tender. It will take 6-8 hours on high, or 10-12 hours on low.

Turn off the crock pot. Carefully remove the pork and place it on cutting board. It will be so tender it will want to break apart. Let the meat rest for about 15 minutes.

Slice it cross grain in one-inch slices. Then shred the sliced meat into bite-size pieces with 2 forks and discard any fat.

Pour all of liquid in the crock pot into a medium size bowl.

Use a skimmer, or strainer, to collect the solid onions and garlic from the liquid and return it to the crock pot.

Set the remaining liquid aside to cool.

Add all of the shredded pork back to the crock pot with 2 cups of barbecue sauce.

When liquid has cooled, skim off the grease and discard.

Now add 1 cup of the strained liquid to the crock pot with the meat and barbecue sauce and discard the remaining liquid.

Heat the pork until ready to serve on hamburger buns.

Garnish with fresh sliced onions, dill pickles and Jalapeño peppers.

Wednesday, February 13, 2013

Brined Fresh Ham with Roasted Potatoes

This week we tried something we'd never done before, we brined a fresh ham and cooked it outdoors, in our wood fired stone oven. All I can say is wow! It has been almost 2 years since we've enjoyed a whole ham, and this was a real treat.

Back in December we split the cost of a freshly butchered pig with a friend and have enjoyed some small pieces on the grill, but we've really wanted to make some sausage and ham. After a little research, we came up with the perfect recipe for the ham. We started to brine the pork on a Thursday morning and the following Monday morning we fired up our stone oven and prepared the ham for roasting. Let me just say, "John is an awesome chef!!

Ingredients:
Brine:
4 cups kosher salt
4 cups sugar
6 bay leaves
1 cup fennel seeds
½ cup mustard seeds
3 tablespoons crushed red pepper flakes
2 sprigs rosemary
25 garlic cloves, or garlic bulbs, cut in 1/2 equatorially
1½ large onions, coarsely chopped
5 ribs celery, coarsely chopped
3 gallons water
3 teaspoons of Prague Powder #1 (or Insta-Cure #1)
1 (15-18 pound) bone-in fresh ham

Paste:
6 sprigs of fresh rosemary, picked and leaves finely chopped
½ cup of finely chopped fresh cilantro
¼ cup of finely chopped fresh oregano
1 pod of garlic, smashed, peeled and rough chopped
2 large pinches crushed red pepper flakes
Kosher salt
½ cup Extra-virgin olive oil

Glaze:
¾ cup Dijon mustard
¾ cup whole-grain mustard
1 tablespoon of mustard seeds
¾ cup honey
¼ cup molasses

Potatoes:
2 pounds medium size unpeeled potatoes, washed and cut in ½
Olive oil
Salt
2 cups chicken stock

Directions:
To brine the pork:
Combine all of the ingredients in a large container. Submerse the ham in the brine and let it soak for 3-4 days in the refrigerator. Weight the ham down with a plate and bricks so that it is totally submerged in the brine. (This is a plan-ahead meal, but worth it!)

To cook the pork in wood fired stone oven:
We cooked the ham outdoors in our wood fired stone oven. We brought the temperature up to 500°F and let the oven soak up the high heat for about an hour. Then the oven heat gradually drops to the perfect roasting temperature for the duration of the cook time. If the oven cools below 300°F, you can always add a little fuel (lit wood or coals) to bring the temperature back up to around 350°F. Follow the instructions below for basting and glazing. After following the instructions for the first hour, we found the potatoes nicely roasted, so we removed them prior to adding the chicken stock. We then covered the ham loosely with aluminum foil and returned it to the oven (now at about 375°F) to finish cooking. When the ham’s internal temperature reaches 150°F to 160° F. deep inside, near the bone, its done. A 15+ ham could take up to 5½ to 6 hours.


To cook the pork in conventional oven:
Preheat the oven to 450 degrees F.
Remove the ham from the brine, pat dry and make slices in the skin to create a diagonal cross-hatch pattern.

To make the paste:
In a food processor, combine the rosemary, cilantro, oregano, garlic, crushed red pepper, salt, to taste, and about 1/2 cup of olive oil. Massage this mixture generously all over the outside of the ham.

Put the potatoes in a roasting pan large enough to accommodate the potatoes and the ham. If the ham hock is exposed, you may want to wrap it in aluminum foil so it doesn’t cook faster than the rest of the meat. Toss the potatoes generously with some olive oil and salt. Nestle the ham on top of the potatoes and place the roaster in the preheated oven. Check the pork in about 30 minutes, and you should find the skin is starting the get brown and crispy. Remove the ham from the oven and rotate it so you can baste the other side with any leftover herb/olive oil paste and rearrange the potatoes so they don't burn. Nestle the pork back onto the potatoes and return to the oven. Roast for another 30 minutes.

Remove the ham from the oven after the first hour. Check the potatoes to see if they are getting a little crispy, rearrange them and add the chicken stock to the bottom of the pan to keep things really moist and juicy. Reduce the heat in the oven to 350°F and roast for another 2 to 3 hours. When the potatoes are done, go ahead and remove them to serve when the ham is finished

To make the glaze:
While the ham is cooking, combine the Dijon mustard, whole-grain mustard, mustard seen and honey in a small bowl. When the meat’s internal temperature reaches 125°F, remove the ham from the oven and brush it, generously, with the honey mustard mixture. Return the ham to the oven and roast it for about 30 minutes. Flip it over and brush again with the honey mustard mixture (really slather it on the pork). Roast until it reaches an internal temperature of 150°-160°F on an instant-read thermometer.

Remove the ham from the oven, to a cutting board, tent it with aluminum foil and let it rest for at least 20 to 30 minutes before slicing.

Carve that puppy across the grain, and arrange the slices on a serving platter. Re-warm (if necessary) the potatoes and transfer them to a serving bowl to serve with the ham

Dig in and enjoy!!!!

Many thanks go to Anne Burrell of the FoodNetwork for the inspiration behind this fabulous recipe.

Thursday, March 22, 2012

Potato & Chorizo Casserole with Jalapeños

This is one of my favorite casseroles because it's one dish, fast to put together, and a real crowd pleaser.  The Jalapeños enhance the flavor the sausage and potatoes without overpowering them with spice.

Ingredients:
2 pounds of potatoes
1½ pounds of chorizo (or other favorite spicy sausage) 
1 medium red onion
1 medium yellow onion
1 - 5½ ounce can of pickled "Malher* Chili Jalapeño" halves in brine (Depending on your tolerance for hot and spicy, you may want to try this the first time with just a ½ can and work your way up.)
2 teaspoons seasoning salt
1 tablespoon Worcestershire sauce 
1 tablespoons olive oil
1/2 cup grated Romano or Parmesan cheese

Directions:
Wash potatoes and cut up into 1 to 2 inch chunks. Slice onion into ½ inch slices and then quarter each slice. Slice the chorizo into 1 inch chunks. Toss everything with seasoning salt in olive oil and place in a baking dish. Pour the brine from the Jalapeño over the potatoes and onions. Remove any stems on the Jalapeño halves and slice each half in thin strips lengthwise and toss them with the chorizo, potatoes & onions. Cover and bake at 375 for 30 minutes. Remove cover, top with cheese and return it to the oven for another 15 minutes or until the potatoes are done and cheese is toasted. Serve

* The Malher brand of Jalapeño chili peppers are found everywhere in Costa Rica, but they are hard to find in the States. These peppers are milder Jalapeños than what you'll find in most of the grocery stores Stateside. This particular brand will enhance the flavor of any food and not over power it. If you can't find the Malher brand, you will need to adjust the amount of brine and Jalapeños to suit your taste.

Thursday, September 15, 2011

BBQ Beef Brisket

Ingredients:

Beef brisket, 1-1½# per adult, but don’t try less than a 7 pounder (however much yer want -- 15-16# makes a feast)
1-3 c. Texas Universal BBQ Sauce/Marinade (depending on how much meat there is)
Adolph’s meat tenderizer or similar brand using the ingredient papain

Trim off any really disgusting looking fat, but remember, we’s lookin for flavor, not the arteries of some 16 year old stud-muffin kid. Turn the meat fat-side up and cut score lines1/2”-3/4” apart, diagonally across the whole brisket through the fat, down to the meat. Similarly, slit through any membrane (eeeoooo!). Generously rub BBQ sauce into the slits and all over the surface. Turn ‘er over and place fat side down in a glass cake pan or porcelained roaster. Cover the lean side generously with the sauce. Cover with plastic wrap & refrigerate for at least 12 hours (this stuff eats foil).

After this marinating period wipe the residual sauce from the meat into the pan (try yer hand, but resist lickin it -- un fricasseed meat juices an all, ya know; and don’t pour it back into the bottle.). Save the sauce in the refrigerator for later. Lay the meat out on a board and sprinkle the surface very copiously (Reader’s Digest, October ‘83) with meat tenderizer. Stab the entire surface with a regular dinner fork, spacing the stabs 1/4”-1/2” apart, tryin to penetrate the full depth of the fork. Flip ‘er over and repeat the tenderizer & stabbin routine on the other side. Knock the old crud offin yer smoker & build a real serious mesquite fire (or, fer you yankees, that’s probly gonna havta be Kingsford charcoal, about 10#, in the (gag) Weber). Damp down the firebox (and push the coals all to the outside, Weber-heads) and put a loaf pan of water in the center no-coals area, or fill the smoker’s water pan. Cover the grill area with heavy foil in the area that the meat will cover. Grease, oil or Pam the foil. Put the meat, fat side down onto the foil & close the cooker. Iffin you has a cooker thermometer, we’s lookin fer 180-225 F as the stable cookin temperature. Smoke for about 4 hours, watchin & replenishin the water & coals as required. After them 4 hours, open the cooker & slather the meat with the sauce saved from the marinadin, adding fresh sauce iffin yer need it to cover all the meat. Keep that temperature down & let’er go to fork tender, about another 4-20 hours, depending on the size of the cow. You will have to do a bunch of coal & water restockin, re-saucin and maybe a bit of foil covering on thinner sections that are goin to crunchy before the thick end gets there. The meat should be fairly smoke-black all over, pull apart with a fork, and sample slices (its allowed ... blame it on the dog) should be tender in the middle, completely rimmed with a 1/8”-1/4” red “rind” (soaked through sauce & smoke) and knock-ya-down juicy & tasty.

Remove from smoker and slice across the grain (start at the pointed, thinner “tip” end, cutting so the tip is a little triangle, informing the crowd that it’s important that the chef sample this tip for edibility). Other than that tip, cut thin slices, no more than 1/8” thick. Your slicin angle will change as you move up the brisket and the grain orientation changes. Serve with heated Universal Sauce on the side (or over, under, sideways, down). This should yield the yummiest, fork-tender eating orgy yer ever chompped. Traditional other meal fare is potato salad, cole slaw, white bread, ranch-style beans, whole jalpeños & iced tea. Go nuts.

Print Page


Originally posted 9/15/07

Tuesday, July 12, 2011

Panini Grilled Barbecue Beef Sandwich

Ingredients:
1 tbsp Extra Virgin Light Olive Oil
1/4 chopped onion
1/4 cup chopped sweet peppers (red green or yellow)
1 garlic clove - minced
8 ounces precooked chopped beef brisket (without sauce)
1/2 cup yellow sweet corn (canned, fresh or frozen)
1/2 cup barbecue sauce
8 thin slices of whole wheat sourdough bread

Directions:
Sauté onion & peppers in a skillet on medium until onions are clear. Add the garlic and cook an another minute or two. Add the meat, corn & barbecue sauce. Cover and bring everything to a simmer on low for 5 minutes.

Divide mixture into 4 portions. Spread mixture on a slice of bread and top it with another slice. Place the sandwich on a hot Panini grill until the bread is toasted on each side.

Make 4 sandwiches

Nutritional Information: Per Serving: 307 Calories; 17g Fat (49.1% calories from fat); 13g Protein; 27g Carbohydrate; 4g Dietary Fiber; 33mg Cholesterol; 404mg Sodium. Exchanges: 1 1/2 Grain(Starch); 1 Lean Meat; 0 Vegetable; 2 Fat; 0 Other Carbohydrates.

Originally posted 7/12/09

Popular Posts

Copyright © 2006-2020MiChunche.com