Select a "Category" tab below, or use the "Index" in the right column to search by ingredient.
Showing posts with label Sous Vide. Show all posts

Saturday, July 10, 2021

Sous Vide Beef Pastrami

Ingredients:

  • 1 home-cured or pre-packaged corned beef brisket (approximately 3 to 4 pounds)
  • 3 tablespoons pastrami rub

Directions:

PREPARE:

  1. Put the corned beef in a pot slightly larger than the meat and cover it with cold water. Refrigerate for at least 8-10 hours. This will remove the excess salt from the meat. It is best if the water is changed a couple of times; at 3 hours, and 6 hours. 
  2. Prepare the Immersion Circulator for Sous Vide and set the water temperature for 65.5°C/150°F.
  3. Remove the desalinated corned beef from the pot. Pat it dry with towels and place into a vacuum sealing bag, or a gallon-sized sealable freezer bag. 
  4. Vacuum seal the bag, or carefully submerge the freezer bag in the water bath until most of the air has been removed before sealing the bag. 

COOK:

  1. Once the bag is sealed, place it in the water bath and cook the corned beef for 30 hours.
  2. Fill a large container with a 50/50 mix of ice and water. Place the bag of sous vided corned beef in the ice water for 30 to 60 minutes to quickly reduce the meat's core temperature to 1-3°C/34 to 38ºF. Place the meat in the refrigerator until ready to smoke (up to two days ahead of time).

SMOKE: 

  1. Set your smoker to 107°C/225°F or prepare a grill for 2-zone cooking and get the indirect side to about 107°C/225°F. If you are using a gas grill, simply turn off the burners on one half of the grill for indirect cooking, adjust the grill temperature to approximately 107°C/225°F, then add a smoker box or smoking wood pouch according to the manufacturer's instructions for the full smoke flavor. Use lots of wood.
  2. Prepare the brisket again. Combine the rub ingredients in a small bowl and mix well.
  3. Remove meat from the vacuum/freezer bag. Trim excess fat. Pat the surface dry with paper towels and season generously all over with the dry rub mixture.
  4. Place the meat in your smoker or on the cooler side of the grill as far from the heat source as possible. Allow the meat to smoke until it reaches an internal temperature of 52°C/125°F, about 1 hour. 
  5. Now, you have pastrami! The pastrami was fully cooked during the sous vide process. The goal is to convert the Corned Beef into Pastrami by adding a smokey flavor to the meat while reheating it to a temperature that is pleasant when served.

SERVE:

Remove the pastrami from the grill, wrap it in a double layer of foil, and allow it to sit for 1 hour before slicing. Slice the Pastrami against the natural grain of the meat for the best texture. 


Tuesday, February 9, 2021

Sous Vide Lemon Curd


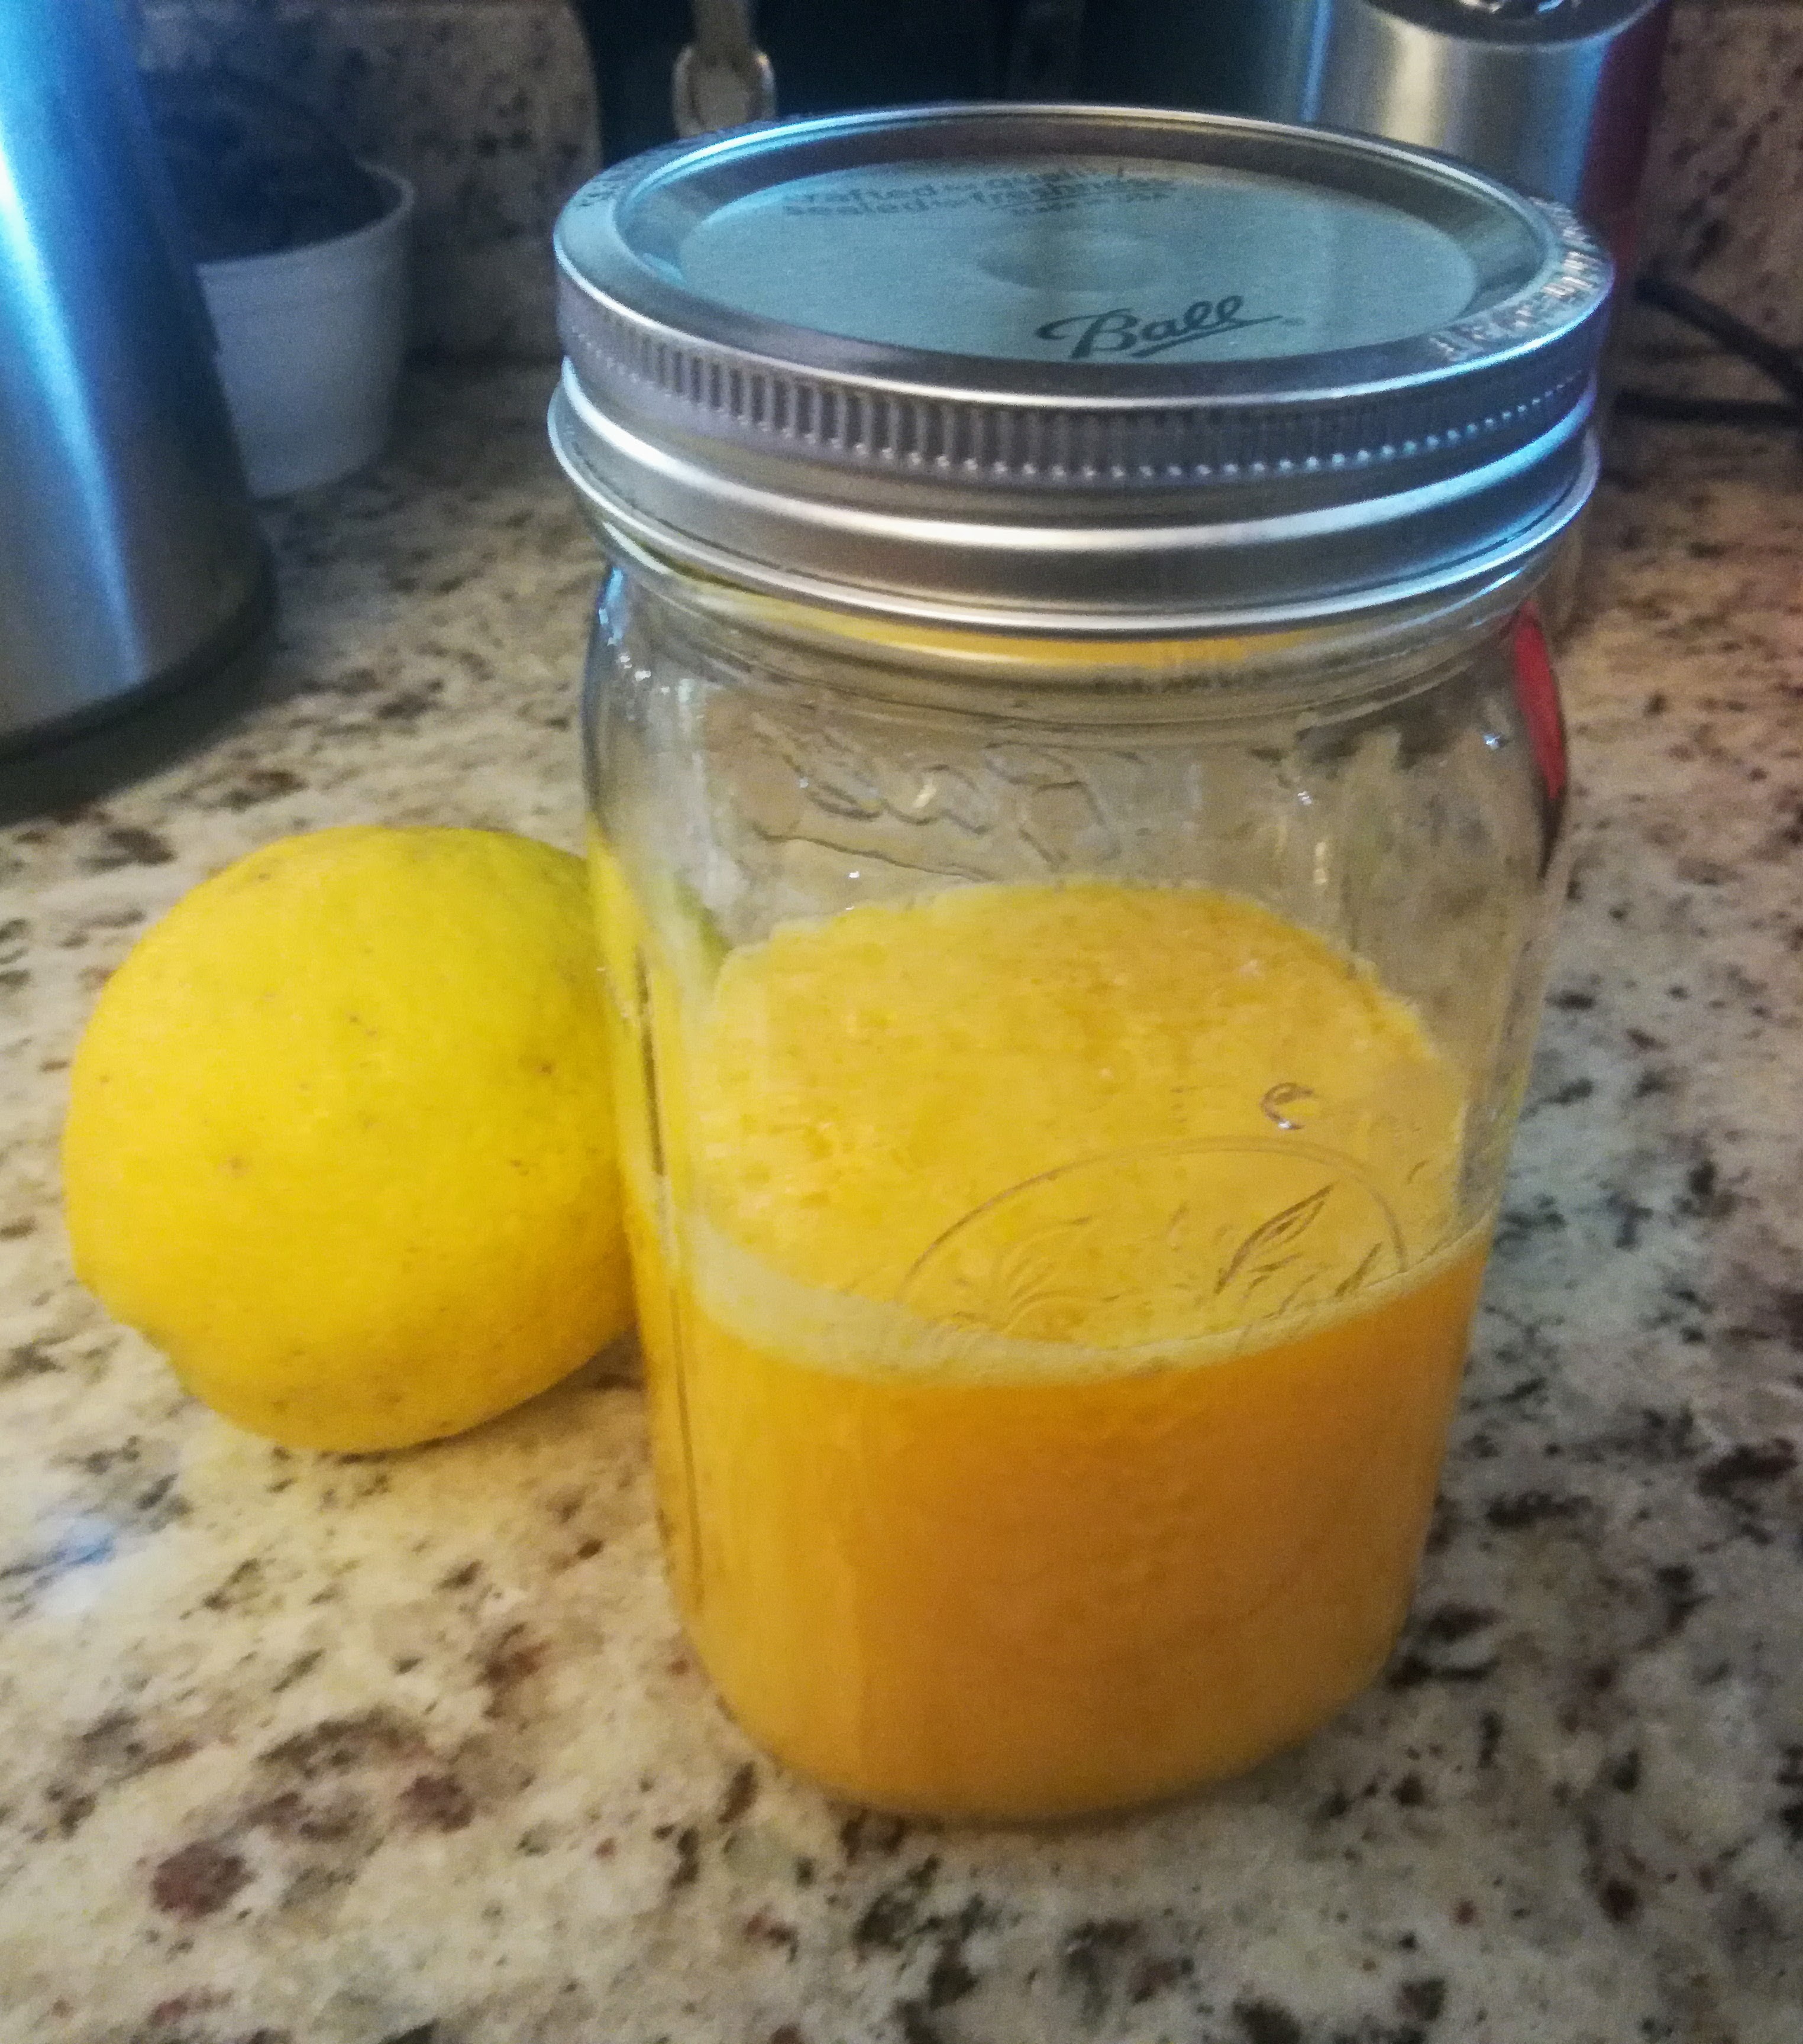
We have a nice harvest of lemons this year, so it was time to make Lemon Curd! I removed the zest and juiced one of our softball-sized lemons from our lemon tree. This one lemon had slightly more than a ½ cup of juice. I used my normal recipe but changed the cooking method from stovetop (see below) to Sous Vide. What a game-changer! No more standing and constantly stirring the curd in a double boiler for me! I simply mixed all the ingredients in a large measuring cup, poured the mixture into a Mason jar, set the jar in the water bath with the Precision Cooker, and walked away. One hour later, 1¾+ cups of Lemon Curd will be done and ready to cool before going into the fridge. 

Ingredients:
  • ¾ cup fresh lemon juice
  • 1 tablespoon grated lemon zest (optional)
  • ¾ cup sugar
  • 3 large eggs
  • ½ cup salted butter, melted

Directions:

Sous Vide Method:

  • Heat the sous vide precision cooker to 167°F/75°C.
  • While the precision cooker comes up to temperature, combine all the ingredients in a large measuring bowl with a pouring spout. 
  • Whisk until all the ingredients are thoroughly mixed.
  • Fill 2 half-pint Mason jars with the lemon curd mixture (Depending on the size of egg yolks, you may have more than 2 cups of curd. In this case, you can also use a quart Mason jar for the 2+ cups of curd.)
  • Place a lid and ring on top of the jars and make the ring finger tight.
  • Once the water bath is heated to the correct temperature, carefully lower the jars into the water with a jar lifter. Make sure there is water completely surrounding the jars.
  • Cook for 1 hour
  • Carefully remove from the water and allow to rest for ten minutes.
  • Using an immersion blender Blend curd on high until fully emulsified, about 30 seconds to 1 minute. Then cool to room temperature and store in the refrigerator for up to 2 weeks.

Serve with your desired treat. Lemon curd is best when well covered and consumed within 1-2 weeks.

Stovetop Method:

  • Combine all the ingredients in a double boiler (or in a metal bowl over a pot of simmering water). Heat while whisking constantly until mixture thickens and reaches 160 degrees, or coats the back of a spoon.
  • Pour the lemon curd into a heatproof bowl, cover with clear wrap pressed onto the top of the curd to avoid a film developing, and refrigerate until cold.

Serve with your desired treat. Lemon curd is best when well covered and consumed within 1-2 weeks.

Saturday, December 12, 2020

Easy Homemade Yogurt (A Sous Vide Recipe)

I started making my own yogurt several years ago when I read somewhere that making yogurt is a very simple process. I can't remember the last time I actually bought any yogurt at the grocery store. There are all sorts of kitchen gadgets to help you make perfect yogurt. It can be made in an InstantPot, specialty Yogurt Makers, a Crockpot/Slow Cooker, or just a plain old soup pot. In my case, I already have the basic tools in my kitchen. Anyone can successfully make yogurt with these tools and instructions. Once you taste this stuff you'll never want the store-bought kind again.

Sous vide, which means “under vacuum” in French, refers to the process of vacuum-sealing food in a plastic food-safe bag, then heating the food to a very precise temperature using an immersion circulator in a water bath. Technically, this yogurt recipe is not "sous vide" because it is not "under vacuum", but it does take advantage of the precision temperature of the immersion circulator in a water bath. This method produces results that are sometimes difficult to achieve with other methods. The immersion circulator allows me to heat the water bath and hold it at an exact temperature for several hours. Yogurt requires a long incubation period to be successful. 

The process requires milk to be heated to 180°F. This will kill the bacteria in the milk so the whey proteins will denature and coagulate enhancing the viscosity and texture of the yogurt. Then the milk is cooled between 110°F-115°F and inoculated with active cultures from the last batch of yogurt, or some store-bought yogurt containing active cultures. The final step requires the milk to incubated for several hours to produce yogurt.

Equipment:
  • Soup pot
  • Spoon or whisk
  • Precision instant-read thermometer
  • Sous Vide Immersion Heater/Circulator
  • Heat safe container 
  • Clean Mason jar(s) with lids and rings
  • Colander (optional)
  • Cheesecloth, large dinner napkin, or large handkerchief (optional)
Ingredients:
  • 2 liters (½ gallon) of whole milk, or 2% milk
  • ¼ cup of yogurt with active cultures at room temperature. This can be the remainder of the last batch of homemade yogurt or some store-bought natural yogurt with active cultures. (I don't recommend using flavored store-bought yogurt because it's hard to know what other additives it might have.) 
Preparation:
  • Setup your heat-safe container and fill it with the amount of water recommended by the manufacturer of your immersion circulator. 
  • Set the temperature to 110°F/43°C
  • Set the time to a minimum of 8 hours. The maximum number of hours should not exceed 24. The longer the yogurt ferments the more tang it will have. If you want a less tangy or thick yogurt, ferment for around 8 hours. For a thick, tangy, and probiotic-rich yogurt, go closer to 24 hours. (I like it at about 12 to 18 hours)
Directions:
  • Pour the milk into the pot and place it over medium-high heat. Stir the milk frequently to prevent it from scorching on the bottom. 
  • Use the instant-read thermometer to watch the temperature and bring it up to 180°F. When it reaches 180°F, remove from the heat and set the pot in a sink full of icy cold water to let the milk cool down to between 110°F and 115°F, stirring regularly for an even cool down. 
  • Once the temperature drops between 110°F and 115°F, remove the pot of milk from the ice water and set it on the counter. 
  • Scoop out about a cup of warm milk and mix it with the plain yogurt you have at room temperature.
  • Gently, but thoroughly, stir this milk/yogurt mixture back into the rest of the milk using a side-to-side motion.
  • Pour this mixture into 2 or 3 quart-sized Mason jars. (I have ½ gallon Mason jars, so I use one ½ gallon jar and if I have a little extra milk mixture, I pour it into a 4 ounce Mason jar.)
  • Place the lids on the jars and put the rings on so they are snug, but not tight. I recommend screwing the rings with just 2 fingers until you meet a little resistance. If the rings are too tight the glass jars could break.
  • Place the jar(s) in the water bath and walk away.
  • When the timer on the immersion circulator goes off, remove the jars, let them rest for 30 minutes and then chill them in the refrigerator.
  • The yogurt will be pretty thick when it comes right out of the fermentation, and it will thicken even more as it chills. 
Note:  If after it’s chilled you want thicker yogurt, strain it through the colander lined with the cheesecloth (or napkin/handkerchief) over a large bowl. The longer you strain it, the thicker the yogurt. The whey that is strained out can be used as a substitute for water in bread dough and other recipes. My dogs even love a couple of tablespoons of whey on their food.

Enjoy the yogurt in all your favorite recipes, served over granola and topped with fruit, and so on. Just be sure to save that last ¼ cup of yogurt from this batch for your next batch.


Saturday, October 10, 2020

Sous Vide Home Cured Canadian/Back Bacon

Our local Supermercado LaCoope in Atenas sells Hormel Canadian Bacon. It has been reported to be selling for around $15 USD per pound, or ¢16,500 CRC per kilo. Now we love Canadian Bacon, but $15 per pound is a splurge and beyond our normal budget. I have nothing against Hormel, but I do consider ABC (already been chewed) meats that have been chopped and formed, very disappointing.

We've been making our own Canadian/Back Bacon for several years now and have been pleased with the overall results. Every now and then we get a batch that is just a little too tough and dry. This week we tried a Sous Vide method to finish the cooking and this is a total game-changer.

So here you have it… A lean pork loin is soaked in a salty-sweet maple cure then smoked with applewood, finished off in the SousVide, and ultimately sliced to be pan-fried. This process produced amazingly moist and fork-tender bacon. The best we have ever eaten.

We picked up a beautiful boneless pork loin for about $2.10 USD per pound. Combined with the ingredients needed for the brine and the cost of electricity for the smoker and Sous Vide our cost will come in around $2.75 USD.

Ingredients:

  • 1 gallon of water, divided into 1 quart & 3 quarts
  • 1 cup kosher or pure salt, coarse or fine grind will work because it will be dissolved in the brine.
  • 1 cup maple syrup (imitation maple will also work)
  • 1/2 cup brown sugar (packed)
  • 2 teaspoons pink curing salt, or 1 teaspoon for every 5 pounds of meat (aka InstaCure or Prague Powder). This is called "Sal de Cura" in Costa Rica and I have found it at the Alajuela Central Market at vendor booth #34)
  • 4 bay leaves
  • 1 sprig of fresh rosemary
  • 4 medium cloves garlic, peeled and smashed
  • 1 tablespoon of peppercorns
  • 1 boneless pork loin, trimmed of excess fat (about 8 to 10 pounds). A thin layer of fat will caramelize and add flavor when the bacon is fried.
  • 1 to 2 large chunks of light smoking wood, such as apple, pecan, lemon, or coffee wood

Directions:


  • Make the brine by combining 1 quart of water, salt, maple syrup, brown sugar, pink curing salt, bay leaves, rosemary, garlic, and peppercorns in a medium saucepan. Bring to a boil over high heat, stirring to dissolve all the salt and sugar. Boil for about a minute.

  • Pour 3 quarts of very cold water into a large container (I use an inverted plastic cake safe). Add the brine mixture and when it is completely chilled, submerge the pork into the cure. If the meat tries to float, place a heavy weight on top of it to keep it in the brining solution. Place the container in the refrigerator for 3 to 5 days. Turn the pork over every day to make sure it cures evenly.
  • Remove the pork from the cure and dispose of the brining solution. Fill the container with fresh cold water and submerge the pork again for a minimum of 90 minutes. Remove pork from the water and pat it dry with paper towels.

  • Heat your smoker or grill to about 165°F and when it at temperature, add the wood chunks (we prefer coffee wood) for the smoke and place the pork in the smoker. It is best to use indirect heat for this process. Smoke the pork for 90 minutes in the smoker. While the meat is smoking, heat the water bath for the Sous Vide to 60°C/140°F. 
  • After the pork loin has been smoked, place it in a large vacuum seal bag (you may need to split the loin into two pieces to fit properly in the water bath container) and seal it. Place the sealed bag(s) in the water bath for 5 hours. 
  • Remove the bag(s) and place in a 1/2 ice & 1/2 water bath until chilled. 
  • Chill the bacon for several hours before attempting to slice.
  • Slice the bacon to your desired thickness and seal packets of the sliced bacon in vacuum-sealed bags for freezing. Bacon may be stored in the freezer for 6-9 months.
  • 5 pounds of Pork Loin yielded 48 slices of Sous Vide Home Cured Canadian/Back Bacon.

Pan-fry the slices and enjoy!


Friday, May 1, 2020

Barbeque Baby Back Ribs (A Sous Vide Recipe)

Fixing some Barbeque Baby Back Ribs this weekend and cooking them low and slow with our Sous Vide Immersion Heater/Circulator. These ribs will be over-the-top with flavor and tenderness.

Sous vide, which means “under vacuum” in French, refers to the process of vacuum-sealing food in a bag, then cooking it to a very precise temperature in a water bath. This technique produces results that are very difficult to achieve through other cooking methods. When cooking with water, instead of an oven or a pan, we can raise the temperature to get the food to the exact temperatures we prefer. We can take it out as soon as it's done cooking, or let it rest in the water until we’re ready to eat—no more obsessively checking inside the oven, no more chaining yourself to the stove.

Equipment:
  • Sous Vide Immersion Heater/Circulator
  • Sous Vide water container with lid
  • Vacuum food sealer (Foodsaver)
  • 3 or 4 vacuum seal bags
  • Large mixing bowl
Ingredients:
Directions:
  • Attach the Sous Vide Immersion Heater/Circulator to the water container
  • Fill the water container with hot water until it reaches about 3 or 4 inches below the maximum water level of the Sour Vide device.
  • Mix all of the spices with the BBQ sauce in a large bowl.
  • Cut the Baby Back Ribs into sections with 3 or 4 bones each.
  • Toss the cut sections into the spicy sauce mixture massaging them so that they are thoroughly coated.
  • Place each section of ribs into a vacuum seal bag and use the vacuum food sealer to seal each bag. Make sure to STOP the vacuuming and seal the bag before the vacuum pressure force a rib bone to puncture the bag.
  • Insert the vacuumed sealed bags into the hot water container so that the bags are not touching each other. Good water circulation is important for the perfect cook.
  • Check the water level in the container and add, or remove, water so that the water level reaches the maximum level of the Sous Vide Immersion Heater/Circulator
  • Follow the guideline of the Sous Vide device and set the cooking temperature to 60.5°C, with the cooking time set to 24 hours. (These ribs can actually cook up to 48 hours in the water bath and they will still be perfect.)
  • Check the water level in the container every few hours to ensure water is not evaporating. If it is, add more to bring the water level back up where it should be.
  • When the ribs are finished, remove them from the vacuumed sealed bags and startup your barbeque grill. When the grill is hot toss the ribs on it for just a few minutes to slightly char them on each side. 
  • Transfer to a cutting board to carve and serve.
  • Enjoy!


Sunday, November 17, 2019

Rum Glazed Pork Tenderloin (A Sous Vide Recipe)

We purchased a Sous Vide Immersion Circulator sometime ago and have been learning new cooking techniques to produce outstanding meals. Today's treat was a Rum Glazed Pork Tenderloin with Roasted Rosemary Lemon Baby Potatoes. It was absolutely amazing! Without a doubt, the most tender piece of meat we have had in a very long time.

Sous vide, which means “under vacuum” in French, refers to the process of vacuum-sealing food in a bag, then cooking it to a very precise temperature in a water bath. This technique produces results that are very difficult to achieve through other cooking methods. When cooking with water, instead of an oven or a pan, we can raise the temperature to get the food to the exact temperatures we prefer. We can take it out as soon as it's done cooking, or let it rest in the water until we’re ready to eat—no more obsessively checking inside the oven, no more chaining yourself to the stove.

Ingredients:
For the Pork
  • 1-2 pounds pork tenderloin
  • 1 teaspoon dried sage
  • 1 teaspoon allspice
  • 1/2 teaspoon ginger
  • ½ teaspoon pepper
  • ½ teaspoon salt
For the glaze
  • 1 cup dark rum
  • ½ cup brown sugar
  • ½ cup ketchup
  • 1 tablespoon butter
  • 2 teaspoons Worcester sauce
  • 1 teaspoon liquid smoke
  • ½ cup apple juice
  • 2 tablespoon lemon juice
  • 1 tablespoon minced garlic
  • ½ teaspoon cayenne pepper
  • ¼ teaspoon dry mustard
  • Salt and pepper
Directions:
  • If cooking the same day, preheat the sous vide water bath. 
  • Mix the spices together in a bowl. 
  • Thoroughly massage the spice blend into the pork tenderloin.
  • Vacuum seal the pork tenderloin in the sous vide bag.
  • Store the sealed tenderloin in the refrigerator for up to 2 days, freeze it for up to 6 months, or cook it right away.
Cooking Instructions:
  • Preheat the water bath to 140°F / 60°C. 
  • Place the sous vide bag in the water bath and cook for 3 to 6 hours.
  • Remove the pouches and place in a 1/2 ice & 1/2 water bath until chilled. You can store the pouches in the refrigerator for around 2 days or freeze them for up to 6 months.
Finishing Instructions:
  • Preheat a grill to high heat or the broiler in the oven.
Prepare the Glaze:
  • Mix together all of the glaze ingredients in a pot over medium-high heat and bring to a simmer, stirring occasionally. 
  • Cook for about 30 minutes, until it thickens some.
  • Take the pork out of the pouches and pat dry. 
  • Sear on the grill until grill marks form on the first side, a couple of minutes.
  • Brush the glaze on the side facing up and turn the tenderloin.
  • Repeat several times until it is coated with the glaze, cooking about 30 to 60 seconds per turn. 
  • Remove from the heat, brush once more with the glaze, slice into 1/2" rounds and serve.

Popular Posts

Copyright © 2006-2020MiChunche.com