Select a "Category" tab below, or use the "Index" in the right column to search by ingredient.
Showing posts with label Snacks. Show all posts

Wednesday, August 28, 2024

Homemade Sourdough Cheez-It Crackers!


Ingredients:

125 grams recently fed starter at 100% hydration
63 grams water
32 grams of melted butter
250 grams flour
10 grams salt
125 grams of shredded cheese

Directions:

  • Mix starter, water, and melted butter together until well combined
  • Add flour and salt to the mixture, and mix until completely combined.
  • Add shredded cheese to the dough, and mix with your hands until you have a well-mixed ball of dough.
  • Wrap in plastic wrap and refrigerate for 12-24 hours.
  • Preheat oven to 350°F.
  • Split the dough in half, and shape each half into a rectangle. Sandwich dough between parchment and roll out until 1/8 inch thin, or as thin as possible.
  • Remove the top piece of parchment and cut the crackers into the desired shape, about 1-inch sq. Poke each cracker twice to keep them from puffing up too much while baking
  • Leave on parchment, and bake in oven for 25-30 mins at 350°F. Turn off the oven and leave the door cracked, allow the crackers to cool in the oven. Then break apart and enjoy!

Sunday, December 24, 2023

Peppermint Bark

 Ingredients:

18 ounces dark chocolate chips (can use semi-sweet or milk chocolate chips)

18 ounces white chocolate chips

1 cup crushed candy canes or hard peppermint candies

½ teaspoon of vanilla extract divided.


Directions:

1. Line a baking sheet with parchment paper.  

2. Melt dark chocolate in a microwave-safe dish for 45 seconds.  Stir, then continue to heat for 10 seconds, stirring in between, until completely melted.

3 Stir in ¼ teaspoon of vanilla.

4. Pour melted dark chocolate onto parchment paper and spread evenly to about ¼ inch in thickness and chill in the refrigerator/freezer while preparing the white chocolate.

5. Melt white chocolate chips in a separate bowl in the microwave following the melting instructions above. If the chocolate should start to seize, you can fix it with a teaspoon of coconut oil.  

6. Add ¼ teaspoon of vanilla and ½ cup of the crushed peppermint candies to the white chocolate and stir to combine. 

7.  Pour white chocolate on top and carefully spread it over the dark chocolate. Sprinkle with remaining ½ cup crushed peppermints. Refrigerate for 10 minutes or until hard. Cut pieces with a sharp knife.

Sunday, August 1, 2021

Sourdough Apple Bacon Fritters w/Maple Bourbon Glaze

This is an Enriched Bread Dough recipe to make eight fritters. If you need more you could easily double it. Bacon fat has been used to enhance the bacon flavor, but it could be replaced with an equal amount of butter.

This recipe is a 2-day process, but it is well worth the effort. You can adjust the timing to fit your schedule so you are not a kitchen slave.

Ingredients

For the dough:

  • 250 grams flour (all-purpose) and more for dusting
  • 115 grams of egg & full-fat milk (1 medium egg and enough milk to weigh 115 grams together)
  • 40 grams sugar
  • 28 grams bacon fat, cool (if you don't want bacon flavor, use butter instead)
  • 100 grams recently fed sourdough starter (my starter is kept at 100% hydration)

For the apples:

  • 2 big honey crisp apples (use any type of apple)
  • 3/4 teaspoon cinnamon
  • 1/8 teaspoon nutmeg
  • 1/8 teaspoon ginger
  • A smidgen of ground cardamom (optional)
  • 1/2 teaspoon of salt
  • 1 tablespoon butter
  • 1/8 (15g) cup sugar (or more if you like it sweeter)
  • 3 slices cooked bacon, chopped

For the glaze:

  • 1/4 cup maple syrup
  • 1¼ cups powdered sugar
  • 1 tablespoon of milk
  • Reserved syrup from cooking apples
  • 2 tablespoons bourbon (optional)

Directions
DAY 1
9:00 AM
1. Weigh everything for the dough into a bowl and mix until roughly incorporated and cover the bowl.

2. Stretch and fold once an hour for a total of 4 sets over a 4 hour period. Add water or flour to adjust consistency.

1:00 PM
3. Cover the bowl and let the dough ferment for several hours, until it expands a bit and air bubbles form. Fluffy, not totally proofed.

4. While waiting, peel and core the apples, cut them into 1/2 inch cubes.

5. Melt butter in a saucepan, add the apples along with spices and sugar.

6. Cook, stirring for about 10 -12 minutes until the apples are a bit softer and the syrup thickens to coat the apple pieces. Drain the cooking juices (reserve for the glaze) Let cool and refrigerate.

4:00-5:00 PM (when the dough is ready)
7. Prepare a baking sheet with parchment paper generously dusted with flour and set aside.

8. Flour a bench surface and roll out the dough into a rectangle roughly 15"x10".

9. Scatter the apple pieces and bacon on the dough, press lightly and roll to form a log and then flatten the log with your hand so that it measures about 15"x5".

10. Cut the log into about 10 equal-sized slices. Then cut each slice in the opposite direction into about 3 pieces. Tuck in any apple or bacon pieces as needed. 

11. Scrunch everything back into a rough ball and stretch it out into a rough log tucking the apple and bacon pieces back into the dough. (use flour to stop it from sticking)
12. Once the log is formed, divide it into 8-10 pieces (you can decide how big or small)

13. Take one piece at a time, onto the palm of your hand and form the dough into a disk, tuck any loose apple pieces into the dough, and place it on the baking sheet lined with flour-dusted parchment.

14. Once done cover the baking sheet with a damp cloth or plastic wrap and place the tray in the refrigerator until bedtime. (Set a timer so you don't forget.)

15. Remove the baking tray from the refrigerator and set it on the counter for the final proof, overnight, 5-8 hours. When ready, they will look puffed up and the dough will be fluffier and softer.

DAY 2
7:00 AM
16. Place the baking tray back in the refrigerator to chill a bit while heating the oil and making the glaze.
17. Heat the oil in a deep-fryer to 375°F/190°C.
18. Mix syrup, sugar, milk, and reserved syrup from the cooked apples and bourbon with a whisk.
19. Drop one to two fritters at a time and fry turning (about 60-90 seconds per side) until done.
20. Remove from the hot oil using a slotted spoon and drain on a cooling rack over another baking sheet.
21. Drizzle the glaze over fritters while still warm.

Enjoy! 


Monday, March 29, 2021

Faerie Hair French Fries

We've been making these as an incredibly crunchy side-dish for a few years now.  We can't find anybody that can eat just one mouthful.  Super-slender tendrils of potato, golden brown, with a crunch that disintegrates in your mouth.  Can't stop eating them.


 The trick, other than the fine "shreds" is "Doble Frita" -- Double Fried.

This is surprisingly simple.

You'll need about 1 medium potato per serving.

Plenty of deep-fry oil.

Deep-fry thermometer.

Seasoning to make you happy.  Try lemon pepper or Tajín, to taste.  Salt as needed.

Tons of toweling for drying the spuds and draining them of oil.

PROCEDURE:

Run the potatoes over the julienne attachment of your mandolin slicer (this critter).  It's the one with all of the tiny close-set blades on the feed bed of the mandolin. 


For real fun, slide the potato back and forth across the blades which cuts some of the julienne "sticks" to "fuzz" thickness.  The sticks (shreds) are about the size of a wood pencil lead.  The fuzz is about the thickness of a 0.5mm mechanical pencil lead.

Depending on your potato type, as in Costa Rica, you should wash the potato shreds under running water until the milky starch stops running out.

Drain them well.

Better than that.  Get them really dry.

Get your oil up to a solid 350F (177C).

CAREFULLY drop a small handful of the shreds into the hot oil.  Watch the boil-up.  If it is safely well below the top rim of your pot, you can add up to about a half potato's shreds.  When the boil-up subsides watch the "fuzz" pieces and pull the batch out just as they show slight browning.  If you don't have any fuzz, pull the batch when they're lightly golden.

Drain the batch on paper towels.

Bring your heat back up to temperature and repeat until all potato is cooked through this first cycle.

Take the heat of the oil up to 370F (188C).

ATTENTION:  This next step happens fast.  Do not drop the fries into the hot oil and turn away or get distracted.

Grab up about a full potato's worth of shreds and gently slide them into the hotter oil.  Keep them submerged.  In about 10 to 20 seconds, the fries will go to a dark golden brown.  

Pull them out quickly to drain.  Repeat to finish the batch.

Season to taste.

Please eat responsibly.  We're not responsible for your overeating episodes.

Edit:  SWEET POTATO MODIFICATION

We discovered that the orange-flesh sweet potatoes (camote-zanahoria in Costa Rica) only require one modification to this procedure:  You don't have to double fry.  Just leave them in 360F oil until they're nice and darkly fried.  We then do the light salt and for sure the Tajín.  It's O.K. to stack up batches in a 180F warm oven to keep them crisp if you live in a high-humidity area.  People can't leave these alone.  They will devour these by the handful.


Tuesday, February 9, 2021

Sous Vide Lemon Curd


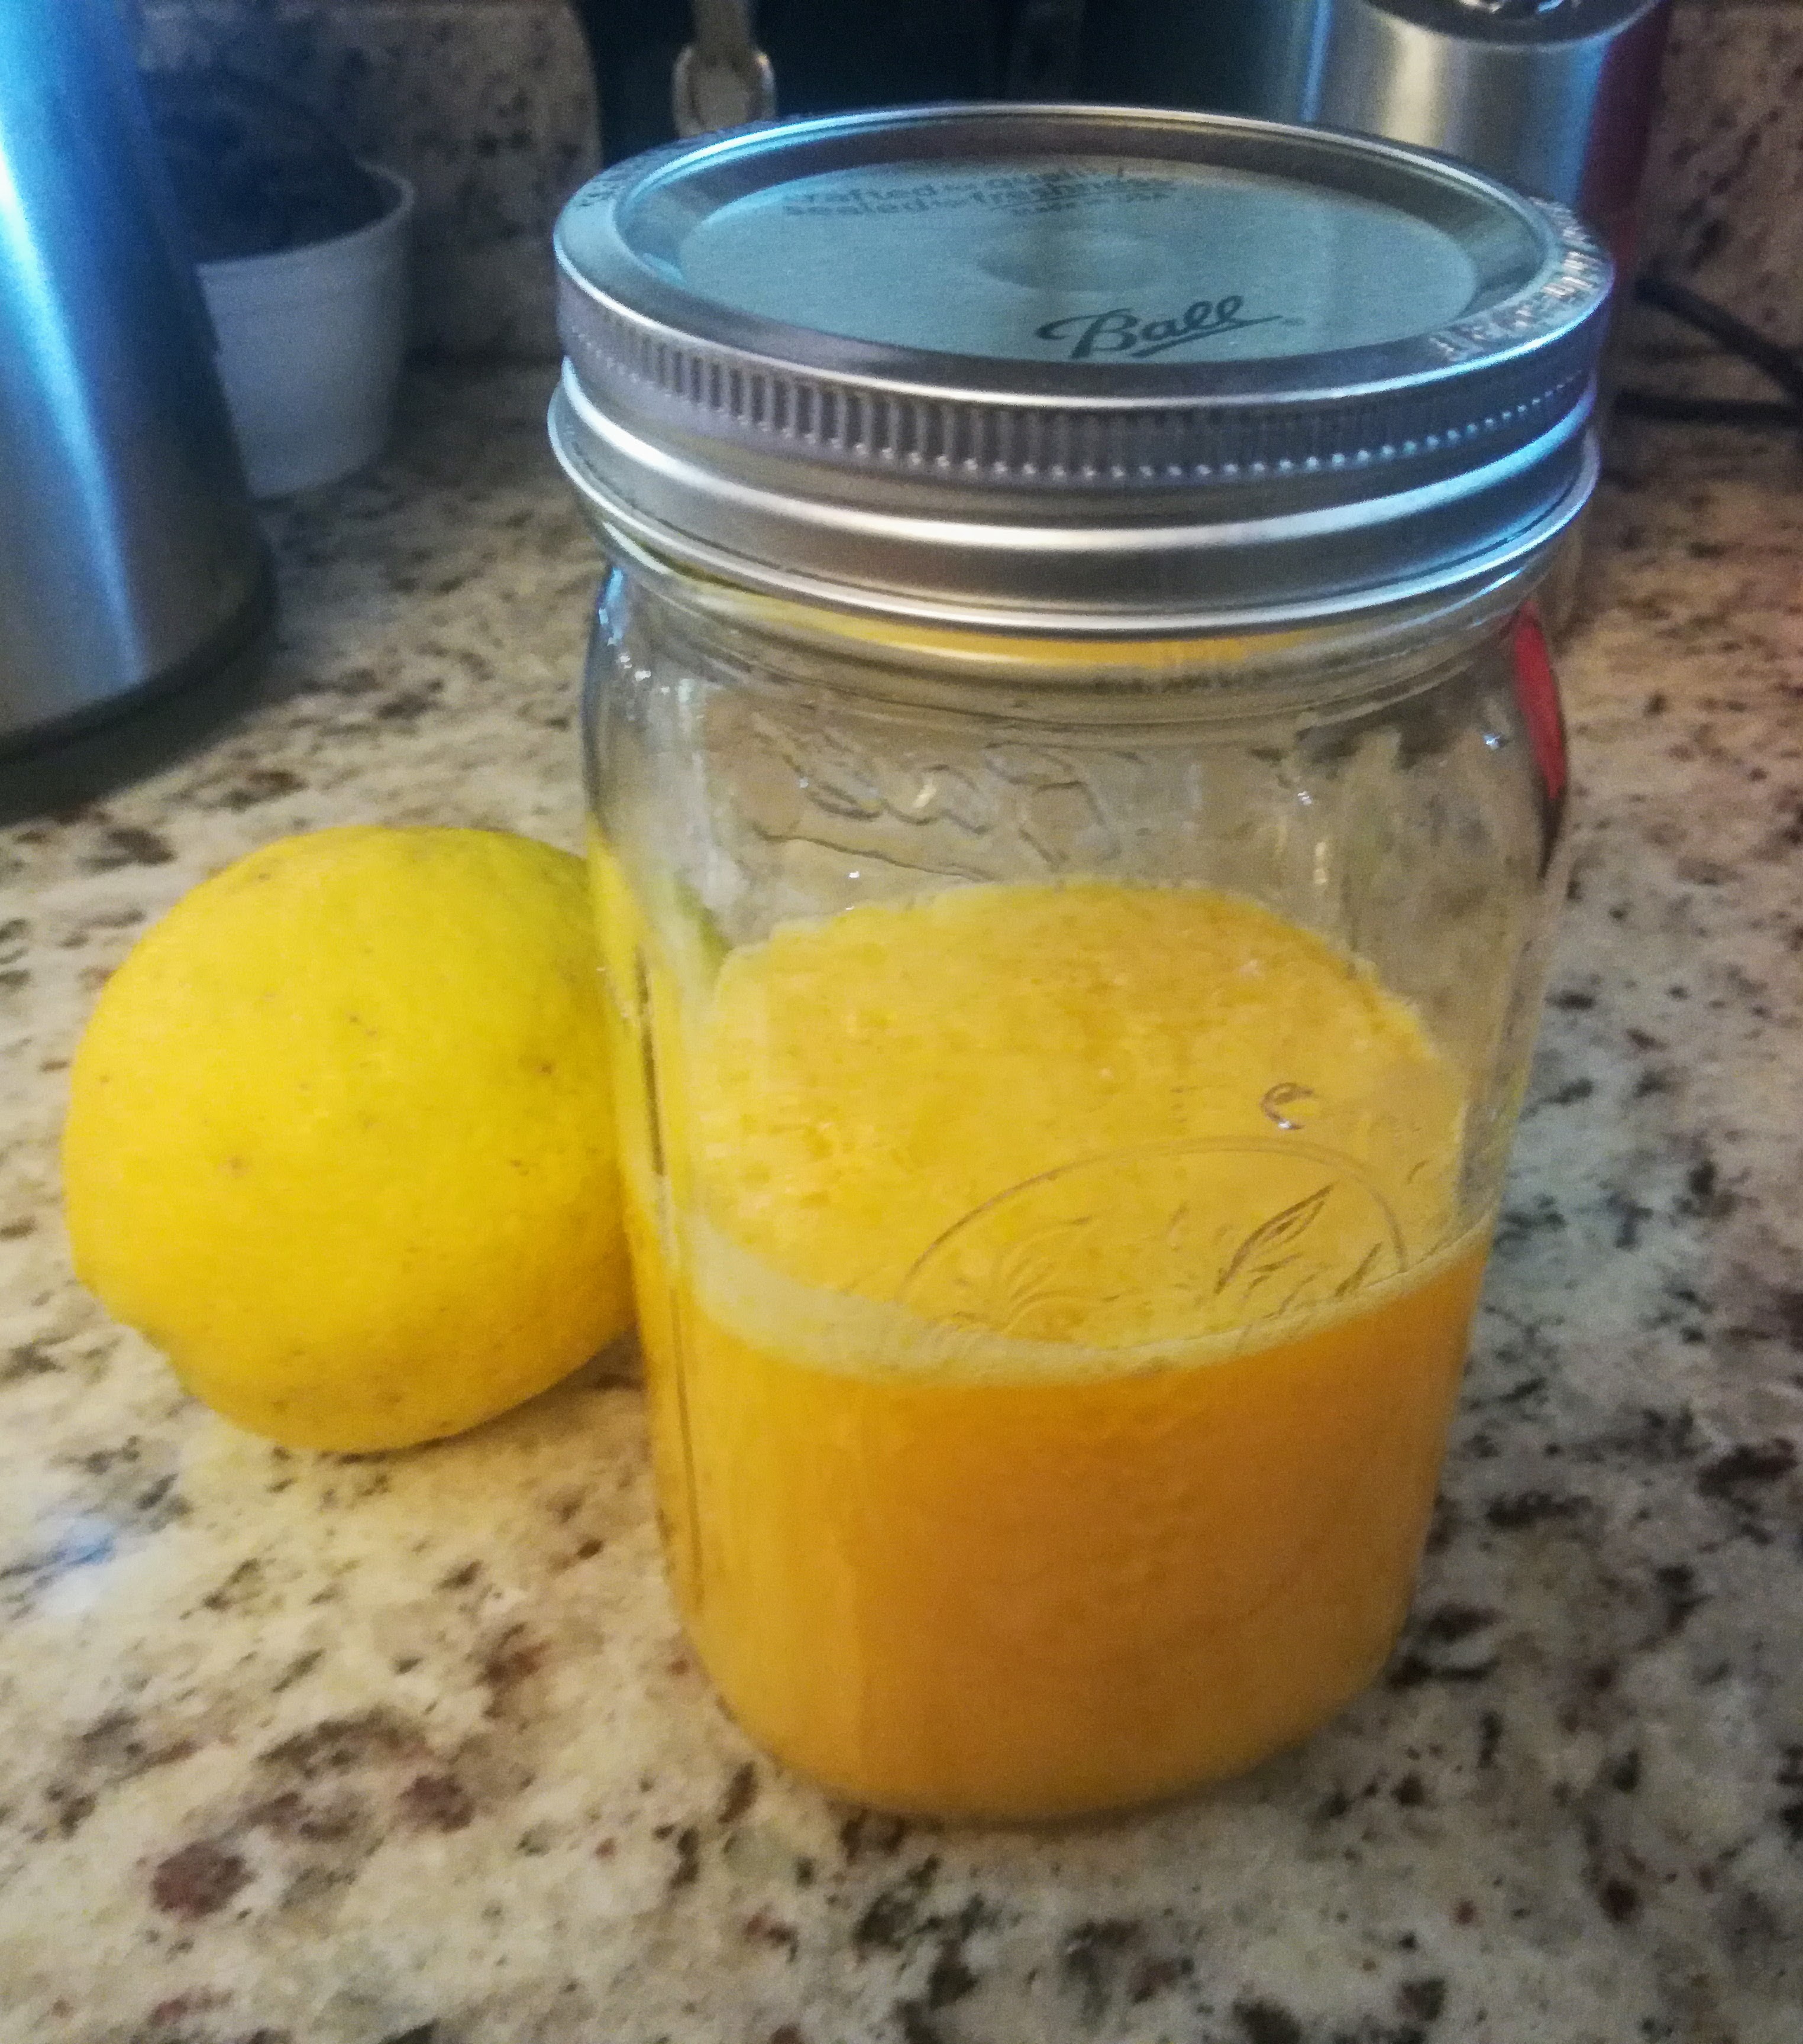
We have a nice harvest of lemons this year, so it was time to make Lemon Curd! I removed the zest and juiced one of our softball-sized lemons from our lemon tree. This one lemon had slightly more than a ½ cup of juice. I used my normal recipe but changed the cooking method from stovetop (see below) to Sous Vide. What a game-changer! No more standing and constantly stirring the curd in a double boiler for me! I simply mixed all the ingredients in a large measuring cup, poured the mixture into a Mason jar, set the jar in the water bath with the Precision Cooker, and walked away. One hour later, 1¾+ cups of Lemon Curd will be done and ready to cool before going into the fridge. 

Ingredients:
  • ¾ cup fresh lemon juice
  • 1 tablespoon grated lemon zest (optional)
  • ¾ cup sugar
  • 3 large eggs
  • ½ cup salted butter, melted

Directions:

Sous Vide Method:

  • Heat the sous vide precision cooker to 167°F/75°C.
  • While the precision cooker comes up to temperature, combine all the ingredients in a large measuring bowl with a pouring spout. 
  • Whisk until all the ingredients are thoroughly mixed.
  • Fill 2 half-pint Mason jars with the lemon curd mixture (Depending on the size of egg yolks, you may have more than 2 cups of curd. In this case, you can also use a quart Mason jar for the 2+ cups of curd.)
  • Place a lid and ring on top of the jars and make the ring finger tight.
  • Once the water bath is heated to the correct temperature, carefully lower the jars into the water with a jar lifter. Make sure there is water completely surrounding the jars.
  • Cook for 1 hour
  • Carefully remove from the water and allow to rest for ten minutes.
  • Using an immersion blender Blend curd on high until fully emulsified, about 30 seconds to 1 minute. Then cool to room temperature and store in the refrigerator for up to 2 weeks.

Serve with your desired treat. Lemon curd is best when well covered and consumed within 1-2 weeks.

Stovetop Method:

  • Combine all the ingredients in a double boiler (or in a metal bowl over a pot of simmering water). Heat while whisking constantly until mixture thickens and reaches 160 degrees, or coats the back of a spoon.
  • Pour the lemon curd into a heatproof bowl, cover with clear wrap pressed onto the top of the curd to avoid a film developing, and refrigerate until cold.

Serve with your desired treat. Lemon curd is best when well covered and consumed within 1-2 weeks.

Thursday, April 23, 2020

Julienne Fries Are Yum!

In Costa Rica, the locals seem to want their french fries blond, limp and mushy.  I'm an In-N-Out double-fry fries guy so the local fries are a no-go.  This recipe takes my "crispy fetish" to the extreme.

If you've never had julienne potato french fries, you haven't lived!  All you need is
  • julienne-capable mandolin or spiralizer with a julienne option, 
  • potatoes
  • high-smoke cooking oil 
  • deep fryer or frying pan with high sidewalls
  • salt, pepper & seasonings to taste 
Start by washing your potatoes.  Peel 'em or don't -- your choice.

Now set your slicing device to its julienne setting and turn the potatoes to a pile of "dress shoe strings," or about the thickness of angel hair pasta.

Some types of potatoes need to be washed after slicing to get rid of any excess of starch.  The Costa Rican types definitely need this starch-washing.

Dry off the julienned potatoes.  We shake them in a sieve and finish on toweling.  A salad spinner might be nice.  Just get 'em dry.

Heat your oil to 350 F (177C), then deep fry your potatoes.  Bring them to a light golden brown, then dump them onto a draining grid or onto several layers of paper towel.  Let 'em rest until they're cool enough to touch with your bare fingers, plus or minus -- the exact degree of cooling isn't important.

In a commercial fryer, you can do a big batch all at once.  If not, do a fist-full at a time so that the oil temperature doesn't drop much.  Be sure to reheat the oil to 350 again before doing subsequent batches.

Now for the crunch ...

Bring your oil up to 380-85 F (193-96 C), then, while hovering over your fryer, plunge a fully submersible batch of the previously fried potatoes into the very hot oil, gently agitating and watching constantly.  (They can go from crunchy to burnt in seconds.)

As soon as some of the thinnest ends are dark brown, pull them out.

Again drain them and shake on salt & pepper to taste.  We add a light sprinkle of cajun Tony's or the Central American chili pepper blend called Tajín Clásico con Limón.  ¡Yum!

We think these are best served hot, right away, but the local kids don't seem to care -- I think they'd eat them frozen.

Monday, February 10, 2020

Cowboy Candy ... AKA Candied Jalapeños

Cowboy Candy is a sweet and spicy treat made with candied jalapeños. Here is a simple recipe you can use to make these tasty treats for desserts, snacking, etc. Use these pepper rings to top cornbread, chop them up and add them to cream cheese for a delicious spread, garnish cocktails, or just snack on them. Basically, the jalapeños are preserved in a simple seasoned syrup and stored in the refrigerator, or processed in water bath.

Ingredients:
  • ½ kilo of fresh jalapeño chili peppers (that about 1.1 pounds for you U.S. folks that still can't use the metric system, or 6-8 peppers)
  • 1 cup white sugar
  • ½ cup apple cider vinegar
  • 1 teaspoon chili powder (optional)
  • ½ teaspoon turmeric powder
  • ½ teaspoon ground ginger
  • ¼ teaspoon salt
Directions:
  • First, clean the jar(s) you will use to store the Cowboy Candy. This recipe will yield about 3½ cups of candied jalapeños.
  • Second, put on a pair of gloves to protect your skin from the oils in the jalapeños.
  • Slice the jalapeno peppers crosswise into 6 mm thick rings (¼ inch). You can remove the seeds if you like a milder treat, but I don't. Set them aside while you make the syrup.
  • Mix together the sugar, vinegar and all the seasonings in a pan. Bring the mixture to a quick boil, and reduce the heat to a low simmer until the sugar dissolves into a thick syrup.
  • Add the jalapeno rings and mix to evenly coat them with the syrup, and bring it back to a low simmer.
  • Simmer the jalapeños in the syrup for about 4-5 minutes. They will darken just a bit as they cook slightly and soak up some of the sugar syrup.
  • Transfer the candied jalapeno peppers into the cleaned jar(s), then fill the jar(s) with the remaining syrup. This time we just used a single one quart mason jar for the whole batch and the recipe didn't quite fill the jar.
  • Cover and store in the refrigerator for up to 3 or 4 months. You can eat them right away, but if you chill them in the refrigerator for a week, or so, the flavors will develop and just get better.
  • You can also use a canning process with a water bath to store them for a year or more. (Click here to learn how.)

Friday, October 18, 2019

Sourdough Discard Soft Chocolate Chip Cookies

Ingredients:
  • 2 ¼ Cups All-Purpose Flour
  • ½ tsp Baking Powder
  • 1 tsp Salt
  • ¾ Cup Butter (softened)
  • ½ Cup Brown Sugar (packed)
  • ½ Cup White Sugar
  • 1 Egg
  • ½ Cup Sourdough Discard
  • 1 tsp Vanilla
  • 3 Cups of a Combination of Mix-ins
    • (I use the following Mix-ins: 1 cup chocolate chips, ½ cup of coconut, ½ cup of rolled oats, 1 cup chopped pecans. You can use anything you like; craisins, walnuts, white chocolate chips, etc.)
Directions:
  • Preheat oven to 300°F.
  • Whisk dry ingredients together; flour, baking powder, salt, and set aside.
  • In a separate bowl, cream softened butter with brown and white sugar until light and fluffy. I use my stand mixer.  
  • Add egg, sourdough starter and vanilla to the butter and sugar mixture, and mix thoroughly.
  • Fold dry ingredients into wet ingredients little by little until fully combined, being careful not to over mix or your cookies will be tough and rubbery.
  • Add in your desired combination of mix-ins using a rubber spatula.
  • Scoop out 1 ounce of dough mixture and roll into balls. The dough may be very soft, so sometimes it is easier to roll the dough balls if the bowl of dough is chilled for about 15 minutes first. 
  • Place the cookie dough balls on a prepared cookie sheet and bake for 24 minutes, be careful not to over bake and dry out cookies.
  • Place on wire rack to cool.
Note: This recipe will make about 36-40 cookies. We bake a dozen at at time, and freeze pre-formed balls of cookie dough on a tray. Once the dough is frozen I put them in a ziplock bag and bake as needed.

Original recipe modified from www.makeitdough.com

Thursday, June 27, 2019

Key Lime Curd / Cuajada de Limón Criollo

Our Key Lime tree has just started producing another beautiful harvest of fruit. This time I decided to make some Key Lime Curd. A dollop of this curd is delicious over Granola, Greek Style Yogurt and Berries.

Ingredients:
  • 1 cup fresh Key Lime Juice
  • 1 teaspoon of finely minced Key Lime zest
  • 1½ cups of sugar
  • 10 egg yolks
  • 1 stick of softened butter, or ½ cup of coconut oil, or a combination of the two
  • Pinch of salt
Directions:
  • Separate the egg yolks from the egg whites (freeze or reserve the egg whites for meringues, pavlovas etc.) 
  • Zest a Key Lime and make sure to avoid getting any of the pith into the zest.
  • Juice enough limes to get a full cup (8 ounces/250 milliliters) 
  • Mix sugar, zest and lime juice with a whisk, in a small saucepan over medium/low heat. 
  • As soon as the sugar dissolves, gradually add the egg yolks while whisking constantly to prevent the yolks from scrambling.
  • Continue to whisk the mixture over medium/low for a minimum of 5-7 minutes. When the curd evenly coats a spoon, add the butter and salt, stir until smooth, and it's done.
  • Pour the curd into a bowl and place a piece of plastic wrap directly on top of the curd to prevent it from developing a film on top.
  • Let the curd cool to room temperature and refrigerate until thoroughly chilled. It will thicken as it cools.
  • Serve and enjoy this sweet tart delight!
Yield: 8-10 servings.

Notes: You can use lemon juice instead of the lime juice, for a traditional lemon curd.

Wednesday, February 6, 2019

Pimientos - Preserved Smoked Sweet Peppers

The Costa Rica Sweet Peppers are delicious raw or cooked without the bitter after taste of the common Bell Pepper. Whenever I find them in season at a great price I pick up about 3 kilos to make smoked and roasted peppers and preserve them for pimiento cheddar cheese, roasted red pepper dip, in meatloaf or soups, or as a sandwich or salad topping. These peppers are amazing.

Ingredients:
  • 8-10 large sweet red peppers
  • 2 tablespoons olive oil
  • ½ cup vinegar (any kind)
  • Kosher salt
  • 1-pint canning jar
Directions:
  • Fire up the smoker with your favorite wood chips; coffee, pecan, apple, cherry, or hickory chips. If you don't have a smoker you can still smoke these with indirect heat on your barbeque grill. Just place the peppers on the grill away from the heat source and place a disposable tin pan filled with wood chips directly over low heat. 
  • Wash the pepper and split them in half.
  • Smoke them in the smoker for 90 minutes, turning at the halfway point.
  • Remove the peppers from the smoker and place them on a cookie cooling rack in a baking sheet.

  • Roast the peppers in the over at 400°F until the skins are charred and blackened. It will take about 40-50 minutes, and you should turn them over from time to time so they blacken evenly. 


  • When the peppers are mostly blackened, place them in a large bowl with a tight-fitting lid, or a paper grocery bag and roll up the bag to seal in the steam. Let the peppers steam in their juices for about 30 minutes and the skins will soften for peeling. 

  • When the peppers are cool enough to handle, remove the skins, stems, and seeds, and place them back in the bowl. Don't rinse the peppers in water, but try to remove as many seeds as you can. Save the juice in the bottom of the bowl!
  • Pour the vinegar in a shallow baking dish. Dredge each pepper in the vinegar to thoroughly coat each one and place them in another bowl.
  • Sprinkle the bowl of peppers with the salt, and very gently mix the peppers with the salt. 
  • Pour about a ¼ inch of vinegar and ½ in of olive oil into the bottom of the jar. Pack in the pepper, leaving at least an inch or two at the top of the jar. 
  • Use a butter knife to run down the side of the jar to release any air bubbles. Pour in the leftover pepper juice.
  • Pour about a ¼ inch of oil on top of the peppers, and screw the lids on.
These peppers will keep at least a year in the refrigerator without traditional canning methods, like a water bath, etc. But, as good as these are, they'll be gone in no time.

Use them in pimiento cheese spread, sandwiches, roasted pepper dips, meatloaf, soups, salads, etc. 


Pimiento Cheese Spread

I made a nice batch of smoked pimiento peppers with some beautiful sweet red peppers. Then I used them to make this delicious Pimiento Cheese Spread. This spread makes a great grilled cheese sandwich, or stuffed celery sticks, or topping on crackers.

Ingredients:
2 cups extra sharp cheddar cheese (shredded)
8 ounces of cream cheese (softened)
½ cup mayonnaise
¼ teaspoon onion powder
¼ teaspoon garlic powder
¼ teaspoon ground cayenne pepper
½ cup of diced pimento peppers (click for recipe)
salt and black pepper to taste

Directions:
Blend all ingredients by hand, or by using a mixer with the paddle attachment. Add salt and black pepper to taste.

Monday, November 5, 2018

Spicy Plantains or Kelewele (Platano Maduro Picante)

Recently a group of us escaped to the Caribbean coast to spend a few days near the beach in Cocles. We went to a wonderful restaurant called “Stashus con Fusion”. I always like to try new treats, so I ordered the “Platano Maduro Picante”, or “Loco Spicy Plantains”. Wow! This was like an amazing party in my mouth, bursting with sweet, spicy and hot flavors.

While there I found out the owner is from Ghana and immediately started research on Ghana plantain recipes. I found this is an African spicy and sweet snack, commonly sold as a street food, called “Kelewele” (kay-lay-way-lay) or “Aloco”.  It is bite sized ripe plantains coated and marinated with Ghanaian spices and deep fried to a golden brown.

There are many versions of this recipe claiming to be the authentic recipe, but one of the key spices, Grain of Selim (Hwentia), can’t be found in Costa Rica. A little research revealed that Selim, or Hwentia, is a type of pepper, frequently used in tea and Touba coffee. I decided to substitute some fresh green peppercorns from my Kampot Pepper vine and found it to be the perfect substitute. Here is my version of “Kelewele”.

Ingredients:
  • 3 Well Ripened Plantains
  • ½ Small Size Red Onion (White Onion or Shallots are also good too)
  • 1 Medium Habanero, Panamanian, or Scotch Bonnet Chili Pepper ( adjust for your taste) 
  • 1 inch of fresh Ginger
  • 5 whole Cloves
  • 5 whole Allspice berries
  • 10 fresh green peppercorns
  • ¼ teaspoon Chinese Five Spice
  • Juice from ½ lemon
  • Salt to taste
  • Chili pepper flakes to taste
  • Oil for Shallow Frying

Directions:
  • Using a mortar and pestle (or blender), grind the chili pepper, cloves, allspice berries, Chinese five spice, and green peppercorns together. If using a blender, pulse just until you have a rough textured spice mix. 
  • Finely mince the onion and ginger into a paste, and combine with the spice mix.
  • Add lemon juice and mix well. Set aside
  • Cut the ripe plantains lengthwise and then in half-moons about ¾ to an inch thick.
  • Coat the plantains with the spice mixture and add salt to taste. 
  •  Let the plantain sit for about 30 minutes, or longer, so that it absorbs the flavors from the spice mixture. I like to marinate for a couple of hours in the fridge until ready to fry.
  • Heat up the oil until hot, about 350°F. Fry small batches of the plantains. If the plantains were refrigerated, let them come to room temperature before frying.
  • Fry the plantains until they are golden brown and crisp. You may have to adjust the oil temperature to make sure the plantains cook all the through without burning. 
  • Drain the Kelewele on paper towels to absorb the oil.
  • Sprinkle with a few chili pepper flakes to taste.
  • Serve the Kelewele hot with chopped nuts, fried or roasted, and a side of sour cream for dipping.
Enjoy!

Friday, October 26, 2018

Homemade Almond Joy and Mound Bars

"Sometimes you feel like a nut, and sometimes you don't!" Try this simple recipe for a sweet treat.

Ingredients:

  • 1 cup unsweetened shredded coconut, lightly packed
  • 3 level tablespoons unrefined virgin coconut oil
  • 2 tablespoons honey or agave syrup
  • 1 teaspoon pure vanilla extract
  • 1/8 teaspoon kosher or sea salt
  • 10-11 roasted and unsalted almonds for the Almond Joy Bars
  • 4 ounces chocolate, either bittersweet chips or a bar broken in to small pieces
Directions:
  • In a food processor, process the shredded coconut, coconut oil, honey, vanilla extract, and salt until it forms a thick paste, about 2-3 minutes. Test the coconut mixture to see if it holds together by squeezing a small amount in your palm. It should compact nicely. If the coconut mixture doesn’t hold together well, then continue to process the mixture for 1 to 2 more minutes.
  • Line a small baking sheet with parchment paper. Using a tablespoon or melon ball scoop, (this helps to keep the bars uniform in size) scoop out and gently press down the coconut mixture into the measuring spoon. You want a fairly level scoop here. Drop the tablespoon of mixture onto the lined baking sheet and then press and mold the balls into a rectangle shape. You can press and mold them on the baking sheet or in the palm of your hand, whatever is easier for you.
  • Press an almond on top of the coconut bars to make an Almond Joy or leave as is to make a Mounds bar.  Place the coconut bars in the freezer for 15 to 30 minutes, or until solid.
  • Once the coconut bars are frozen, it’s time to melt the chocolate. Keep the coconut bars in the freezer until you have melted your chocolate. If you’re using a 4-ounce bar of chocolate, you will need to chop it up or break it up into small pieces. I use 1 cup of semi-sweet chocolate chips. Place the 4-ounces of chocolate into a heatproof bowl.
  • Set the bowl over a pan of simmering water, (make sure that the bowl doesn’t touch the water) and melt the chocolate, stirring constantly with a rubber spatula, until melted and smooth. Immediately remove the melted chocolate from the heat and give it a stir with a spatula.
  • You can also melt the chopped chocolate in a microwave-safe bowl for 15-second intervals, stirring between each interval, until the chocolate is smooth. Be very careful to not overcook or scorch the chocolate.
  • When the chocolate is melted, take out the frozen bars.
  • I find it easiest to set the bar in the chocolate and use the spatula to thoroughly coat it with chocolate.  Alternately, you can gently insert a toothpick into a bar, and dip the bar into the melted chocolate making sure that the whole bar gets covered with chocolate. Lift the bar out and tap off any excess chocolate. Return the chocolate covered bar to the parchment paper. Repeat the process with the other remaining bars.
  • Once all of the bars have been dipped into the chocolate, place them in the freezer for a few minutes to set.
  • Store the bars in the refrigerator in an airtight container. These bars should keep for several days.
  • Take the bars out for a few minutes to thaw a bit before you consume them!
Yield: 10-13 bars


Tuesday, May 8, 2018

Wasabi Guacamole

The back story.... I've been wanting to make more of my Wasabi & Soy Roasted Almonds, but I was out of fresh Wasabi powder. I found some at an Asian supermarket in San José last week, but the smallest quantity they sell is a 1 kilogram bag (2.2 pounds for those of you not on the metric system). I divided it into 9 vacuumed sealed bags of 100 grams each, and put the remainder in a small jar for use now. To keep the wasabi as fresh as possible, I'm storing all of it in the freezer.

Avocados are in season right now, so I made a batch of guacamole today, following my favorite recipe, but for a twist I added wasabi powder. Absolutely amazing! Guacamole will never be the same in my house.

Ingredients:
  • 3 cups of diced and gently mashed avocado
  • ½ cup of diced onion
  • ¾ cup of diced tomato
  • ½ fresh minced jalapeño
  • ¼ cup of chopped cilantro
  • ¼ teaspoon of garlic powder
  • ¼ teaspoon of cumin powder
  • 1 tablespoon of wasabi powder
  • ¼ cup fresh lime juice
  • Salt and pepper to taste
Directions:
  • Dice and gently mash avocado
  • Dice onion and tomato
  • Mince jalapeño
  • Chop cilantro
  • Gently fold in the garlic, cumin, wasabi and lime juice
  • Add salt and pepper to taste
Important note: Heat will breakdown the taste of wasabi, so store it in the refrigerator or freezer. The intensity of the wasabi will increase after it is added to the guacamole, so adjust the quantity to suit your palate.

Wednesday, April 11, 2018

South African Biltong

Meat preservation is a survival technique dating back to ancient times. Many cultures developed recipes for dried cured meat, or jerky. Biltong is just one type originated in Botswana, South Africa, Zimbabwe and Namibia. Various types of meat can be used to produce biltong, ranging from beef and game meats to fillets of meat cut into strips following the grain of the muscle, or flat pieces sliced across the grain. It is related to beef jerky in that they are both spiced, dried meats; however, the typical ingredients, taste and production processes may differ.

John discovered this delicious recipe for a South African style jerky a couple of years ago. We give full credit to https://www.biltongblog.com/making-biltong/ for this original recipe. There are many other techniques for producing a great biltong, but this is the method that works best for us.


Ingredients:
  • 2 kilos (4.4 lbs) good beef cut (or venison if you have available)
  • 1½ cup white distilled vinegar
  • ½ cup Worcestershire Sauce
  • 4 tablespoons coarse salt
  • 4 tablespoon ground black pepper
  • 8 tablespoons of ground coriander seeds
  • ½ cup of whole coriander seeds (these will be roasted in a pan then crushed and applied just before drying)
  • 4 tablespoons of raw brown sugar
  • 65 mg of ground smoked Carolina Reaper pepper
  • other optional ingredients: paprika, cayenne pepper (for spicier biltong – not much needed..), crushed dry garlic, any other herbs and spices that you want to experiment with.
Directions:
  1. Start with a cut of good beef such as sirloin. 
  2. Cut the beef into flat strips of about 1 inch deep by 2 inches wide. Cut the strips with the grain and if possible (and desired) leave a thin strip of the fat on one side. The fat will dry out nicely and add to the taste.
  3. Make the brining solution: Mix 1½ cups of white vinegar and ½ Worcestershire Sauce into a large flat dish deep enough to cover the meat strips. Lay the strips in the vinegar mix for 2-4 hours to absorb and begin the curing process. When finished this initial curing remove the strips and squeeze and pat dry. You can keep the vinegar/water mix for rinsing the strips later.
  4. Prepare the dry rub: Mix the dry spices (excluding the whole coriander seeds)
  5. Place a layer onto the bottom of a dish or plastic container that is large enough to lay the meat flat. Stack the spiced strips on top of each other with a layer of spices in between each. 
    Pour any excess dry rub over the top of the meat strips, and press spices into the strips. Set aside to cure for 6 – 24 hours. The longer you leave it the more the meat will absorb the salt, pepper, coriander – i.e. if you prefer a more natural taste then leave the meat in the spices for less time.
  6. Remove the spiced strips from the dish and rinse in the vinegar/water mix from 2 above. Most of the spices on the outside of the meat should wash off.
    Squeeze or pat dry.  Leave more or less of the spices to your taste.
  7. OPTIONAL – ADD CRACKED CORIANDER SEEDS Lay the meat down and apply the coarse cracked coriander seeds to the outside of the meat in sufficient quantity to stick to the strips. If you slightly roast the coriander seeds in a pan before crushing them this releases additional flavor of the seeds – highly recommended (you can also put the seeds into the microwave for 20-30 seconds). Crush the seeds into halves or quarters in a small mortar bowl so you end up with pieces that will stick nicely to the meat. Alternatively you can put the seeds in an old pepper or spice grinder that is set to grind very coarse.
  8. Dehydrate the biltong strips in a smoker (no wood chips to produce smoke required, but we add a small amount at the beginning of the drying process), or oven, set to 165°F. Lay the strips on racks with a space between each strip for the air to circulate. Depending on the thickness of the biltong, it should take about 12 hours in the smoker/oven, and another day to air dry. During this time you can gently pinch the pieces to check for dryness and/or cut off pieces to sample to check for readiness.
  9. Once the strips are dried, they're about two-thirds their original thickness and width. Traditionally the finished strips are cross-cut into little rectangular "cookies" about 1/4" thick. That exposes the tender middle and makes them a great snack, or energy source.
  10. Store biltong in the fridge, especially in warm climates.  Never store in a plastic bag unless vacuum sealed. 

Thursday, March 29, 2018

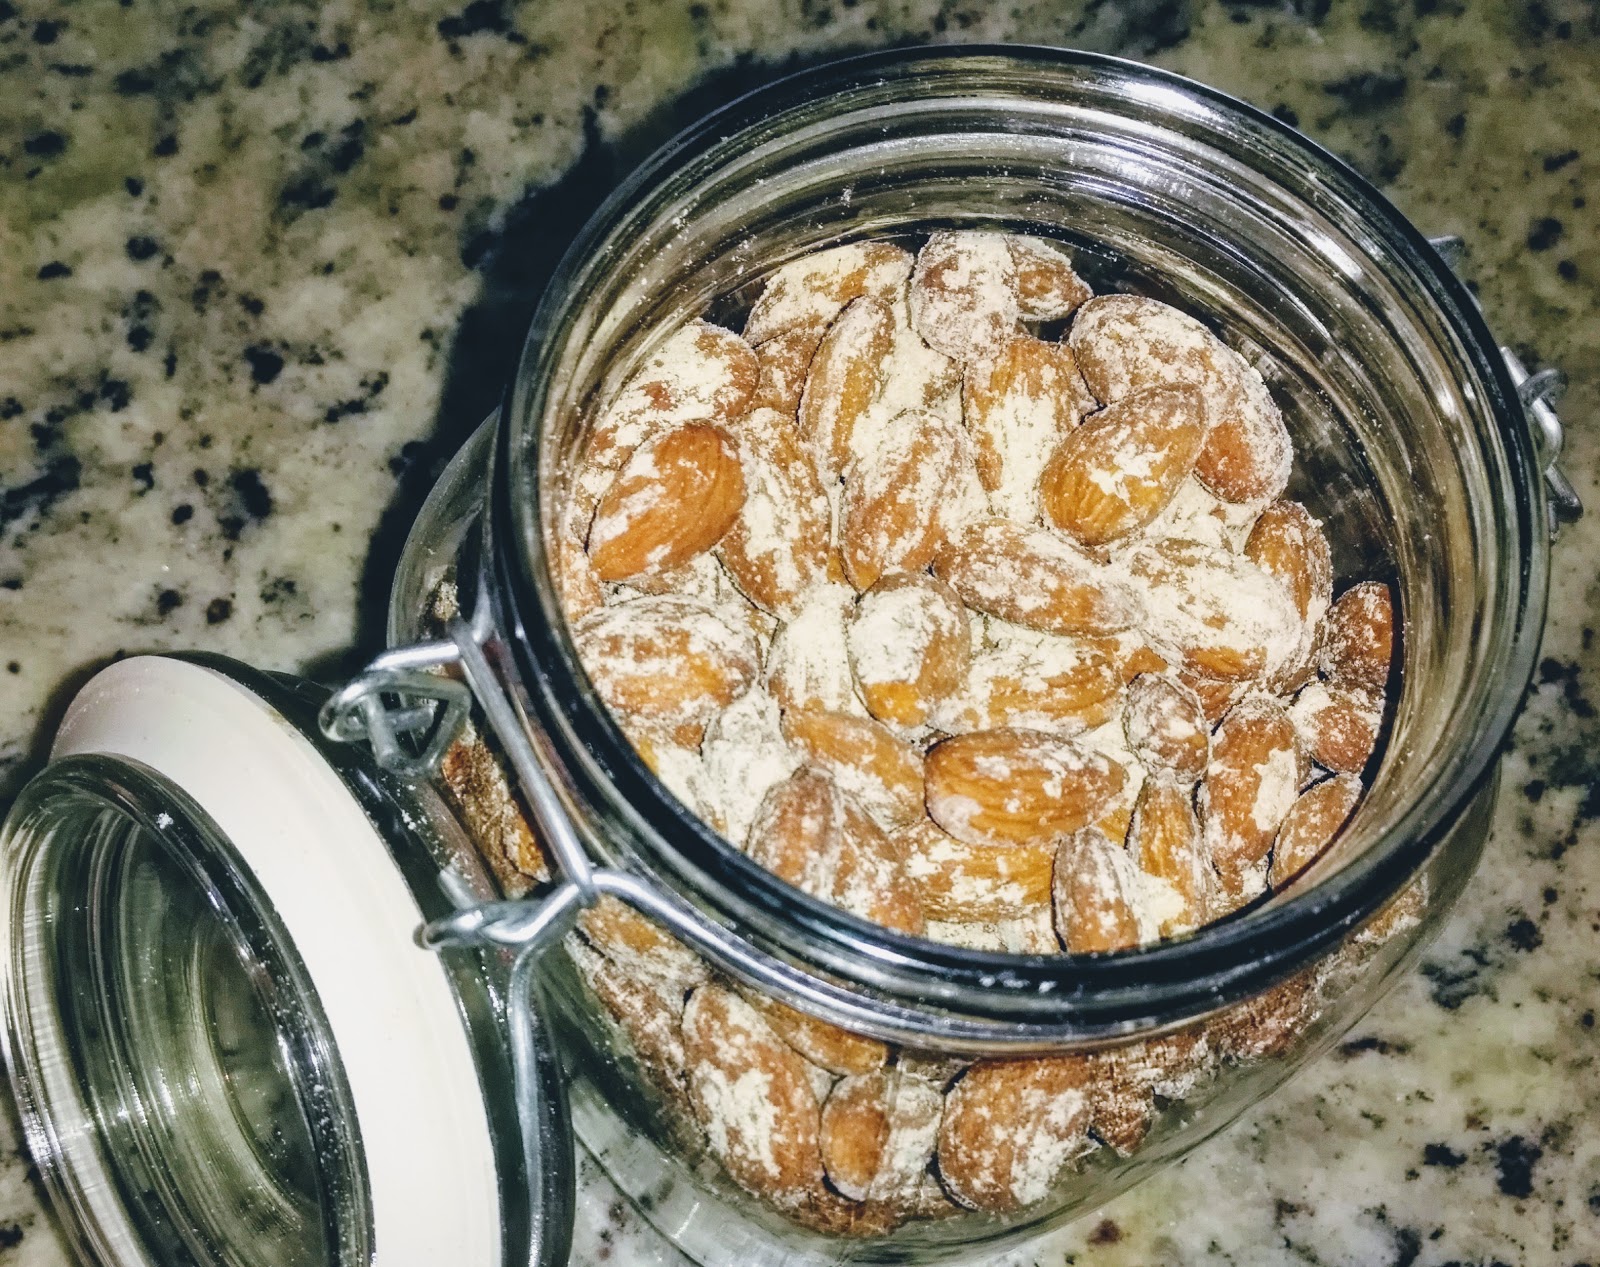
Wasabi & Soy Roasted Almonds

These Wasabi & Soy Roasted Almonds are a wonderful snack treat, and they can be made as spicy and hot as you like.

I've bought the packaged Blue Diamond version of these in the U.S. in the past. I find these to be as good, if not better, and they contain no chemicals that I can't pronounce.

Ingredients:

5 cups of shelled Almonds

Wet Ingredients:
  • 1/3 cup Soy Sauce
  • 1 tsp Garlic Powder
  • 1 tsp Onion Powder
  • 1 tsp Cayenne Pepper (add 1 tsp more if you like it really spicy)
  • ½ tsp Chinese Five Spice
  • 1 tsp Ground Ginger
Dry Ingredients:
  • 6 tbsp Wasabi Powder - NOTE: DO NOT roast your Wasabi powder. The oven heat will destroy the Wasabi flavor.
  • 1 tsp Fine Powdered Salt (I use a spice grinder to create powdered salt from coarse salt crystals)
  • ½ tsp Powdered Sugar
  • 1 tsp Cornstarch
Directions:
  • Preheat oven to 350°F.
  • Line a large cookie sheet with aluminum foil.
  • Spread the almonds out evenly on the cookie sheet and roast for 12 to 15 minutes, just until they begin to toast.
  • While the almonds are toasting, thoroughly mix all the wet ingredients in a large bowl, and mix all the dry ingredients in a small bowl or measuring cup. 
  • When the almonds are toasted, transfer them to the bowl with the wet ingredients. Mix thoroughly to coat all the nuts and return them to the cookie sheet with a large slotted spoon or spider web strainer. This method allows the excess liquid to drain off.
  • Spread the almonds out evenly on the cookie sheet and return them to the hot over for another 12 minutes. Stir them once at the the halfway point.
  • While the almonds roast in the soy sauce mixture, wash and dry the large bowl.
  • When the almonds finish roasting, transfer them back to the large mixing bowl and pour all the dry ingredients over the hot nuts. Toss the almonds to thoroughly coat them with the dry powder mixture.
  • Spread the nuts out again on the cookie sheet to allow them to cool. As they cool they will begin to crisp up and the powder will stick to the almonds better.
  • When the almonds are completely cooled, transfer them to a airtight container to keep them fresh.
  • You can shake off the excess powdered spices if you like a milder nut. I like the spicier taste, so I don't remove the excess spices. I just sprinkle it on top of the almonds before I seal the container. 


I modified the original recipe from Mike O'Brien on www.cookpad.com

Monday, December 25, 2017

Stuffed Pepperoncini

Ingredients:
  • 6 slices bacon, cut into small pieces 
  • ½ cup minced onion
  • 1 large sweet pepper, minced 
  • 1 (8 ounce) package cream cheese, softened 
  • 1 cup grated Mexican cheese blend
  • 32 ounce jar of pepperoncini 
Directions:
  • In a large skillet, cook bacon over medium heat until bacon is browned and crisp. Move the bacon with a slotted spoon to paper towels to drain the grease and cool. Keep the bacon drippings. When the bacon is cool, dice it up.
  • Sauté the onion and sweet pepper in bacon drippings over medium heat until translucent and tender. About 5 minutes. Remove the onion and peppers with a slotted spoon to paper towels to drain and cool for about 10 minutes.
  • In a mixing bowl, mix the cream cheese and grated cheese. Stir in the bacon, onion and sweet peppers into the mixture.
  • Spoon cream cheese mixture into a heavy weight plastic bag. Cut a small hole in one corner to make a piping bag to squeeze the filling from. 
  • There are two ways to prepare the pepperoncini, depending on size. Cut the stems off and remove the seeds, or use a small knife to cut a slit lengthwise into each pepper and remove the seeds. Do not cut the whole way through the pepper. Pipe the cheese mixture into the peppers. Cover and refrigerate for at least 1 hour. Serve within 24 hours for best flavor.

Sunday, September 17, 2017

Savory Whole Wheat Seed Crackers


Looking for something to accompany a great soup or stew, or perhaps some cheese? Here is a simply delicious homemade cracker you can prepare in about 10 minutes. These are great for snacking, and they are good for you too.

Prep time: 10 minutes
Cooking time: 45 minutes

Ingredients:
  • 230g/8oz whole wheat flour
  • 115g/4oz semolina flour
  • ¾ tsp fine salt
  • 50g/1¾oz sesame seeds
  • 50g/1¾oz flax seeds
  • 50g/1¾oz sunflower seeds
  • 50g/1¾oz pumpkin seeds – finely chopped
  • 15g/½oz poppy seeds
  • 1 tbsp honey
  • 3½ tbsp vegetable oil, plus extra for greasing
  • 210ml/7¼fl oz water
  • Coarse salt to taste
  • Fresh coarsely ground black pepper to taste
Directions:
  • Preheat oven to 375°F (180°C)
  • Mix all the seeds together in a small bowl and set aside.
  • In a large bowl, mix the flours with the fine salt. When thoroughly combined, add 200 grams (7 ounces) of the mixed seeds and mix well.
  • In separate bowl, whisk 210ml/7¼fl oz water with the honey and oil. Stir in to the dry ingredients and mix to a medium-firm dough.
  • Knead the dough for five minutes by hand, or use a stand mixer with a dough hook. Cover the dough let it rest for 20-30 minutes.
  • Prepare 2-3 cookie sheets with some non-stick parchment paper.
  • When the dough is rested, oil the work surface with the extra vegetable oil and roll the dough out to a thickness of 3mm/0.1”. Try to get it as even and as thin as possible.
  • Using a sharp knife of pizza cutter cut the dough into strips approximately 3x10cm/1x4in. You can cut them into diamond or rectangular shapes.
  • Gently peel the strips off the work surface and place them on the cookie sheets close together, but not touching. You can add the odd sized, left over dough scraps to the cookie sheets anywhere you can squeeze them onto the sheet.
  • Gently spray water on the crackers, and top with the leftover seeds. Generously sprinkle some coarsely ground salt and pepper. 
  • Bake the crackers for 15 minutes. Turn the oven off, open the door for 45 seconds. Close the oven door and let the crackers continue to bake with the residual heat in the oven for another 30 minutes until they are extra crispy. Transfer to a cooling rack and enjoy.

Saturday, July 22, 2017

Empanadas - Hand Pies

The Empanada, or hand pie, has been a staple in Latin cuisine forever. They are very simple to make and the dough can be made with either corn masa or flour. This recipe is for a simple dough using all purpose flour. Sorry I don't have any pictures to share of the process or finished product. We ate them all. I'll remember to take pictures next time I make more empanadas.

Ingredients:
3 cups of all purpose flour
¼ teaspoon salt
1½ sticks of very cold butter
1 large egg
¼ to ½ cup of cold water

Directions:
Mix the flour and salt in a food processor. Cube up the butter and add them to the flour. Pulse until the dough looks like well mixed sand. Add the egg and pulse until well mixed. Start adding a little water and pulse. Keep adding water until the dough form into a manageable ball.

Divide the dough into half, wrap one in plastic wrap and store in the refrigerator until needed (can be store up to 3 days.) There are a couple of ways to form the empanada disks. The easiest is to pinch off 1-1½ inch diameter balls and use a tortilla press to make 4 to 6 inch disks. The second way to form the disks requires you to roll out the dough and cut it with a round pastry cutter, glass, or small bowl. The disks should not be too thick, or you'll wind up with a doughy empanada. Place a layer of waxed paper between each disk.

Preheat oven to 375° to 400° F.

Empanada Filling:
This can be anything you like, from savory to sweet. Diced leftovers make wonderful empanadas. Apple or berry pie filling is delicious. Just use your imagination. The filling can't be too wet, or it will run out the edges of the empanada during baking. Place a small amount of filling on one half of the empanada disk, leaving at least ¼ inch of clean margin for crimping. Fold the empanada in half and press the edges together. If you have a crimping too, great. If not, fingers and a fork work just fine.

Make an egg wash with one egg yolk and a tablespoon of water. Brush the tops of the empanadas just before baking. Bake 25-30 minutes until golden brown on top.

Tips: The empanada disks may be frozen and thawed when needed. Herbs and spices can be added to the empanada dough. The empanadas can be frozen after filling to be bake at another time. Adjust your baking time accordingly. These make great appetizers, or snacks, and several will make a great meal. Serve with a dipping sauce like salsa for the savory empanada, or whipped cream for a sweet empanada.

Saturday, March 11, 2017

Chocolate Pudding - A DIY Instant Mix

This is a quick and easy mix you can prepare ahead of time to have on hand when you want a quick dessert.

Ingredients:
1 1/4 cup granulated white Sugar
1 cup Cornstarch (Maicena in CR)
1 cup Milk Powder (Pinito in CR)
1/2 cup Cocoa Powder
Pinch of Salt

Directions:
Prepare Pudding Mix:
In a bowl, whisk all the ingredients together. Seal in an airtight container and use as needed.

Make Pudding:

In a saucepan, blend 2 cups of milk and ½ cup of Instant Pudding Mix with a whisk. Bring the mixture to a low boil. Reduce the heat to a low simmer, stirring constantly for about 4-5 minutes, until the pudding thickens. If desired, stir in a 1/4 Tsp Vanilla or Mint extract. Remove from the stovetop, pour pudding into a large bowl, or individual ramekins, and let rest for 5-10 minutes until warm and ready to eat. If you prefer your pudding chilled, place the pudding in the fridge and let cool completely.

To prevent the "skin" that forms on top of puddings, press plastic wrap onto the top of the pudding and place in the fridge to chill.

Serve.

Note: You can make this same recipe without the Cocoa Powder and add different flavors to keep it interesting. You could add Vanilla, Coconut, or Bananas. It could also be served as a Vanilla pudding over fruit.

Popular Posts

Copyright © 2006-2020MiChunche.com