Select a "Category" tab below, or use the "Index" in the right column to search by ingredient.
Showing posts with label Bread. Show all posts

Saturday, August 12, 2023

Moist Sourdough Cranberry Muffins (Overnight Option)

Ingredients:

200 g all-purpose flour (1 1/2 cups)
1/2 tsp. baking soda
1/2 tsp fine sea salt
60 g sourdough starter (active sourdough starter or sourdough discard)
1/2 cup whole milk
115 g (8 tbsp.) unsalted butter, at room temperature (soft)
200 g (1 cup) granulated sugar
1 tsp. vanilla extract
Zest of 1 orange or the juice from 1 mandarin
2 large eggs
165 g (1 heaping cup) fresh or frozen cranberries, plus more for decoration
Extra sugar for dusting before baking


Directions:
1. Preheat your oven to 375 F/ 190 C. Line a 12-cup muffin pan with paper liners.

2. Sift the flour, baking soda, and salt together in a small bowl; set aside.

3. Whisk the sourdough starter and milk together in a separate small bowl; set aside.

4. In a stand mixer fitted with the paddle attachment (or by hand with a wooden spoon): cream the butter, sugar, vanilla extract, and zest/juice together. Add the eggs, one at a time, beating well after each addition.

5. Working in batches, add 1/2 of the flour mixture. Once absorbed, add half of the milk mixture. Repeat until everything is used up and the batter is smooth and well incorporated.

6. Lightly toss the cranberries in flour to prevent them from sinking to the bottom of the muffins.

7. Fold the berries into the bowl with a rubber spatula. Make sure to evenly distribute the berries throughout the batter (check the bottom of the bowl!).

7. Fill the muffin pan, about 3/4 of the way full. Top with a few berries if you like, making sure to tuck them in so they don’t pop out during baking. Then dust the tops with a little granulated sugar.

8. At this point, you can bake right away or chill overnight, for 12+ hours.

9. To bake now: place the tin on the center rack and bake for 25-28 minutes.

10. To bake later: remove the tin from the refrigerator; discard the foil. Bake straight from cold for 25-28 minutes.

11. Cool the muffins in the pan for 15 minutes. Transfer to a wire rack to finish cooling so the bottoms don’t get soggy.


Thursday, May 19, 2022

Tropical Sourdough Dinner Rolls


Ingredients:
 
50 grams of recently fed sourdough starter at 100% hydration 
220 grams of pineapple juice 
30 grams coconut syrup 
2 large eggs 
30 grams sugar 
70 grams water 
1 tsp vanilla extract 
7 grams salt 
700 grams of bread flour 
1/4 tsp ground ginger 
90 grams cold butter grated 

Note: All measurements are by weight, not volume. 

Directions: 
1. Add all ingredients to a large bowl, mix, cover, and rest for a few hours. 

2. During the resting period, perform 2 or 3 sets of Stretch & Folds at 30-45 minute intervals. 

3. Cover the bowl with a damp cloth and bench rest for 5 to 6 hours. 

4. Place the covered bowl in the refrigerator overnight for a cold retard. 

5. Next morning remove the dough from the refrigerator. Leave it covered and allow it to come up to room temperature for a few hours. It should take 2-2½ hours depending on your room temperature.
 
6. I find working with the dough easier when it is still slightly chilled. Lightly dust your workbench with flour, divide the dough, and form it into 18 balls of 70-75 grams each. 

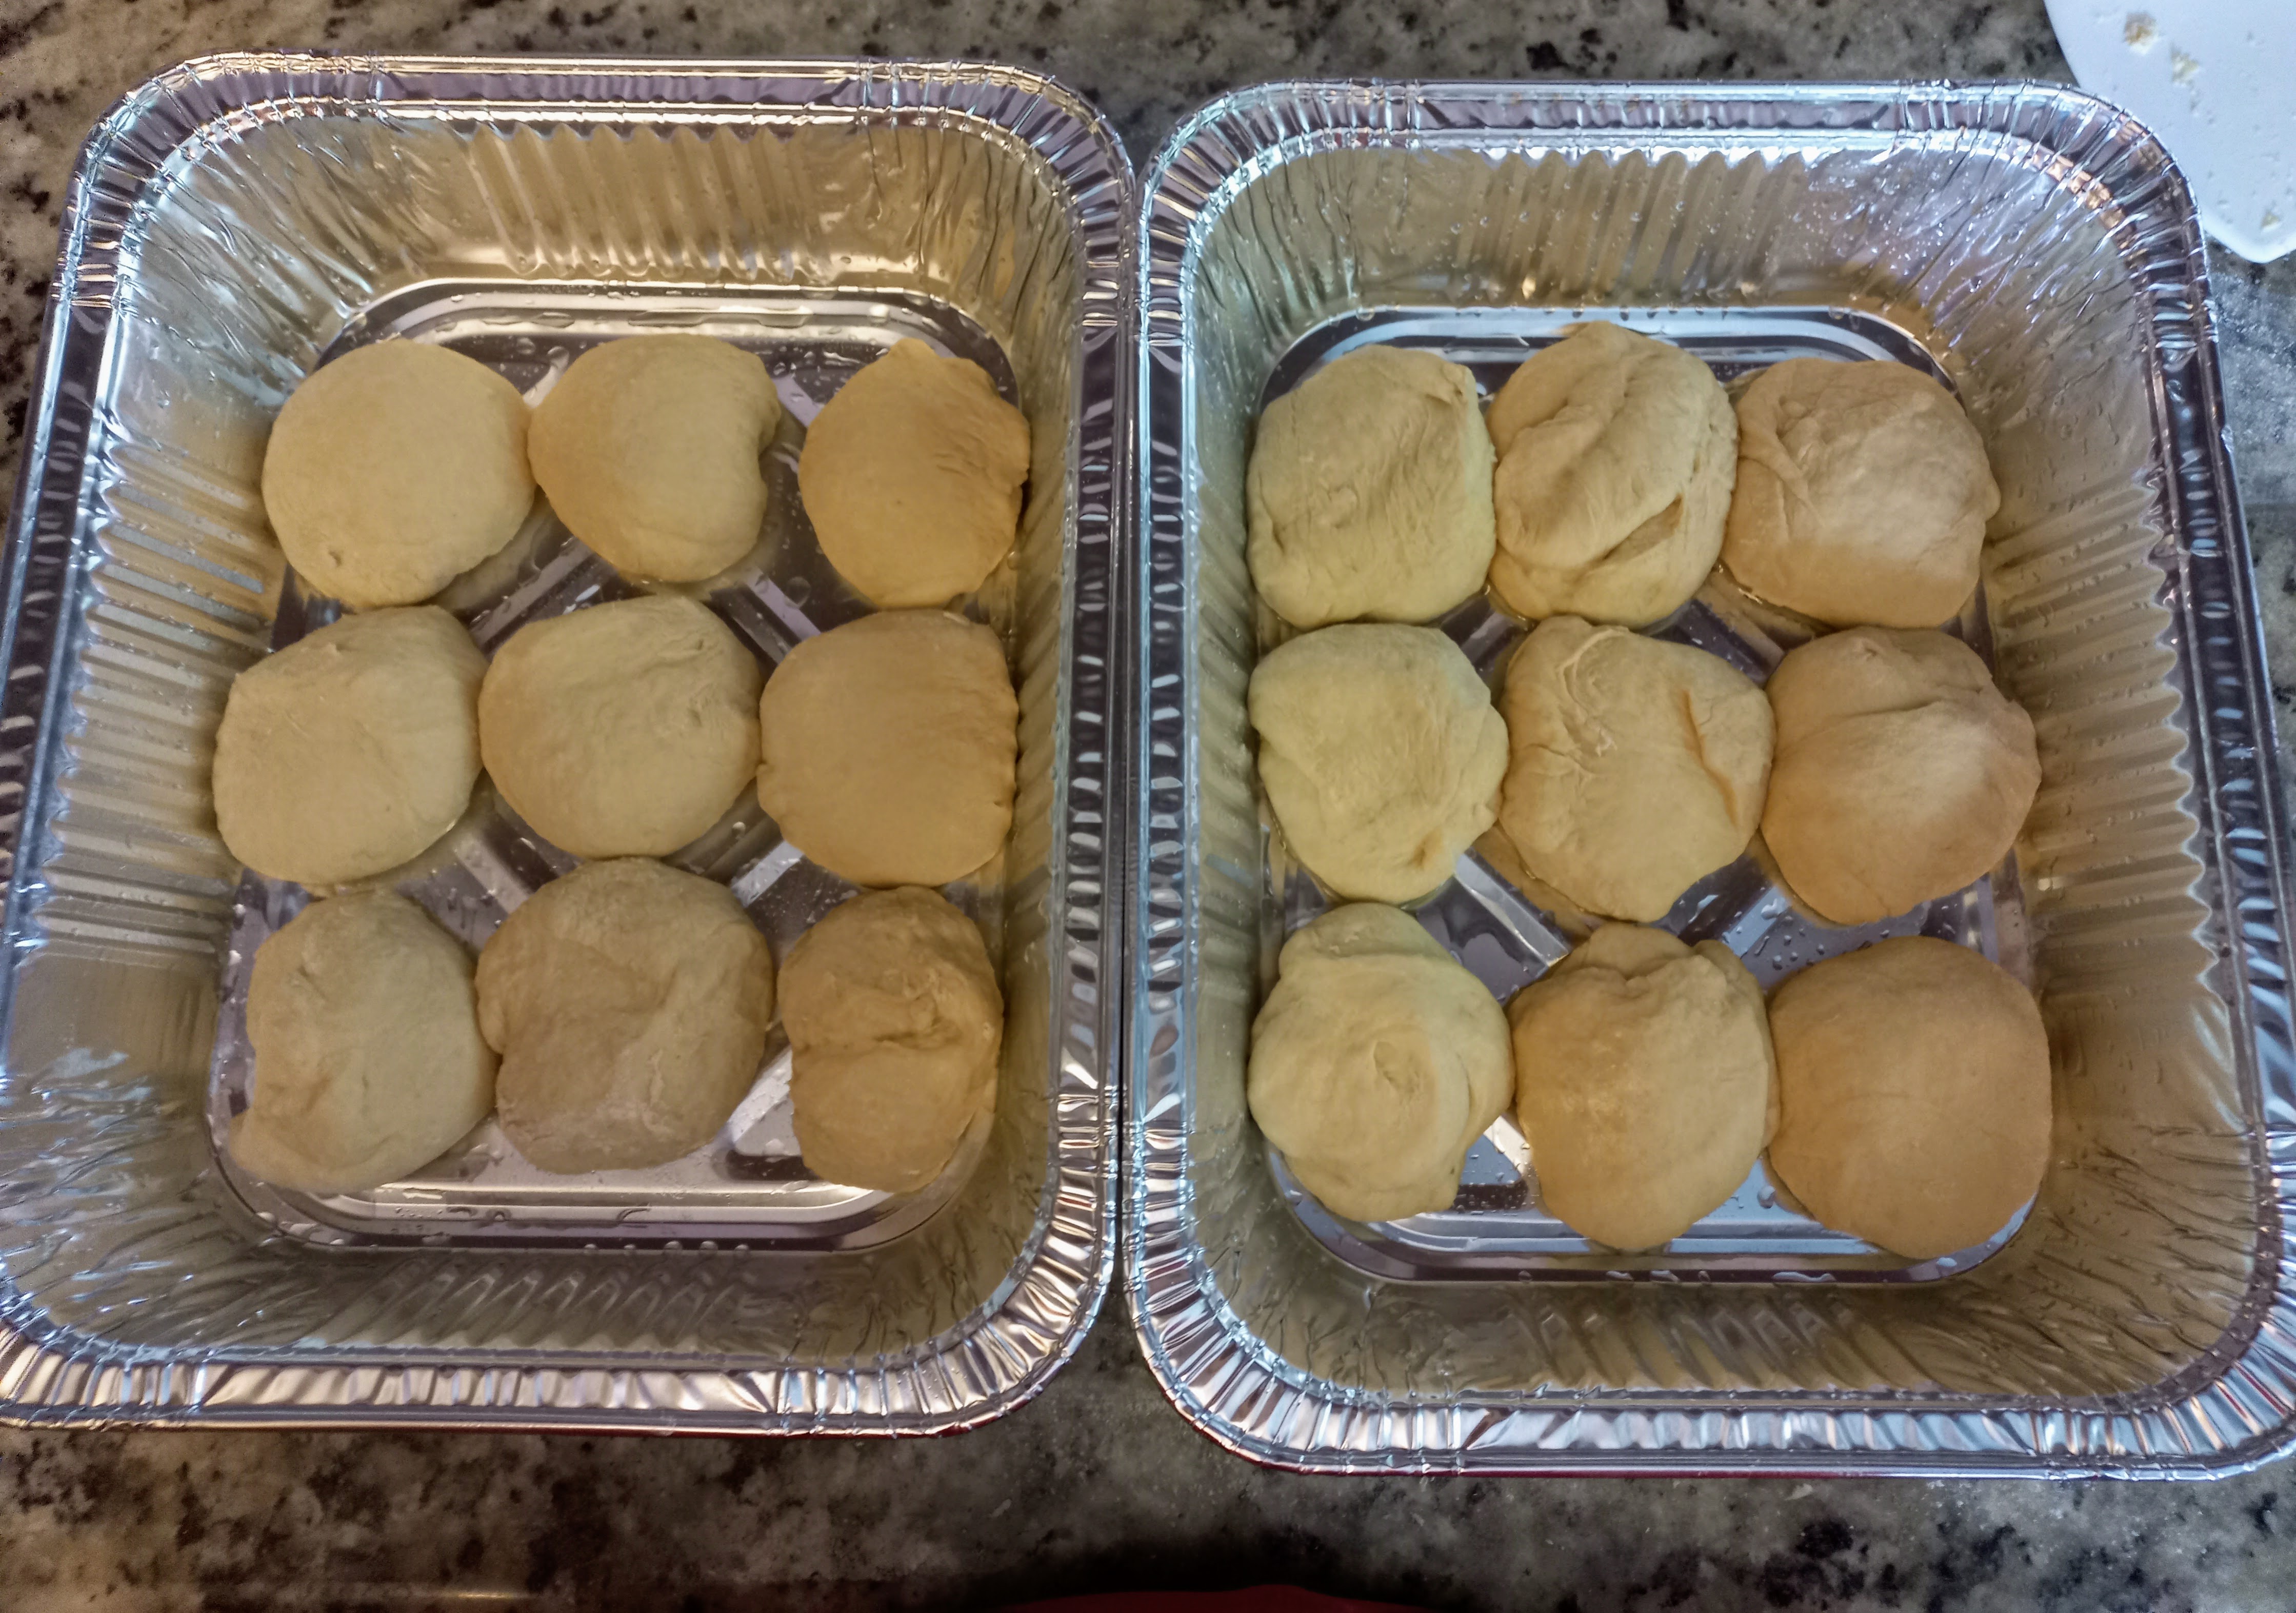
7. Place the dough balls into greased pans, cover, and let rise to the desired size. 

8. Bake uncovered for 35 minutes at 375°F. 

Optional: Baste the rolls with butter while still warm. 


Enjoy!

If you want to make these using commercial yeast, here's how...

Ingredients if using Active Dry Yeast:
220 grams of pineapple juice
2 large eggs
60 grams coconut (palm) sugar
120 grams water
3 packets of active dry yeast (¼ oz. each)
1 tsp vanilla extract
7 grams salt
725 grams of bread flour
1/4 tsp ground ginger
90 grams cold butter grated

Directions if using Active Dry Yeast:
1. Mix tepid water, a teaspoon of coconut sugar, and yeast packets in a small bowl and let it bloom for about 10 minutes.
2. Add all ingredients to a stand mixer bowl, mix, cover, and rest for a couple of hours.
3. During the resting period, mix the dough on low for about 15 seconds 2 or 3 times at 20-minute intervals.
4. Cover the bowl with a damp cloth and bench rest until almost doubled in volume.
5. Place the covered bowl in the refrigerator overnight for a cold retard.
6. Next morning remove the dough from the refrigerator. Leave it covered and allow it to start to come up to room temperature for an hour. 
7. I find working with the dough easier when it is still slightly chilled. Lightly dust your workbench with flour, divide the dough, and form it into 18 balls of 70-75 grams each, or 24 balls of 50-55 grams each. 
8. Place the dough balls into greased pans, cover, and let rise to the desired size. 
9. Bake uncovered for 35 minutes at 375°F. 

Optional: Baste the rolls with butter while still warm. 

Sunday, August 1, 2021

Sourdough Apple Bacon Fritters w/Maple Bourbon Glaze

This is an Enriched Bread Dough recipe to make eight fritters. If you need more you could easily double it. Bacon fat has been used to enhance the bacon flavor, but it could be replaced with an equal amount of butter.

This recipe is a 2-day process, but it is well worth the effort. You can adjust the timing to fit your schedule so you are not a kitchen slave.

Ingredients

For the dough:

  • 250 grams flour (all-purpose) and more for dusting
  • 115 grams of egg & full-fat milk (1 medium egg and enough milk to weigh 115 grams together)
  • 40 grams sugar
  • 28 grams bacon fat, cool (if you don't want bacon flavor, use butter instead)
  • 100 grams recently fed sourdough starter (my starter is kept at 100% hydration)

For the apples:

  • 2 big honey crisp apples (use any type of apple)
  • 3/4 teaspoon cinnamon
  • 1/8 teaspoon nutmeg
  • 1/8 teaspoon ginger
  • A smidgen of ground cardamom (optional)
  • 1/2 teaspoon of salt
  • 1 tablespoon butter
  • 1/8 (15g) cup sugar (or more if you like it sweeter)
  • 3 slices cooked bacon, chopped

For the glaze:

  • 1/4 cup maple syrup
  • 1¼ cups powdered sugar
  • 1 tablespoon of milk
  • Reserved syrup from cooking apples
  • 2 tablespoons bourbon (optional)

Directions
DAY 1
9:00 AM
1. Weigh everything for the dough into a bowl and mix until roughly incorporated and cover the bowl.

2. Stretch and fold once an hour for a total of 4 sets over a 4 hour period. Add water or flour to adjust consistency.

1:00 PM
3. Cover the bowl and let the dough ferment for several hours, until it expands a bit and air bubbles form. Fluffy, not totally proofed.

4. While waiting, peel and core the apples, cut them into 1/2 inch cubes.

5. Melt butter in a saucepan, add the apples along with spices and sugar.

6. Cook, stirring for about 10 -12 minutes until the apples are a bit softer and the syrup thickens to coat the apple pieces. Drain the cooking juices (reserve for the glaze) Let cool and refrigerate.

4:00-5:00 PM (when the dough is ready)
7. Prepare a baking sheet with parchment paper generously dusted with flour and set aside.

8. Flour a bench surface and roll out the dough into a rectangle roughly 15"x10".

9. Scatter the apple pieces and bacon on the dough, press lightly and roll to form a log and then flatten the log with your hand so that it measures about 15"x5".

10. Cut the log into about 10 equal-sized slices. Then cut each slice in the opposite direction into about 3 pieces. Tuck in any apple or bacon pieces as needed. 

11. Scrunch everything back into a rough ball and stretch it out into a rough log tucking the apple and bacon pieces back into the dough. (use flour to stop it from sticking)
12. Once the log is formed, divide it into 8-10 pieces (you can decide how big or small)

13. Take one piece at a time, onto the palm of your hand and form the dough into a disk, tuck any loose apple pieces into the dough, and place it on the baking sheet lined with flour-dusted parchment.

14. Once done cover the baking sheet with a damp cloth or plastic wrap and place the tray in the refrigerator until bedtime. (Set a timer so you don't forget.)

15. Remove the baking tray from the refrigerator and set it on the counter for the final proof, overnight, 5-8 hours. When ready, they will look puffed up and the dough will be fluffier and softer.

DAY 2
7:00 AM
16. Place the baking tray back in the refrigerator to chill a bit while heating the oil and making the glaze.
17. Heat the oil in a deep-fryer to 375°F/190°C.
18. Mix syrup, sugar, milk, and reserved syrup from the cooked apples and bourbon with a whisk.
19. Drop one to two fritters at a time and fry turning (about 60-90 seconds per side) until done.
20. Remove from the hot oil using a slotted spoon and drain on a cooling rack over another baking sheet.
21. Drizzle the glaze over fritters while still warm.

Enjoy! 


Tuesday, June 1, 2021

Enriched Artisan Sourdough Rye Bread

I came up with this recipe by fusing a rye bread recipe from a friend with my original artisan sourdough rye bread. My friend's recipe uses instant dry yeast instead of a sourdough starter. I replaced the yeast with my sourdough starter. I maintain my starter at 100% hydration using rye flour only. I reduced the amount of water and flour in my friend's recipe to offset the flour and water in my sourdough starter. These adjustments resulted in a dough hydration of 76% with a weight of just over 1 kilogram.  Enriching the dough with egg and shortening resulted in a softer crumb that I don't get with my original recipe. 

Ingredients:
  • 250 grams Water
  • 150 grams Sourdough Starter
  • 43 grams Molasses (I use Miel de Caña (Sugar  Cane Syrup))
  • 1 large Egg
  • 22 grams Shortening
  • 5 grams Fennel Seed:  1 Tbs. (or 1 tsp if using ground fennel seed)
  • 2.5 grams Anise Seed (not Star of Anise):  1 tsp. 
  • 4.5 grams Caraway Seed:  2 tsp.
  • 8 grams salt
  • Zest of 1 Orange (Optional)
  • 150 grams Rye Flour
  • 350 grams Bread Flour
  • 20 grams Vital Wheat Gluten
Directions:
  • Mix the sourdough starter and water into a large mixing bowl. I find a large plastic container with a tight-fitting lid works best for me.  Add the egg, shortening, and molasses. Mix to combine and then add all the seeds and the optional orange zest.
  • In a separate bowl, combine the flours, vital wheat gluten, and salt. Run a fork through the mix to make sure the flours are evenly distributed.
  • Gradually add the dry ingredients into the wet using a dough whisk or spoon until the flour is well blended. Coat your hands with flour and knead the dough for a couple of minutes. It will be sticky but that is the nature of rye flour. Cover the bowl with a tight lid or plastic wrap and let rest it for 30 minutes.  Do 3 sets of stretch and folds with wet fingertips 30 minutes apart. Let the dough sit at room temperature for roughly 10-12 hours.
  • After the long 10-12 hour proof, lightly flour a large board or counter. This is a high hydration dough, so gently scrape the dough out of the bowl. 
  • Flour your hands and gently stretch the dough into a rectangle. Try not to deflate the gases trapped in the dough. Now fold the dough in thirds and then in half. Gently shape the dough into a boule, or batard (round or oblong) for baking. 
  • Gently place the dough in a proofing basket dusted with rice flour for the final rise. If you don’t have a proofing basket, you can line a bowl with a well-floured kitchen towel and put the dough in there for the final rise. The final rise should take about 1 to 1 1/2 hours, until the dough doubles in size. Make sure you cover the dough with a damp cloth, plastic wrap, or an inverted bowl to keep it from drying out.
  •  My oven preheats within 10 minutes, so I usually don't bother to preheat. If your oven takes longer, place your baking vessel and lid in the oven and preheat it to 450°F about 30 minutes before baking.
  • I bake in an oval enameled roaster, but you can use any vessel you like. A slow cooker’s ceramic pot with an oven-proof lid is also a great choice.
  • Gently transfer the dough into the hot baking container. Score the dough with a razor or sharp serrated knife and bake until the internal temp is about 200°F. Bake at 450°F for 25 minutes, remove the lid, drop the temperature to 400°F and continue baking for another 20-25 more minutes.

  • Let cool completely on a wire rack before slicing.
Notes:
You can prepare the dough for the long proofing time in the evening. Then, in the morning, give it the final shaping and second proof. If you want to prepare the dough earlier in the day, you can place the dough in the refrigerator for a few hours, and then pull it out for the 10-12 hour proof before you go to bed, and leave it at room temperature overnight.


Wednesday, October 14, 2020

Sourdough Soft Share and Tear Rolls with Whole Wheat

These rolls are nice and soft, easy to pull apart, with a beautiful crumb inside. This dough makes perfect dinner rolls, but they are so versatile you can use them as sliders buns, for a breakfast sandwich with egg, sausage, and cheese (my favorite), or just eat them plain. The dough can also be shaped for a burger or hot dog buns. Just use your imagination.

The dough is enriched with butter, egg, milk, and sugar. To obtain the soft texture of the rolls use a stand mixer to incorporate air into the dough and give it the strength it needs to properly rise. After you make the dough, you can shape the rolls, let them rise, and bake them immediately, or you can just refrigerate them overnight to enhance the flavor. 

NOTE: This recipe has been modified from the original recipe found in Emilie Raffa’s book, “Artisan Sourdough Made Simple”. I changed it to use some whole wheat flour, and I tweaked a few of the other ingredients to our taste.


Makes 12 Soft Pull-Apart Rolls 

Ingredients: 

  • Dough 
    • 240 grams (1 cup) milk, whole or 2% 
    • 60 grams (¼ cup) water 
    • 28 grams (2 tablespoons) butter (plus extra for coating the bowl used for the bulk rise and the baking dish)
    • 1 large egg 
    • 200 grams (1 cup) active starter 
    • 36 grams (3 tablespoons) sugar 
    • 350 grams (3¼ cups) white bread flour
    • 100 grams (½ cup) whole wheat flour 
    • 9 grams (1½ teaspoons) salt 
  • Egg Wash 
    • 1 egg white 
    • 2 teaspoons of water 

Directions:

  • Feed the Starter:
    • A few days before baking, feed the starter with enough flour and water to obtain the 200 grams needed to make the rolls. When the starter is active and full of bubbles, store the starter using your preferred method; at room temperature or refrigerated. If your starter is cold from the refrigerator, give it an hour to come up to room temperature before you start making the dough. 
  • Make The Dough: 
    • Measure out the flours and salt in a bowl and mix in the salt with a fork. Set aside.
    • Warm the milk, water, and butter in a saucepan over low heat, or heat the mixture in the microwave in a microwave-safe container. The butter should be melted, but not hot. If it is too hot, let it cool to slightly warm before adding the liquid to the dough. Set aside.
    • Add the egg, starter, and sugar to the bowl of a stand mixer fitted with the paddle attachment. Mix on low speed to combine. 
    • Once combined, slowly add the warm milk mixture, followed by the flour and salt mixture. Continue to mix at low speed until it develops a wet sticky dough that looks like a thick cake batter. This should take about 1 to 2 minutes to get the right consistency. 
    • When finished, scrape down the sides of the bowl. Cover the bowl with a damp cloth and let the dough rest for 30 minutes.
    • While the dough is resting, prepare for the next steps. Feed your starter with fresh flour and water, and store according to your preference. Lightly coat a new large bowl with butter for the bulk rise. Switch out the paddle attachment for the dough hook on the stand mixer 
    • After the dough has rested, knead the dough with the dough hook on medium-low speed for about 6 to 8 minutes. The dough will not pull together into a ball but it will look shiny and smooth when ready. Scrape down the sides of the bowl once more. 
  • Bulk Rise: 
    • Transfer the dough to the buttered bowl. Cover the dough and find a warm spot for it to rise. This could be near a heater, on top of the fridge, in a cabinet, or in the oven with the light on and the oven door slightly wedged open. Let the dough rest until doubled in size, about 6 to 8 hours. In my tropical climate is sometimes only takes 4 hours to double. The bulk rise depends on the temperature, so watch the dough, not the clock.
  • Shape: 
    • Lightly coat a 9x13-inch (23x33-cm) baking pan with butter. 
    • Remove the dough onto a floured surface and lightly dust the dough with additional flour. Using floured fingertips, gently flatten the dough into a rectangle. Cut the dough into 12 pieces, about 85 grams (3 oz) each, with a floured knife or bench scraper. Gather the ends of each piece of dough together and flip the dough over, and roll each piece into a ball. I find the bench scraper in one hand and the other hand lightly floured really helps shape the dough balls. Place into your pan, 3 pieces across and 4 down. 
  • Second Rise:
    • The dough will need a second rise at room temperature, but you have a choice on how to proceed: Do the second rise immediately, refrigerate the dough for 8-12 hours and bake the next day.

      • Same Day Bake:
        • Cover the baking pan with a damp towel and let rest for 1 hour or more, depending on temperature. The dough will be puffy, but not fully risen, when ready. 
        • Skip to the Bake step below.
      • Next-Day Bake:
        • Cover the dough with a damp towel, or lightly oiled plastic wrap, and let the rolls rest for about 30 minutes before chilling in the refrigerator overnight, up to 12 hours. Return the dough to room temperature before baking, about 1-2 hours. The dough will be puffy, but not fully risen, when ready.  
        • Continue with the Bake step below
  • Bake: 
    • Preheat your oven to 400°F (200°C). 
    • Combine the egg white with a splash (2 teaspoons) of water. Brush the tops of the dough for a shiny finish.
    • Bake the rolls on the center rack of the oven for about 35 to 40 minutes. When finished, the rolls will have fully risen with a rich golden brown color. 

Serve the rolls warm or at room temperature. The soft rolls will stay fresh for 2 to 3 days when stored in a plastic bag at room temperature or up to a week if refrigerated.

The rolls can be reheated by wrapping them in foil and warming them in a 350°F (180°C) oven for 10 minutes.

Burger and Hot Dog Roll Variation: Remove the dough from the bowl after the bulk rise is finished onto a floured surface and lightly dust the dough with additional flour. Using floured fingertips, gently flatten the dough into a rectangle. Cut the dough into 8 pieces, about 125 grams (3 oz) each. Shape them into balls for burger buns, or an oblong shape for hotdog buns. Brush the tops with egg white wash and gently pat down the rolls so they a not plump (the dough will rise back up as they bake). Place them in a large baking dish side by side. Bake at 400°F (200°C) for 25 minutes or until golden brown. 


Sunday, July 19, 2020

Sourdough Bagels

This is a simple recipe for delicious sourdough bagels you can make in just a few hours, and an overnight ferment is totally optional. Make the timing fit into your schedule. Even though a few hours sounds like a lot of work, in reality, it only involves about an hour of actual work. The rest of the time is just letting the dough rest until its ready for the next step. This is the perfect way to spend a morning or afternoon making bagels while still having time to tend to other activities.

Yield: 8 Bagels
Total Time: 6-8 hours + cold ferment (Depends on long the dough needs to proof and if you want an overnight cold ferment.)

Ingredients:
  • 100 grams of sourdough starter at 100% hydration (The starter should be recently fed, within the past few days, and it can be used cold from the refrigerator)
  • 250 grams warm water (not hot, or it will kill the yeast) 
  • 25 grams of sugar or honey
  • 350 grams of bread flour
  • 100 grams of whole wheat flour
  • 10 grams of salt
  • 2 tablespoons of molasses or pure sugar cane syrup (for boiling)
Optional if adding toppings:
  • 1 egg white
  • 1 tablespoon of water
See below for add-in ideas and steps.*

Directions:
  • Mix the starter, water, and sugar, or honey in a large bowl. Cover and allow the mixture to bubble up then let it rest for 20 minutes.
  • Add the bread flour, whole wheat flour, and salt to the starter mixture and mix until everything is incorporated. Shape the dough into a rough ball. The dough will be very stiff. Cover the dough with a damp towel or plastic wrap and let it rest for 30 minutes before the first stretch and fold.
  • Stretch and fold the dough every 30 minutes for a total of 2 hours. (See this video to learn how to stretch and fold the dough.)
  • Cover the dough with a damp towel or plastic wrap and let it rise until doubled in size. In my tropical climate, it only takes a couple of hours. It can take as much as 4 to 6 hours to double. 

  • Remove the dough from the bowl to a lightly floured work surface.
  • Divide the dough into 8 equal pieces (about 100 to 105 grams each). Shape the dough pieces into smooth balls. Let them rest for 20 minutes on the work surface, covered with a damp towel or plastic wrap.
  • Using your thumb or index finger, poke a hole through the center of each ball, then gently twirl the dough on your finger to stretch the hole about 1½ to 2 inches in diameter (each bagel will be about 3" in diameter). Place each of the bagels on a Silpat lined (or lightly oiled) baking sheet.
  • Cover with a damp towel or plastic wrap and refrigerate for at least 1 hour. You can leave them up to 36 hours if you want. According to the baking master and educator, Peter Reinhart, and his recipe for New York Style Bagels with Sourdough. He says, "Once bagels are ready, place them, still covered with plastic or damp cloth, in the refrigerator and leave overnight or up to 36 hours. Do not skip the refrigeration step: it is necessary for flavor and texture development." I have successfully baked the bagels after a 15-hour cold ferment in the refrigerator and they were perfect.
  • Arrange a cooling rack over a baking sheet. Line a second baking sheet with parchment paper.
  • Preheat oven to 425°F/220°C and bring a large pot of water to a rapid boil with the molasses or sugar cane syrup.
  • Boil the bagels, 3 or 4 at a time, for 1½ minutes on the first side. Then flip them over and boil for an additional minute.
    Transfer to the cooling rack set over a baking sheet and repeat with remaining bagels.
  • If you want to add toppings, do so while the tops of the bagels are still damp. Mix one egg white with a tablespoon of water and gently brush the tops of the boiled bagels with the egg-white wash. Then sprinkle on the toppings of your choice. Consider sesame seeds, poppy seeds, flaked salt, ET, etc.  Here is a link to my ET (Everything but the) Bagel topping
  • Transfer the bagels to the parchment-lined baking sheet and bake the bagels for 20-25 minutes until they turn a deep golden brown.  
  • Remove the bagels to a cooling rack and allow them to cool completely before slicing.
* Bagel Add-in Ideas and Steps
  • Jalapeño Cheddar Bagels
      • Important note: Wear gloves to chop Jalapeño peppers, for the stretch and folds, and for the dough shaping.  
    • 3 medium jalapeño peppers, de-seeded and diced.
    • 115 grams (4 ounces) sharp cheddar cheese, grated, divided in half.
    • Prepare the dough as indicated above.
    • Gently fold in the diced jalapeños and ½ of the cheddar cheese into the dough during the first stretch and fold.
    • Continue with the remaining instructions above.
    • Add the reserved cheddar cheese to the tops of bagels during the last 10 minutes of baking.
  • Cinnamon Raisin Bagels
    • Add 6 grams (2 teaspoons) of ground cinnamon to the dry ingredients. 
    • Prepare the dough as indicated above.
    • While the dough is resting, soak 80 grams (½ cup) of raisins in warm water. 
    • Drain the water from raisins and knead them gently into the dough during the first stretch and fold.
    • Continue with the remaining instructions above. 
  • Onion Bagels
    • Add 1/3 cup chopped dehydrated onion to the starter, water, and sugar (or honey) in the first step.
    • Continue with the remaining instructions above. 
  • Asiago Cheese Bagels
    • 170 grams (6 ounces) asiago cheese, grated and divided in half.
    • Gently fold in half of the grated asiago cheese during the first stretch and fold.
    • Continue with the remaining instructions above.
    • Add the reserved asiago cheese to the tops of bagels during the last 10 minutes of baking.

Note: Bagels will keep for about 5 days in a plastic bag, or freeze them for up to 3 months. If you pre-slice, before freezing, they don't have to be completely thawed before toasting.

Saturday, May 30, 2020

Banana Mango Coconut Bread

Living in the tropics, we enjoy diverse tropical fruits all year long. This is the time of year when ripe fruit is falling off our two Mango trees. Every day we get to enjoy fresh mango in spicy salsas, smoothies, in bread, as dessert toppings, cobblers, or just plain. Yesterday friends gave us some of the delicious "Platano Manzano", "Banana Manzano", or Apple Bananas in English. These bananas have a distinct apple flavor that pushes the banana-eating experience over the top. When these bananas are overly ripe, they are the perfect key ingredient for banana bread. Today was the day to combine these bananas with our own mango harvest to create this deliciously moist Banana Mango Coconut Bread!

Plátano Manzano: La agridulce fruta en peligro de extinciónThis is an easy recipe you can pull together with, or without, an electric mixer. Instead of butter, margarine, or vegetable oil, the recipe calls for coconut oil and sour cream. Sugar has also been reduced to offset the sweetness of the fruit.

Ingredients: 
  • 2 large eggs
  • ½ cup of coconut oil
  • 1/3 cup sour cream or Greek yogurt
  • ¾ cup brown sugar, packed
  • 1 tablespoon vanilla extract
  • 2 cups mashed ripe bananas (approximately 4 medium/large bananas)
  • 2 cups all-purpose flour
  • 1 teaspoon baking powder
  • 1 teaspoon baking soda
  • ½ teaspoon cinnamon
  • ¼ teaspoon salt
  • 1½ cups of mango (not overly ripe and mushy) diced into 1/4" cubes 
  • 2 tablespoons all-purpose flour, for tossing the diced mango
  • ½ cup diced walnuts or pecans (optional)
Directions:
  • Preheat oven to 350°F/175°C. 
  • Measure and prep the mashed bananas and diced mango into two small bowls, and set aside.
  • Grease or spray two small 8½"x4½" loaf pans with oil or butter, dust the pans with flour, and set aside.
  • In a large bowl, add the eggs, coconut oil, sour cream, brown sugar, vanilla, and whisk to combine. You can mix by hand or use an electric mixer.
  • Add the bananas and stir to incorporate.
  • Add 2 cups flour, baking powder, baking soda, cinnamon, and salt, and fold with spatula or stir gently with a spoon until just combined. If you overmix, the bread will be tough.
  • Dust the small bowl of diced mango with the 2 tablespoons of flour and gently toss. This helps keep the fruit from sinking to the bottom of the bread.
  • Gently fold the diced mango and optional nuts into the batter; don’t overmix.
  • Divide the batter between the two bread pans and spread the batter evenly across the top with a spatula.
  • Bake for 50-60 minutes until done (Internal temperature between 195°F-205°F/91°C-96°C). Test for doneness with an inserted toothpick. If it comes out clean, with no batter, it's done. Check at about 40 minutes into the bake to make sure the top is not browning too fast. If it is, tent some foil over the bread pans. 
    • Note: Baking times will vary based on the moisture content of the fruit, the accuracy of your oven, and the size of your bread pans. The recommended times are what works for me and my oven. So, don't watch the clock; watch the bread. I'd start checking for doneness at 45 minutes and in 5-minute intervals until done.
  • Allow the bread to cool in the bread pans for about 15 minutes, then remove the loaves to a wire rack to cool completely before serving.
  • Store the cooled bread in plastic wrap for up to a week, but if you live in the tropics, store the bread in the refrigerator. This can also be frozen for up to 6 months.

Monday, May 4, 2020

Sourdough Pizza Dough

This is a "no-knead" recipe for a delicious pizza crust that you can prepare ahead of time and freeze. It is an overnight process, but it requires very little hands-on attention. This makes enough dough for 8 individual pizzas measuring about 10-12 inches in diameter. This recipe was developed weighing each ingredient in grams.

Ingredients:
1100 grams of bread flour (approx 8½ cups)
200 grams of freshly feed and active sourdough starter at 100% hydration (approx 1¼ cups)
600 grams of water (approx 2½ cups)
100 grams of olive oil (approx ½ cup)
20 grams of salt  (approx 1 tablespoon)

Directions:
The Day Before...
  • Sometime in the morning feed the Sourdough Starter.
  • Feed your starter using your normal method. I keep my starter at 100% hydration. This means I use equal parts of unfed starter, water, and rye flour as my preference. You can use your own flour preference to feed the starter. When the freshly fed starter has doubled and is nice and bubbly, you are ready for the next step. Mine usually takes 2 to 4 hours to reach its peak, then I put the starter back into the refrigerator until I am ready to make the dough in the evening.
Make the dough...
  • I like to mix the dough sometime in the evening, after dinner.
  • Remove the starter from the cold fridge and take out the 200 grams of starter you need for the dough.
  • Add the starter, water, and olive oil to a very large bowl and whisk to combine. I use a Danish Dough Whisk to mix my doughs.
  • Gradually add the flour and salt. Mix with a dough whisk or a fork to form a rough dough, then finish by hand to ensure the flour is fully incorporated. Cover the bowl with a damp towel and let it rest for 30 minutes.
  • After the dough has rested, gently work the dough into a semi-smooth ball, being careful to not over knead. This should only take about 15 to 20 seconds.
Bulk Ferment Overnight...
  • Cover the bowl of dough with a loose lid or a lightly oiled plastic wrap and leave on the kitchen counter overnight.
  • In the morning, you will have a beautiful bowl of fully risen dough.
The Next Day...
  • Shape the pizza dough balls.
  • In the morning, generously flour the counter surface, scrape the dough onto the floured surface, and let the dough rest for about 10 minutes.
  • Divide the dough into 8 pieces weighing about 250 grams each.
  • Gently shape each piece of dough using a rounding motion between the palms of your hands until you have a smooth ball.
  • Wrap each dough ball in a piece of lightly oiled plastic wrap.
  • Place the dough balls on a cookie sheet and place it in the freezer.
  • Once the dough has frozen, remove the dough balls from the cookie sheet and place them in a large ZipLock freezer bag. 
  • Place them back in the freezer until you are hungry for a pizza.
  • If you want to make pizza now, leave one of the dough balls out of the freezer.
Making the Pizza...
  • Remove a pizza dough ball from the freezer to let it thaw (or use the dough ball you didn't freeze). I usually let the frozen dough thaw in the refrigerator overnight and leave it there until just a couple of hours before I want to bake.
  • When the dough is totally thawed, oil a medium-size bowl, remove the plastic wrap and place the dough in the bowl to rise at room temperature.
  • Room temperature dough will take about 60 to 90 minutes to double in size.
  • Preheat oven to 450 to 500°F.
  • Lightly grease your pizza pan with olive oil.
  • Place the dough on the pizza pan with well-floured hands.
  • Gently stretch the dough out toward the edges of the pan. 
  • The dough will be very elastic, but if you let it rest for a few minutes you should be able to stretch it out to fully cover the pizza pan. Keep your hands floured so that the dough doesn't stick.
  • Gently prick the surface of the dough with the tines of a fork to prevent too many air pockets from rising when the pizza bakes.
  • Top the pizza with your favorite pizza sauce and toppings.
  • Place the pizza in the hot oven and bake for about 17 to 20 minutes.
  • Check for doneness by looking at the bottom of the pizza. If it's a nice golden brown, it's done!
Enjoy! ¡Buen Provecho!

Number of Servings: 16 servings in total. Each ball of dough will make one 10-12 inch pizza.

Sunday, May 3, 2020

Sourdough English Muffins

Once you make English muffins at home, you'll never want store-bought again. We find these English muffins are better than the store-bought Bays and Thomas muffins we grew up eating. This is a 2-day process that can't be rushed, but they are so worth the effort. I like to start making these on a Saturday morning so we can have them ready for Sunday brunch!

Ingredients:
  • 245 grams of milk (whole or 2% is recommended) (1 cup + 1 teaspoon)
  • 120 grams of water (½ cup)
  • 55 grams cold salted butter, cut into cubes (4 tablespoons)
  • 75 grams of freshly feed and active sourdough starter (½ cup)
  • 25 grams of raw, or brown sugar (2 tablespoons)
  • 500 grams of bread flour (4 cups + 2 tablespoons)
  • 7 grams (1¼ tsp) salt (1¼ teaspoon)
  • Cornmeal for dusting (If you don't have cornmeal, use polenta)
Instructions:
The Day Before...
Early in the morning feed the Sourdough Starter
  • Feed your starter using your normal method. I keep my starter at 100% hydration. This means I use equal parts of unfed starter, water, and rye flour as my preference. You can use your own flour preference to feed the starter. When the freshly fed starter has doubled and is nice and bubbly, you are ready for the next step. Mine usually takes 2 to 4 hours to reach its peak. 
Make the Dough
  • Warm the milk, water, and butter together over low heat in a saucepan. You can also use a heat-safe container in the microwave, on high, for about 45 seconds; just long enough to melt the butter. Make sure the mixture is just lukewarm, or tepid before you mix it into the sourdough starter.
  • Add the starter and sugar to a large bowl. Slowly pour in the warm milk mixture, while whisking to combine.
  • Gradually add the flour and salt. Mixing with a dough whisk or a fork to form a rough dough, then finish by hand to ensure the flour is fully incorporated. Cover the bowl with a damp towel and let rest 30 minutes.
  • After the dough has rested, gently work the dough into a semi-smooth ball, being careful to not over knead. This should only take about 15 to 20 seconds.
Bench-Rest 
  • Cover the bowl with the damp towel and let the dough do a bulk rise until doubled in size, about 8-10 hours at 70 degrees F. (21C). I live in the warm tropics and my kitchen is much warmer than normal, so my bench-rest only takes about 6 to 8 hours.
Overnight Bulk Ferment 
  • Once the dough is fully risen, cover the dough with a lightly oiled plastic wrap and store it in the refrigerator overnight.
The Next Day...

Shape

  • In the morning, or whenever you can get back to it, remove the cold dough from the refrigerator onto a generously floured surface. Let the dough rest for about 30 minutes. Meanwhile, line a sheet pan with parchment paper and generously sprinkle cornmeal all over it the parchment. This will help prevent the dough from sticking.
  • Dust the surface of the dough with flour and coat your hands with flour. Pat and stretch the dough into a rectangle about ½ inch thick. Cut rounds of dough about 2½ to 3 inches in diameter. If you don't have a ring to cut with, use the ring from a wide-mouth Mason jar or a straight-sided glass. Just make sure the glass wall isn't too thick. You should be able to get about a dozen rounds of dough. Place them onto the baking sheet that you dusted with the cornmeal. Sprinkle tops with more cornmeal.
Second Rise
  • Cover the dough with a damp towel and let rest till puffy, about 60 to 90 minutes, depending on the temperature in your kitchen. Watch the dough, not the time.
Cook the muffins
  • Pre-heat a large non-stick skillet, a cast iron griddle, or an electric griddle to medium heat. I use an electric griddle set to 325 to 350°F. If you use cast iron, give it plenty of time to preheat so that you get an even cook. Spread some butter over the skillet/griddle. If it sizzles and immediately burns, your temperature is too high. Lower it a bit. The butter should just melt and just barely sizzle. Place a few rounds of dough onto the cooking surface, leaving about an inch between the muffins. The muffins will rise as they cook, but they won't spread.
  • Cook on one side for about 6 to 8 minutes, but check the bottom of the muffin after about 5 minutes to make sure the muffins are browning evenly. Adjust the heat if necessary. 
  • Flip the muffins over and cook the other side for an additional 5-7 minutes. When ready, the muffins should feel lightweight and the sides should spring back when pressed gently. If you want, you can use an instant-read thermometer. The internal temperature should be around 195°F.
  • As the muffins are finished cooking, place them on a wire rack to cool. Continue cooking the remaining rounds.
  • When ready to eat, split them open using a fork to pierce them halfway into the side of the muffin all the way around until you can gently pry them open.
  • These muffins should stay fresh for a couple of days, stored in a plastic bag at room temperature. If you still have some left after 2 days, store them in the refrigerator.
Enjoy! ¡Buen Provecho!

This is an Emilie Raffa recipe that I adjusted for my preferences. The original recipe can be found in her book, Artisan Dough Made Simple sold on Amazon.

Tuesday, February 19, 2019

Tita's Light & Fluffy Cream Biscuits

Hot from the oven!
These biscuits are incredibly light and fluffy, and take just about 5 minutes to prepare the dough. The best part is you can make the biscuits ahead of time, flash freeze them, and then just bake a few whenever you need them.

Ingredients:
  • 3 tablespoons (45 grams) melted butter
  • 2 cups (250 grams) all-purpose flour, plus more for dusting the surface
  • 1 tablespoon (15 grams) baking powder
  • 1/2 teaspoon salt
  • 1 tablespoon (15 grams) sugar
  • 1 250 ml carton of cold heavy cream (about 1¼ cups) 
  • 2 tablespoons of 7-Up, Sprite, Ginger Ale, or Club Soda
Directions:
  • Preheat the oven to 425°F.
  • Line a baking sheet with parchment paper.
  • Melt butter in a small pot or microwave dish, and set aside.
  • Sift two cups flour, the baking powder, salt and sugar into a large bowl. 
  • Mix the soda beverage into the cold heavy cream.
  • Gently fold the liquid into the flour working the dough as little as possible.
  • Flour your work surface and turn the dough out onto the floured surface.
  • Mound the dough into a ball and gently stretch it out using your hands. 
  • Press it to a thickness of about 3/4 inch. 
  • Cut into rounds about 2¼ inches in diameter without twisting the cutter, and place them on the baking sheet.
  • Gather dough scraps and continue to make rounds.
  • Generously brush the tops with the melted butter.
  • Flash freeze them for later, or bake them for 12 to 15 minutes, until golden brown. Serve immediately.
Flash frozen biscuits ready for baking
The secret to keeping these biscuits light and fluffy is very cold cream and handling the dough as little as possible to prevent the development of gluten.

Makes 10-12 biscuits

If you are making these biscuits ahead of time, flash freeze them on the baking sheet and transfer them to a zip lock freezer bag until you need them. Add 3-5 minutes to the baking time when using frozen biscuits.


Sunday, January 28, 2018

Whole Wheat Sourdough Dinner Rolls

These are simple rolls to make. The rolls are soft and tender making them the perfect complement to any meal.

Ingredients:

  • 1/4 cup melted butter, plus a little more for greasing the pan
  • 1/4 cup of a neutral cooking oil, plus a little more for coating the proofing bowl
  • 1 cup refreshed sourdough starter (66% hydration, or 3:2 flour:water)
  • 1cup milk
  • 1/3 cup honey
  • 3 eggs (2 in dough, 1 for brushing)
  • 3 teaspoons salt
  • 3½ cups all purpose or bread flour
  • 2 cups whole wheat flour

Directions:

  • Mix the dry ingredients (flours and salt) in a large mixing bowl and set aside.
  • Melt the butter in a separate mixing bowl and add in all the other liquid ingredients, reserving 1 egg for brushing. Mix well
  • Gradually add the liquid ingredients to the bowl of flours and stir until and dough starts for form and come together. If the dough is too sticky, let it rest about 10 minutes in a covered bowl. Knead for 10-15 minutes. If necessary, add additional bread flour, a ¼ cup at a time, until you have a cohesive dough that doesn’t stick to your hands. 
  • Lightly grease the proofing bowl, add the dough and turn it so that it is coated with oil. Cover the bowl with plastic wrap or and towel and let it rise for several hours. I find about 9-10 hours is just perfect to get a perfect rise. Your sourdough starter, climate and temperature will impact the amount of time you need for the first rise. When the dough has doubled in size, it’s ready.
  • Butter two 9x13 pans. Divide dough into two equal pieces, and divide each of those into 8 equal pieces. If you have a kitchen scale, you can weigh the dough and divide. For me, each roll usually ends up being between 95-100 grams (3.35-3.5 oz). 
  • Cover the half of dough you're not working with plastic wrap to prevent it from drying out. 
  • Once you've divided the dough into 16 pieces, shape each one by pressing it onto a clean surface to form a small oval disk. Then, gather the edges together to form an oblong ball and pinch them together to seal it. Place each roll, pinched-edge down, into the prepared pans with about ½" between them. Cover the pans and let the dough rise for another 2½-3 hours. They will double in size when fully risen. 
  • Preheat the oven to 375°F. Just before baking, beat the last egg slightly and use it to brush the tops of the rolls. 
  • Bake for 20 min, or until the tops are golden brown and the interior temperature is between 190-200F. 
  • Let cool on wire racks for 5-10 minutes. Then, turn the rolls out of pans gently. Serve warm or let cool completely on wire racks and store them in an airtight container or zip lock plastic bags.


Thursday, June 1, 2017

Artisan Sourdough Rye Bread

A friend gave me a small bag of dark rye flour and asked me to help her come up with a recipe she could use for our climate in Atenas, Costa Rica. It took a couple of attempts, but I think she will be pleased with the outcome. We are in the middle of our rainy season, so you may need to add a little more water when the dry season gets here. I used a sourdough starter, but it will work just as well with instant yeast. I adapted the recipe below from one I found on Breadtopia.com. I modified the ingredients to work in my high humidity climate at an altitude of 700 meters. (2300 ft)

Ingredients:
Water:   400 grams, 1 & 2/3 cups
Sourdough Starter:   70 grams 1/3 cup (omit if making the instant yeast version)
Instant yeast:  1 tsp. (omit if making sourdough leavened version)
Rye Flour:  250 grams, 2 cups
Bread Flour:  250 grams, 2 cups
Vital Wheat Gluten:  20 grams 1½ Tbs.
Molasses:   43 grams, 2 Tbs. (I couldn’t find molasses, so I used “Miel de Caña (Sugar Cane Syrup))
Fennel Seed:  1 Tbs. (or 1 tsp if using ground fennel seed)
Anise Seed (not Star of Anise):  1 tsp.
Caraway Seed:  2 tsp.
Salt:  8 grams, 1¾ tsp.
Zest of 1 Orange (Optional)

Instructions:
Sourdough Version:
Mix the sourdough starter and water into a large mixing bowl. I find a large plastic container with a tight-fitting lid works best for me.  Add the molasses, stir to dissolve, and then add all the seeds and orange zest.

In a separate bowl, combine the flours, vital wheat gluten, and salt. Run a fork through the mix to make sure the flours are evenly distributed.

Gradually add the dry ingredients into the wet using a dough whisk or spoon until the flour is well blended. Coat your hands with flour and knead the dough for a couple of minutes. It will be sticky but that is the nature of rye flour. Cover the bowl with a tight lid or plastic wrap and let rest it for 15 minutes.  Knead the dough again for a minute or two. Let the dough sit at room temperature for roughly 12-14 hours.

Instant Yeast Version:
The only difference if you don’t use a sourdough starter, add an extra tablespoon of water to the liquid ingredients, and mix the instant yeast into the dry ingredients before combining with the wet ingredients.

Both Versions:
After the long 12-14 hour proof, lightly flour a large board. This is a high hydration dough, so gently scrape the dough out of the bowl. Flour your hands and gently stretch the dough into a rectangle. Try not to deflate the gases trapped in the dough. Now fold the dough in thirds and then in half. Gently shape the dough into a boule, or batard (round or oblong) for baking. Gently place the dough in a proofing basket for the final rise. If you don’t have a proofing basket, you can line a bowl with a well-floured kitchen towel and put the dough in there for the final rise. The final rise should take about 1 to 1 1/2 hours, until the dough doubles in size. Make sure you cover the dough with plastic, or an inverted bowl to keep it from drying out.

Place your baking vessel and lid in the oven and preheat it to 450°F about 30 minutes before baking. I bake in an enameled cast-iron Dutch oven, but you can use any vessel you like. A slow cooker’s ceramic pot with an oven-proof lid is also a great choice.

Gently “pour” the dough into the hot baking container. Score the dough with a razor or sharp serrated knife and bake until the internal temp is about 200°F. Bake at 450°F for 20 minutes, remove the lid and drop the temperature to 400°F and continue baking for another 20-25 more minutes.

Let cool completely before eating.

Notes:
I like to prepare the dough for the long proofing time in the evening. In the morning I give it the final shaping and proofing. If you want to prepare the dough early in the day, you can place the dough in the refrigerator and then pull it out for the 12-14 hour proof before you go to bed, and leave it at room temperature overnight.

Wednesday, October 26, 2016

Buttermilk Biscuits - A McDonald's Copycat Recipe


Here is a simple recipe I found to replicate those light and tender biscuits served on the McDonald's breakfast menu. I did have to modify it just a bit to use real butter and my homemade Bisquick mix. The preparation time is only about 10 minutes if you have Bisquick and buttermilk on hand. 

Ingredients:
  • 2 cups Bisquick baking mix (Don't have Bisquick? Make your own with this easy Bisquick recipe.)
  • 2/3 cups buttermilk (Don't have buttermilk? Add 1/2 teaspoon of white vinegar to the milk and let it sit for about 30 minutes.)
  • 2 teaspoons white sugar (Don't have sugar? I see a trip to the store in your future.)
  • 1/4 teaspoon salt
  • 2 tablespoons butter, melted and divided

Directions:

  • Preheat oven to 450° F.
  • In a medium size bowl, combine the Bisquick, buttermilk, sugar, salt and half of the melted butter. Mix until well blended. You will probably have to get a hand into the dough to mix it properly. I recommend only using one hand, so the other hand isn't too sticky for the next steps.
  • Turn the dough out onto a floured surface and knead for about 30 seconds, or until the dough becomes elastic, but don't over knead the dough or you'll wind up with tough biscuits. 
  • Roll the dough to about 3/4­inch thick and cut out the biscuits with a 3 ­inch cutter. I don't have a 3 inch cutter, so I use the ring from a Mason jar.
  • Arrange the biscuits on an ungreased baking sheet, and bake for 10 to 12 minutes, or until the biscuits are golden on top and have doubled in height.
  • Remove the biscuits from the oven and brush the tops with the remaining butter while they are still hot from the oven.
  • Serve warm.

This should make about 8 biscuits. The first time I made these, I got 10 because I rolled them too thin. They were still light and delicious.

Thanks to Todd Wilbur and www.topsecretrecipes.com for the inspiration.

Saturday, August 13, 2016

Whole Wheat Blueberry Muffins with Sourdough Starter

Delicious Blueberry Muffins go great with a cup of coffee for breakfast or a snack.

This recipe turned out to be a happy accident today. I failed at my attempt to follow a recipe I found online. The original recipe called for twice the amount of sourdough starter. I used coconut oil instead of vegetable oil, and I think it adds a depth of flavor. So, now when you've run out of friends to share your sourdough starter with, and you're wondering what you can do with your excess, make a quick bread!

Ingredients:
2 egg
1 tsp vanilla
1/2 tsp salt
1/2 cup coconut oil
1 cup sourdough starter
2 cups whole wheat flour
2 tsp baking soda
1/2 cup raw sugar
1½ cup blueberries

Directions:
Preheat oven to 425°F.

Mix all the dry ingredients in small bowl with a fork. Mix all the wet ingredients in medium bowl until well incorporated. Gradually add the dry ingredients to the wet ingredients and blend. Fold in the blueberries and let the batter rest for a 3-5 minutes. The baking soda will interact with the acid in the sourdough starter and give a nice rise to the muffins.

Prepare the muffin pan by oiling the cups and dusting them with flour. You can also spray your muffin cups with Baker's Joy or other product with oil and flour in it,  Spoon the batter into the muffin cups. The cups should be about 3/4's full. If you use a standard 12-cup muffin pan, you should get a yield of 12 muffins.

Bake at 425 for about 20 minutes. The muffins are done when a toothpick comes out clean.

Let the muffins rest for about 8-10 minutes to make it easier to remove them from the pan.

Wednesday, October 28, 2015

Artisan Sourdough Bread ~ No-Knead Method

This is a simple method for making delicious sourdough bread without kneading. It requires very little effort, but it does require a little pre-planning to have the bread ready when you want it.

The day before you want to bake, remove the starter from the refrigerator and let it come to room temperature. Then feed it with ½ cup of flour and 1/3 cup of water and let it sit at room temperature for several hours. If you have an active starter, it should double or triple in size. Do not put the lid on too tight, the gases need room to expand. I usually take the starter out of the refrigerator around 7 AM, and then feed it about 10 AM.

In the evening I mix the dough and let it proof overnight.

Ingredients:
  • 1 cup (5 oz. by weight) whole wheat flour and 2½ cups (11 oz. by weight) white bread flour, or
  • 3½ cups of white bread flour, or
  • (3½ cups of all purpose flour with 1/3 cup of vital wheat gluten, or)
  • (1¾ cups of bread flour + 1 ¾ cups of whole wheat)
  • 1½ tsp. salt
  • 1½ cups purified water
  • ¼ cup sourdough starter (The starter will have risen considerably, so stir it down before measuring. 
Directions:

  • Mix together the dry ingredients.
  • Dissolve 1/4 cup starter into the purified water
  • Add water / starter to dry ingredients and stir until the water is incorporated.
  • Cover with plastic and let sit 12-16 hours.
  • Gently dump the dough out onto a floured board or counter top.
  • Gently stretch the dough out into a rectangle about 12” by 9” in size. Fold 1/3 of the dough in on itself, and then fold the other 1/3 on top. Then fold it in half.


  • Cover loosely with plastic and rest for 15 minutes. 
  • Gently transfer the dough to well floured towel or proofing basket or bowl. (I use parchment paper in the bowl to make it easy to transfer to La Cloche, or Dutch Oven.) 
  •  Cover with towel and let rise about 1½ - 2 hours. IMPORTANT NOTE: If you prefer to bake in a loaf pan, skip the proofing basket or bowl, and gently transfer the dough to a lightly greased loaf pan (I use Baker’s Secret), cover with a towel and let it rise about 1½ - 2 hours.
  •  You will need a longer proofing time if you have a cold kitchen. 
  • Preheat the oven to 450°F about 30 minutes before baking. (If you use a loaf pan, place a small oven safe pan or crock in the oven and add water for steam just before you bake.) 
  • Bake in covered La Cloche, Dutch Oven, or loaf pan preheated to 450 degrees for 25 minutes.
  • Remove cover; REDUCE heat to 425 degrees and bake an additional 15 minutes. 
  • The bread is done when it has an internal temperature between 195°F and 205°F. 
  • Remove the baked loaf from the pan and let cool about 20 minutes on a rack before slicing.

Eat bread, be happy!

Don’t forget to return the starter to the refrigerator with a loose lid. Starter needs to be feed every 2 weeks if not baking regularly.

Popular Posts

Copyright © 2006-2020MiChunche.com